Friday, June 24, 2011

Nanny Paula's Hot Fudge


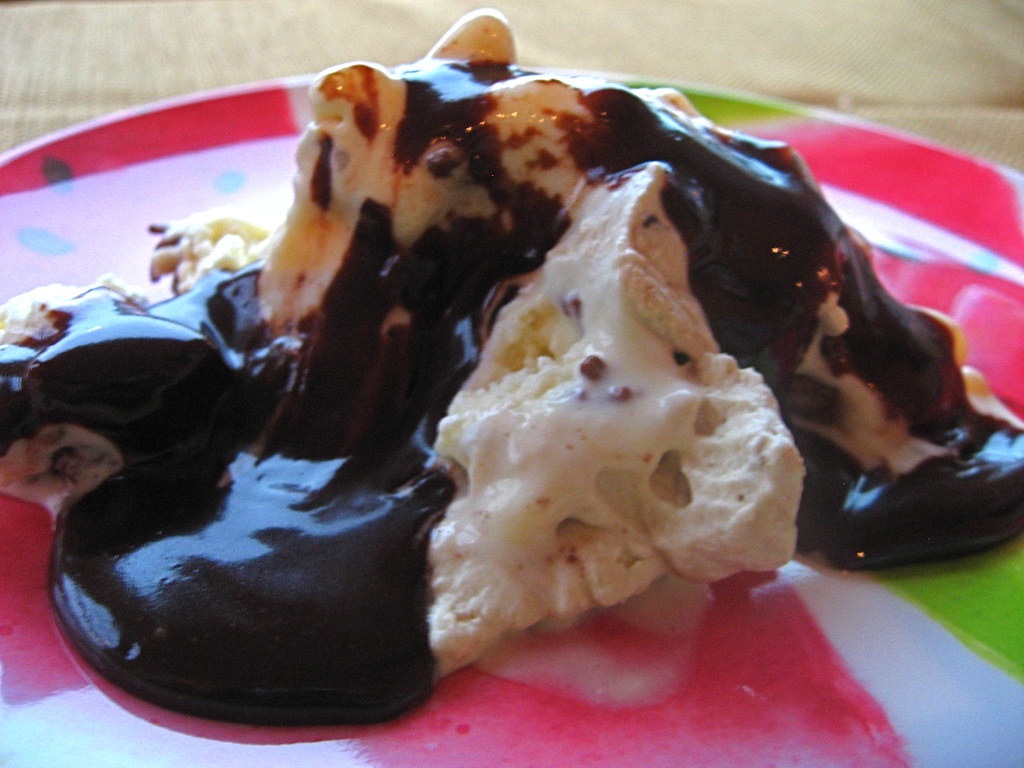
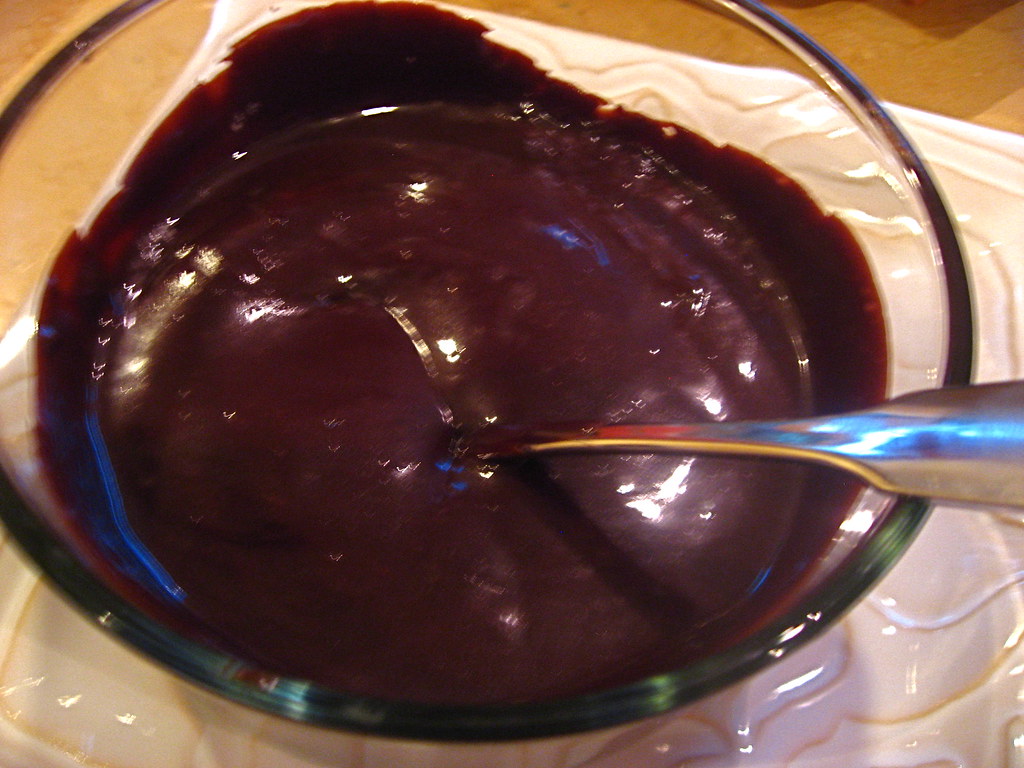
My Nanny Paula is a great cook.  The recipe I really want from her is for her applesauce, but her hot fudge is always a big hit in our family.  Throughout my childhood, everyone has always enjoyed it on a big bowl of ice cream (or Lactaid ice cream for my Papa).  I'm not a huge chocolate person but this is pretty darn delicious.

Nanny Paula's hot fudge

Last night, she made it for her famous ice cream pie.  It was silky and chocolately and warm  - way better than anything from a jar.  And check out the recipe, it's super easy to make!  For the 4th of July I strongly recommend you make this sauce and serve it up on a big ice cream sundae.  Don't forget the cherry on top!

Nanny Paula's hot fudge

Nanny Paula's Hot Fudge

Ingredients
1 stick butter
3 oz unsweetened chocolate
1 1/2 cups sugar
1/2 cup cocoa
1 cup (1/2 pint) whipping cream

Instructions
Over a double boiler, melt together the butter and chocolate.
Mix with sugar and cocoa in a pot on the stove over medium heat until smooth. The mixture will be thick.
Add the whipping cream, stirring constantly.
When the mixture starts to boil remove from the stove and serve.

Tip: You can double this recipe and put in tupperware and freeze.  Then just microwave to reheat when you're ready to serve.

Tuesday, June 21, 2011

Rhubarb Applesauce


On my birthday, the Monkey Scientist took me to the farmer's market in the morning. He knew it was exactly how I like to spend Saturday mornings, and it was the perfect start to the day.  It's located right in between where we live and is pretty much the first place we ever went together.  It had been closed for the early spring, so this was the first time I'd been able to go since March - which was a very special birthday treat.


While we were there, I discovered huge stalks of beautiful rhubarb.  Did you know rhubarb has the same flavor when it is red or green?  My farmer's market taught me that.  It also taught me that rhubarb leaves are poison (they're usually removed when sold), so if you grow your own make sure to remove them! I'm a big fan of education while I shop for my fresh fruits and veggies.


Anyways, I wanted to make a unique and interesting dish with the rhubarb - pie or crisp just seemed too obvious (besides being too heavy on the waistline).  I found this recipe for applesauce and thought it'd be an interesting dessert/side dish to bring to a BBQ that some friends were having.  It wasn't exactly typical BBQ fare, but I wanted to bring in fresh fruit without it being a fruit platter. It certainly was healthier than a pasta or potato salad with mayo!


This recipe could not have been easier to make.  I just cut everything up, threw it in my dutch oven, and let it cook on down, stirring occasionally.  It took hardly any time at all and almost no strenuous labor.  I have to admit, it isn't as good at my grandmother's applesauce (the only thing I ate at Thanksgiving for years) but for a quick and simple spring recipe, it hits the spot. It's tart, yet sweet, and everyone seemed to enjoy it!


Rhubarb Applesauce

Ingredients:
1/4 cup water
1 pound rhubarb, trimmed and cut into 1/2-inch chunks
2 pounds Granny Smith apples, peeled, cored and cut into 1/2-inch chunks
1/4 cup-1/2 cup sugar, depending on how sweet you want the applesauce (I used about 1/4 cup)
1/2 teaspoon ground cinnamon
1/4 teaspoon nutmeg

Instructions:
Place water, rhubarb, apples, and sugar in a large saucepan. Cover and simmer until fruit is soft, about 30-40 minutes, stirring occasionally. Stir in cinnamon. The applesauce will be slightly chunky (mine really was pretty smooth though). If you prefer smooth applesauce, you can run it through a blender or food processor. Serve at room temperature or cold. Store rhubarb applesauce in refrigerator for 2-3 weeks. This applesauce also freezes well, store in an air-tight container in the freezer for up to one year.

Sunday, June 19, 2011

Mom's Pot Roast [Guest Blogger]


I'd like to welcome to the blog a certain someone you might have heard me mention before.  I'd like to give a big welcome to the Monkey Scientist, who will be sharing his Mom's Pot Roast recipe.  He did take photos of the prep, but very unfortunately his house was robbed last night and his camera was taken.  A big thank you to him not only for blogging, but for cooking me this meal - it was super delicious! (And I'm glad you'll finally get to see how much he teases me!!)
The Monkey Scientist's Roast
photo by d.liff
Greetings everyone…Monkey Scientist here. Believe it or not I do actually have a name but I’m going to leave that anonymous to add to the intrigue.
D always gets mad when I made fun of the way she writes on her blog (she does actually talk this way in real life by the way), so in that vein I am going to try and imitate her style as much as possible…


IMG00297-20110615-1009
photo by the Monkey Scientist

If there’s one thing you should know about me, it’s that I’m not usually one to follow any sort of set recipe. I more just like to throw everything together in a big pot and see how it turns out. D introduced me to this thing called a “side dish” but I still don’t quite subscribe to that belief.
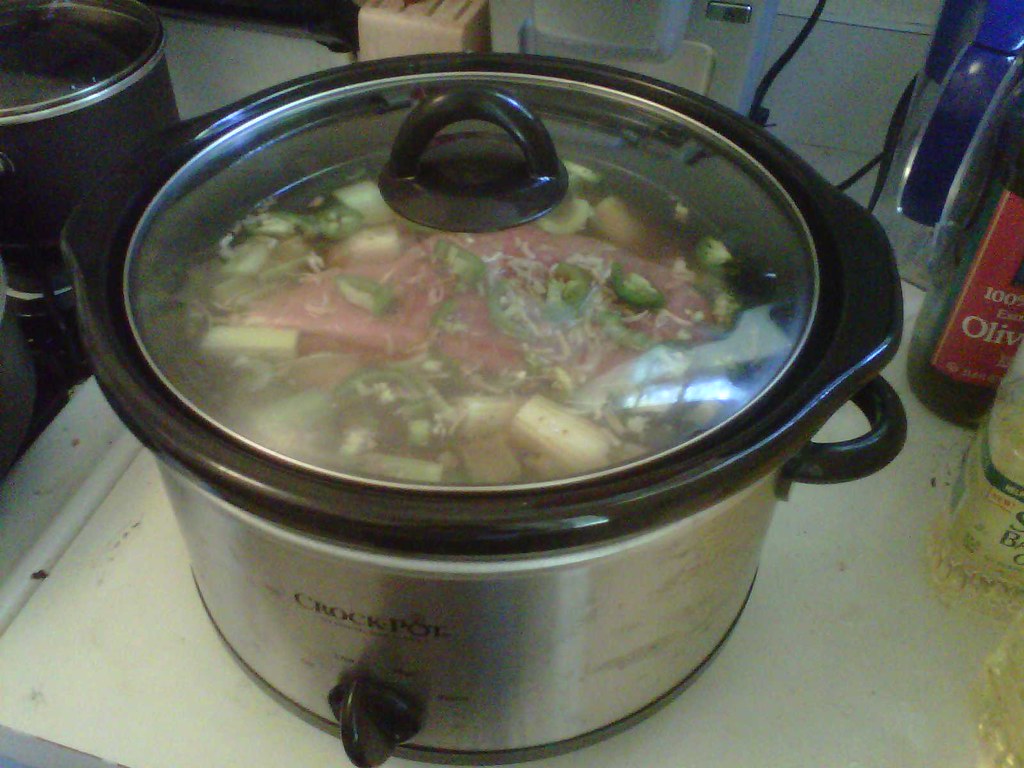
So today’s “recipe” comes from my mom’s kitchen back in Chicago. Pot roast is one of her the rarer dishes that she cooks, but when she does make it we all enjoy quite the feast. For Christmas she gave me my very own Crock Pot, and since then I have made some pretty fantastic meals (you’ll just have have to wait til February for the family Super Bowl Chili recipe…my personal favorite). I absolutely LOVE cooking with the Crock Pot! It brings together so many diverse flavors, and you don’t need to break the bank in finding the best meat out there. Just your typical run-of-the-mill top round roast from the local supermarket will do. When I went to the store, I was delighted to see that roasts were the “Big Buy” of the day. Over 2 ½ pounds of meat for under eight dollars!
I’ll admit there’s really nothing fancy about this pot roast recipe compared to any other. Just throw in a bunch of vegetables with the meat and let it all soak together throughout the day. Based on a limited veggie selection at our grocery store, I just went with some white potatoes, carrots, and celery, and to add a little twist, some chili peppers…not a necessary addition but certainly worth trying if you like a little kick.


The Monkey Scientist's Roast
photo by d.liff
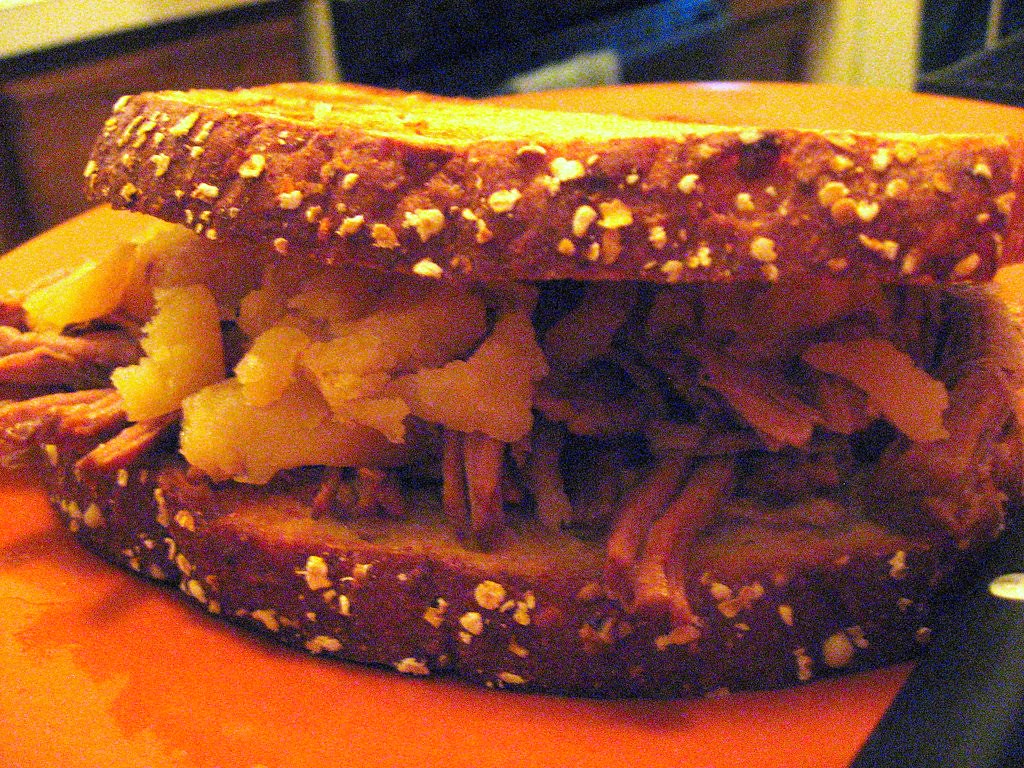
When it was done we just scooped it out of the pot and served on toast to make some nice hearty sandwiches. You might find that when it’s done it will need some sort of sauce to add another dimension. We used Sweet Baby Ray’s barbeque sauce but you can probably also use a spicy mustard or throw some flour in the meat juice to make a thicker gravy. Also, you might want to brown the meat before putting it in the Crock Pot for the day, but I was a little pressed for time so I just skipped that part. I would recommend some mashed potatoes and maybe some steamed green beans if you’re into the whole side dish thing…or just grab more out of the pot and put that on the side!

The Monkey Scientist's Roast
photo by d.liff
Mom's Pot Roast 
(serves 4-6)

Ingredients
2.5 lbs top roast (you can use more or less depending on size of slow cooker)
7 carrots, unpeeled (but washed) and chopped
3 medium-sized white potatoes, quartered
2-3 stalks celery
2 whole jalapeños, fresh
1 can of chipotle peppers in adobo sauce (if you don't love really spicy food, only use 1-2 peppers)
1 packet of onion soup mix (can be substituted or augmented with 1 whole white onion)
*Note: amounts of ingredients may vary with size of Crock Pot


Instructions

1. Chop carrots and celery into ½ to 1 inch chunks, depending on width
2. Chop potatoes into about 8 pieces, or slightly bigger than the carrot chunks
3. Slice jalapenos and cut into half circles
4. Add about half of the chopped vegetables and 3-4 chili peppers from can into crock pot. Save the other half to top around and on top of the meat.
5. Rinse the meat and pat dry. You can brown lightly to add texture and cut some of the fat but if short on time this is not necessary.
6. Place meat on top of vegetables and fill the rest of the crock pot to about ¾ depth with remaining vegetables.
7. Add water to ¾ depth, or enough to cover all contents. Add onion soup mix and lightly stir to mix it all in.
8. Set crock pot to low, cover, and let cook for 8-10 hours
9. Meat should easily fall apart with a fork and be stringy in nature.
10. Dig in and put it all on toasted bread to make the perfect pot roast sandwich

Thursday, June 16, 2011

Father's Day [PW's Malted Chocolate Chip Cookies]

malted chocolate chip cookies

HAPPY FATHER'S DAY!

malted chocolate chip cookies

My dad is just about the greatest person in the entire world.  He knows something about just about everything, and I can always rely on him when I have a question. He has always been very supportive of me and encouraged me to follow a path that I felt was right for me. Dad is definitely one of the major reasons I've gotten to where I am today.

malted chocolate chip cookies

My dad, growing up in Rhode Island, has always been a big ice cream fan.  I remember going down to Rhode Island with him as a kid to get Del's lemonade and an Awful Awful.  We've traipsed all over the Cape and New Hampshire trying the best homemade ice creams.

malted chocolate chip cookies

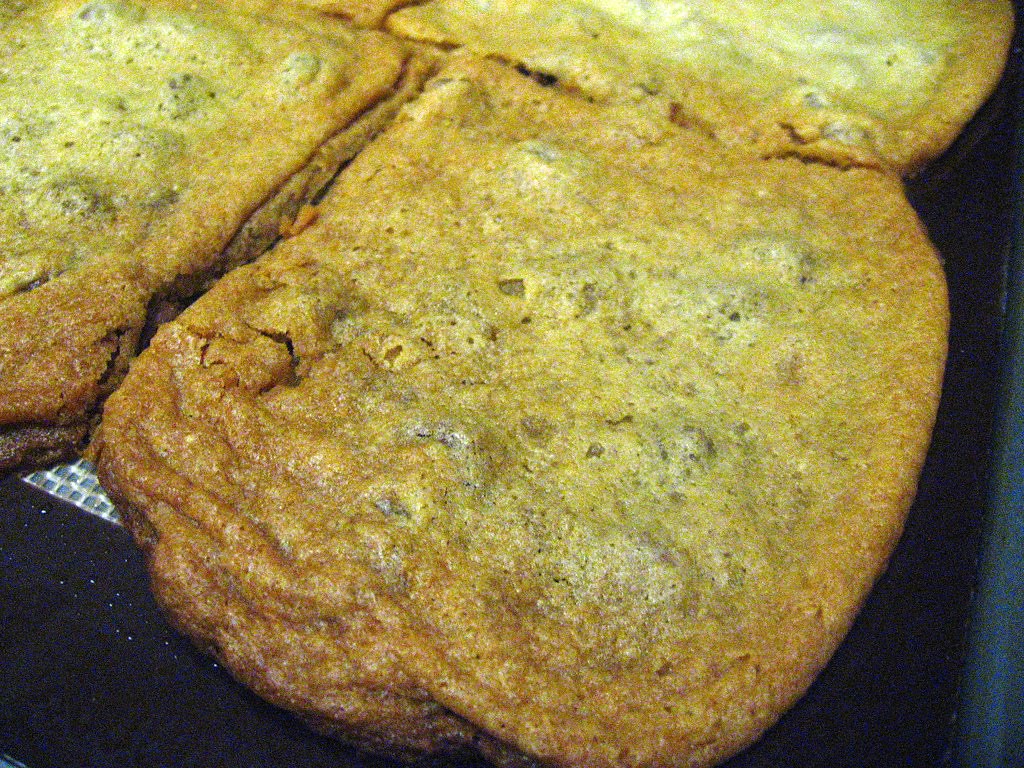
I couldn't exactly send Dad homemade ice cream, but I know he loves to make his own ice cream sandwiches.  PW strongly encouraged making ice cream sandwiches with these cookies, so I thought he'd really enjoy them.  It makes perfect sense - they're crispy, flat, and are filled with malted milk powder - the ingredient that puts a frappe over the top. (By the way, I bought my malted milk powder on Amazon.)

malted chocolate chip cookies

I hope Dad enjoys the cookies and is no longer jealous of the cookies I made for my brother.  And, even though I won't be up in New Hampshire Sunday, I hope he has a wonderful father's day with my mom and brother!  

malted chocolate chip cookies

I love you, Dad!

malted chocolate chip cookies

Malted Milk Chocolate Chip Cookies
from the Pioneer Woman
Makes about 30 cookies

Ingredients
1 cup (2 Sticks) Unsalted Butter Softened
¾ cups Golden Brown Sugar (light brown sugar)
¾ cups Sugar
2 whole Eggs
2 teaspoons Vanilla Extract
2 cups All-purpose Flour
1-¼ teaspoon Baking Soda
1-¼ teaspoon Salt
½ cups (rounded) Malted Milk Powder
1 bag (12 Ounce) Milk Chocolate Chips

Instructions
Preheat oven to 375 degrees.
Cream butter, then add both sugars and cream until fluffy. Add eggs and beat slightly, then add vanilla and beat until combined. Add malted milk powder and beat until combined.
Sift together flour, baking soda, and salt. Add to butter mixture, beating gently until just combined.
Add chocolate chips and stir in gently.
Drop by teaspoonfuls (or use a cookie scoop) and bake for 10 to 12 minutes. Bake less if you want chewy cookies; more if you want crispy cookies. (I need to check the temperature of my oven, but I baked 11 minutes and the 2nd batch could have used a little more time)
Optional: Allow to cool completely, then use two cookies to make an ice cream sandwich. Add sprinkles to the sides of the ice cream, then wrap individually in plastic wrap.

Saturday, June 11, 2011

23 Years [Guest Baker: Yellow Butter Cake with Chocolate Malt Frosting]

Twenty-three years ago today, I was born. Which, I suppose, makes today my birthday.

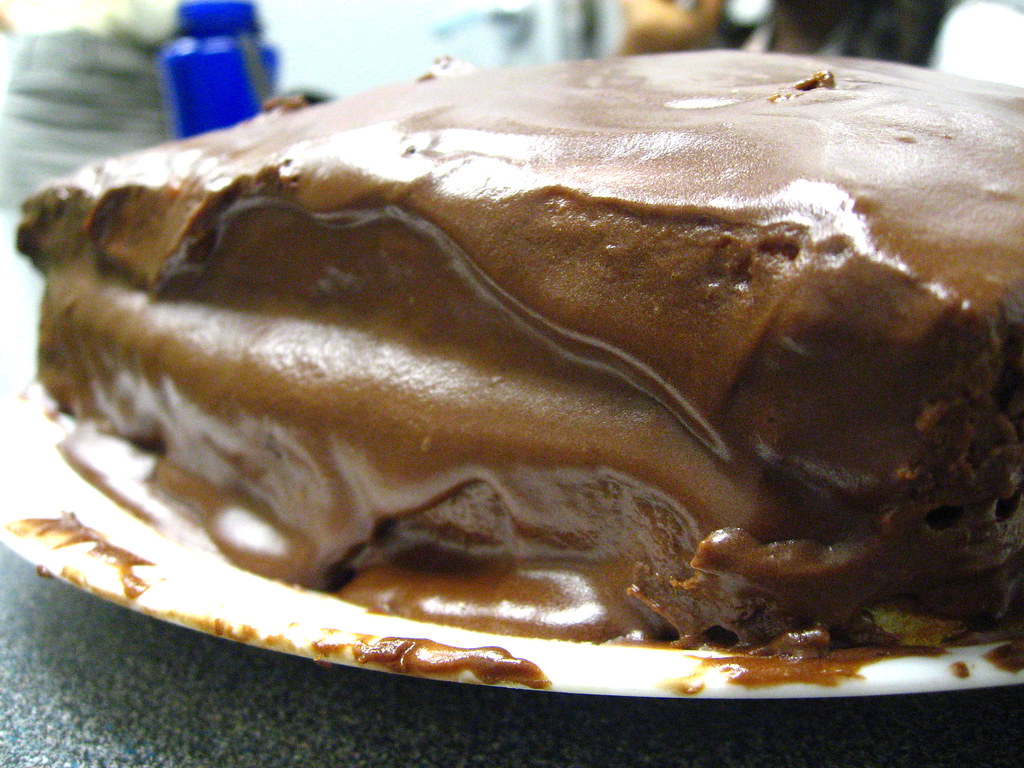
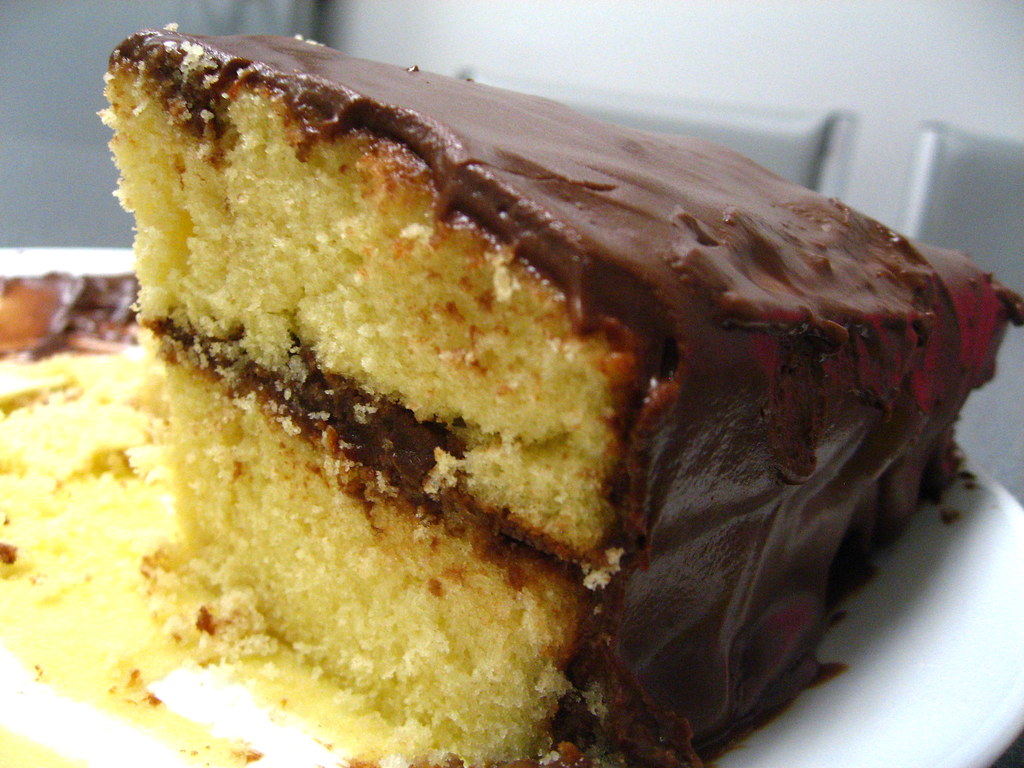
Chocolate malt frosted cake

I have to admit, this year has been a pretty amazing one.  I am so lucky to have the most wonderful, loving, and supportive family I could ask for, incredible and reliable friends both here in DC and around the country - who I love like family, a pretty spectacular boyfriend, a job I enjoy, my health - which I realize every day is an amazing gift, and, as a result, so much happiness. I'm so grateful for all of my good fortune. 

I can only help that this next year is as wonderful as the last!

DSCF0088
photo by Amanda Farr
Speaking of incredible friends - my coworker, Amanda, was so nice and made me a beautiful birthday cake. It just so happened to be exactly what I wanted!  I purchased malt milk powder a few month's back with the hope of trying to make malted chocolate chip cookies, but I just haven't gotten around to it.  When I saw this recipe, I was really hoping Amanda would help me out by giving it a try. What am I going to do when she leaves DC!?

DSCF0090
photo by Amanda Farr
The only recommendation Amanda had was to use a little more malt powder, as you couldn't really taste it.  It tasted amazing - like pound cake with chocolate frosting - and I was so excited to get to celebrate my birthday with my amazing coworkers.

DSCF0091
photo by Amanda Farr

Tonight I'll get to celebrate with many of my friends in DC and in a few weeks I can celebrate at home with my family!  Thank you to everyone for a great year and many more to come!

IMG_5427

Basic Yellow Butter Cake

Ingredients
2 3/4 cups flour (I used all-purpose)
1 1/2 cups sugar
1 tablespoon baking powder
1/4 teaspoon salt
16 tablespoons (2 sticks) butter, room temperature (I used salted)
1 cup milk, divided
4 eggs
2 teaspoon vanilla extract

Instructions
Preheat oven to 350°F.
Lightly whisk together first 4 ingredients; flour, sugar, baking powder, salt.
Add butter and 3/4 cup milk and beat together until just combined. Stop to scrape sides down a couple of times. Do not over beat.
In a separate bowl, lightly beat eggs, remaining milk and vanilla extract together. Gradually add to flour/sugar/butter, and mix until just combined. Again, do not over beat.
Divide batter into two greased and parchment lined 9 baking pans.
Bake at 350°F for 30-35 minutes, or until cake tester or toothpick comes out clean.

Chocolate Malt Buttercream Frosting

Ingredients
1/2 cup butter (again, I used salted)
1 teaspoon vanilla extract
2 cups powdered sugar (confectioner’s sugar)
1/2 cup cocoa powder
1/2 cup malted milk powder
7 tablespoons milk

Instructions
In a mixer, beat butter and vanilla extract together until smooth.
Add in powdered sugar, cocoa powder, malted milk powder, lightly mix.
Gradually add in milk, one tablespoon at at time until smooth.

Wednesday, June 8, 2011

Chicken and Artichokes in a White Wine Sauce

IMG_5448

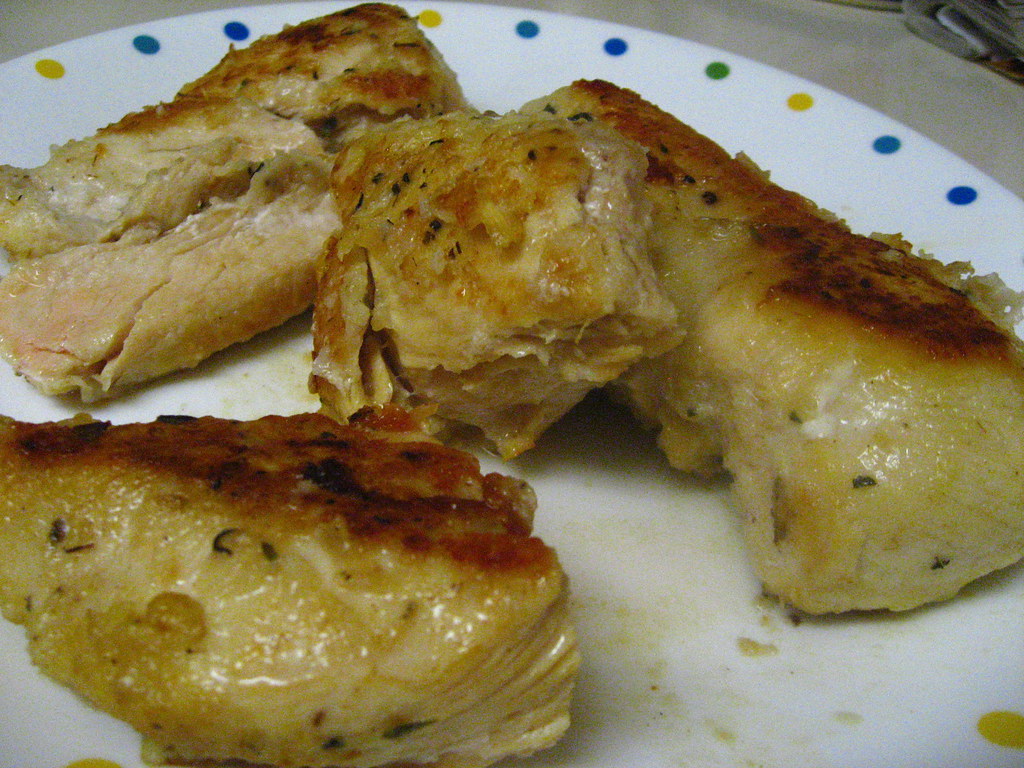
Last week, I got a super couponing deal on Perdue chicken breasts.  They were on sale AND I had a $0.75 coupon which doubled at my market! Unfortunately, I forgot the chicken at work over the weekend, so I had to wait until the week started again to use it up.

IMG_5429

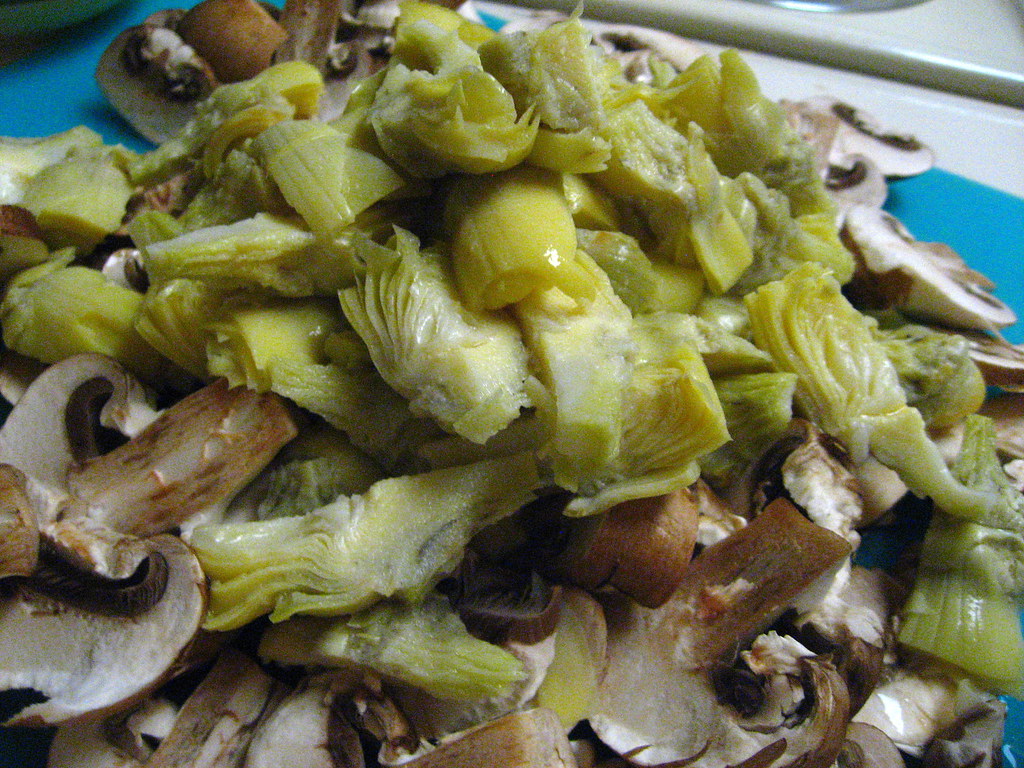
I found this recipe and was immediately drawn to it - I absolutely LOVE artichokes.  We have a wonderful specialty wine shop in my neighborhood, so I picked up a half bottle of wine just to cook with ($3.99) and was able to complete my meal pretty inexpensively.  I do wish I had picked up the artichoke hearts at Trader Joe's, where I know they were cheaper.  I was this close to buying them when I was there, too!

IMG_5434

This meal came together really easily.  I meant to serve it over brown rice, but I forgot to start it in time. Instead, I served it over Israeli couscous, which I adore.  The Monkey Scientist actually made the couscous, and he cooked it in chicken broth seasoned with garlic powder and herbs de provence, which gave it wonderful flavor.  And, he cooked it to perfection!  The couscous gave the dish another textural element and absorbed the flavors of the sauce.

IMG_5440

We really enjoyed this dish a lot.  It was interesting that it didn't include any lemon juice, which I thought would have added a nice citrusy element.  However, my dad hates citrus, so it was nice to try an artichoke chicken recipe that I knew he'd enjoy (and therefore my mom can replicate).  It reminded me of my favorite restaurant in the Greater Boston area, aptly named Artichokes, which has the most amazing artichoke appetizer you've ever tasted.  We've gone there a few times on my birthday, which made this the perfect week to compose this dish - my birthday is in just a couple of days!

IMG_5446

Chicken and Artichokes in a White Wine Sauce

Ingredients:
½ cup all-purpose flour
1 tsp. herbes de provence (or a combination of other dried herbs such as basil, parsley, oregano, thyme)
¼ tsp. salt
¼ tsp. pepper
4 boneless, skinless chicken breast halves (2 chicken breasts total)
2 tbsp. olive oil
1 tbsp. butter
2 cups sliced baby bella mushrooms
1 (14 oz.) can quartered artichoke hearts, drained
1/3 cup dry white wine
1/3 cup chicken broth
Grated Parmesan cheese, for serving
Minced fresh parsley, for serving

Directions:
In a pie plate or shallow dish, combine the flour, dried herbs, salt and pepper and stir with a fork to blend.  Reserve 1 tablespoon of the flour mixture.  Using tongs, coat the chicken breast halves in the flour mixture, shaking off the excess.

Heat the olive oil in a skillet over medium-high heat.  Add the chicken to the pan and cook until golden brown and cooked through, about 8-10 minutes, turning halfway through cooking.  Remove the chicken to a plate; cover and keep warm.

Add the butter to the pan and warm until melted.  Add the mushrooms and artichokes to the pan and cook until most of the liquid is released from the mushrooms and the vegetables are tender, about 5 minutes.

In a liquid measuring cup, combine the white wine, chicken broth, and reserved tablespoon of flour; whisk until smooth.  Add the mixture to the skillet, cooking until it is warm and slightly thickened.  Return the chicken to the pan to warm through and cover with sauce.  Serve the chicken with sauce spooned over the top, and garnish with grated Parmesan and fresh parsley as desired.

Monday, June 6, 2011

Susan G. Komen Global Race for the Cure

A little over a year ago, I decided that if I was going to do all this cooking...well all this eating... I needed to start exercising more.  In DC, running is the most common form of exercise. I knew if I set my mind to it, I could become a runner- even though I have absolutely not been a runner my whole life.

I started a 5K training program and about 3 weeks in I was hit by a car. I was lucky, and only dislocated my thumb, which meant I was in a cast for about a month (including the week I started at my job now).  Still, the frightening x-rays and the frustration of a city hospital made me less apt to start running again.


My "exercise habits" were less than stellar for the rest of 2010.  In January, I decided to pick it back up again.  I could probably barely run a mile on January 1, but I decided to dedicate myself to finishing Couch to 5K.  I set a goal in mind to finish a race before my birthday (June 11) and I wanted to pick a race with a cause I was passionate about.


Susan G. Komen Global Race for the Cure was this past Saturday, June 4. My mom's best friend from college is a breast cancer survivor and I have always been so amazed by her strength to overcome life's challenges.  I ran the race in her honor and I think it gave me the strength to stick to my goal.  I'm so excited to say I finished - without walking at all - and that I raised $890 to support breast cancer awareness, prevention, and research.  I may not have been the fastest participant, but just finishing was a huge goal for me and I can't wait to work to improve my time in future runs. I am SO grateful to my friends and family for their donations and support - I couldn't have done it without them.


Also, a big thanks to Casey, Amanda, and Derek for running with me - I had SUCH a fun morning!  For those of you who never thought you were a runner - I really suggest trying Couch to 5K and getting out there for a race in your area.  It is an absolute blast and I am so glad I did it!

Now, for those of you disappointed in the lack of food in this post, I did make an amazing dinner last night, but didn't manage to take pictures.  If you need a meal for dinner tonight, I strongly recommend Gina's Skinny Chicken Tikka Masala.  The Monkey Scientist and I really enjoyed it - and all of his roommates, including one who is Indian, said it tasted great.  Then get out and start running!

Saturday, June 4, 2011

American Flag Cake


I apologize here for a few reasons.  For one, I made this cake before either of the shower recipes.  But everyone had been asking for the recipes from the shower, so I had to get those up first.


I also have to apologize, because this recipe is about as Sandra Lee as I get.  The Monkey Scientist will tell you (if you haven't realized already) that I really like to make EVERYTHING from scratch.  But I got the idea to make this mere hours before I had to be at a BBQ, so I did go the boxed cake route.


However, I did try to play with the boxed cake a bit. I used both white cake and strawberry cake, and swirled them. It made for a pretty and patriotic design.  Everyone was quite surprised when they cut into it! My friend taught me to sub 1/2 the water for whole milk, which makes for a much moister cake.  You should try it!


Also, while I was cutting this, one of my strawberries sliced into perfect hearts. How flippin' adorable is that?


I made this cake for a Memorial Day BBQ, but it would be really great for the 4th of July as well.  It couldn't be easier to throw together - although if I make it again I promise to make the cake from scratch! It is a huge hit and of course tastes delicious. (It's just cake, Cool Whip, and berries, how could it not be delicious?)  Sandra Lee may not be a recipe writer but she is a great decorator - so sometimes it is good to emulate her, right?


American Flag Cake
(makes 2 cakes)

Ingredients
1 box white cake mix
1 box strawberry cake mix (you can add red food coloring to white cake if you don't like strawberry)
ingredients on the back of the box, but sub 1/2 water for whole milk
2 containers Cool Whip
1 lb ripe strawberries, sliced thin
1/2 pint blueberries

Instructions
Mix the cake mixes as instructed on the back of the box.
Spread half of the white cake into each pan.  Put dollops of strawberry cake mix on top. Using a thin knife, swirl with the white cake below.
Bake as direction and let cool COMPLETELY.
Place the blueberries in the top left corner and make stripes with the strawberries to resemble an American flag.

Friday, June 3, 2011

Baby Bacon, Leek, and Cheddar Quiches


For my coworker's baby shower, I made mini quiches.  Since it was a baby shower, I decided to call them baby quiches.  I thought they'd just be an adorable treat for everyone!


I decided to try to lighten this recipe up a bit. Instead of pork bacon, I used turkey bacon.  As a result, I had to add in a little vegetable oil when I went to sauté the leeks.


Man, I love leeks.  They are just one of the most wonderful things I've ever discovered.  Remember that soup I made back in March? This is like a spring version.


I have to find some more leek recipes after this one - they add another dimension to every meal that you can't get from similar ingredients.  They aren't oniony but they do have that carmelized texture.


As long as I was lightening up this recipe, I also used fat free half and half.  I think it didn't affect the taste at all. How do they make it fat free without it getting watery?


The hardest part of this recipe was keeping the filling moist.  I had to stir it between filling each and every quiche to spread the egg evenly.  I also filled a little too much so I was about 6 quiches short.  I also had extra puff pastry - I probably rolled it too thin.


The preparation is pretty simple, although filling all of the muffin tins does take forever. I finished one of my 24 muffin tins and then baked them off while I filled the rest so I didn't have to spend too much time in my hot kitchen.  It's amazing how hot it gets in the summer with the oven on!


These were definitely a hit at the baby shower.  They are salty and a little bit sweet, and definitely savory.  Plus they're so much easier to serve than a full quiche. Mine weren't quite as pretty as Tracy's but they sure were tasty! I tried one hot, which was really good, but they were just as good cold or at room temperature.  They're the perfect appetizer to bring to a baby or bridal shower.  Since 3 people we work with are having babies in late July, I imagine you must know someone getting married or having a baby too!


Baby Bacon, Leek and Cheddar Quiches
Lightened from Tracy’s Culinary Adventures

Ingredients
3/4 lb turkey bacon, cut into medium dice
1 tablespoon vegetable oil
3 cups medium-diced leeks, washed and drained (about 3 leeks, white and light green parts only)
1 1/4 cups fat free half and half
1 cup (4 oz) grated extra-sharp Cheddar
2 large eggs
2 large egg yolks
2 tablespoons chopped fresh thyme leaves or 2 teaspoons dried thyme
1 teaspoon kosher salt
1/2 teaspoon freshly ground black pepper
1/4 teaspoon ground nutmeg
2 1.1-lb packages frozen puff pastry sheets, thawed (homemade puff pastry would work too)

Instructions 
Set a skillet over medium to medium-high heat and cook the bacon until crisp.  Use a slotted spoon to remove the bacon to a paper towel lined plate.  If there is almost no fat in the pan (which is likely) add 1 tablespoon in the skillet (if there is fat, add oil to have total 1 tbsp of liquid).  Return the pan to medium heat and add the leeks.  Cook until softened, stirring occasionally, then set aside to allow the leeks to cool a bit.

Meanwhile, add the half and half, cheese, eggs, egg yolks, thyme, salt, pepper and nutmeg to a medium bowl.  Use a fork to break up the eggs and yolks and mix the ingredients.  Add the bacon and leeks (both of which should be cooled) and toss to distribute evenly.  Set the filling aside.

Preheat oven to 400 F. Spray your mini muffin pans with cooking spray.

Unfold one sheet of puff pastry and place on a lightly floured work surface. Roll the sheet into a rectangle approximately 10x18 inches big. Using a 3-inch round cookie cutter (or the top of a glass cup), cut 12 circles from the sheet of puff pastry. Fit each round into one well of the prepared mini muffin pan, making sure that the dough extends to the top of well. Fill each well with about 1 tablespoon of filling (it's fine to fill it just about to the top). Repeat with the remaining dough and filling.

Bake for about 20 minutes, or until the filling puffs and the crust is golden brown. Remove the quiches from the pans and serve.

Alternatively, you can prep the quiches ahead of time and freeze them (for up to a month). After assembling them, pop the mini muffin pans in your freezer for a few hours, until the quiches are set, then transfer them to resealable freezer bags. When you are ready to bake, transfer the frozen quiches from the bags to the mini muffin pans and bake for about 30-35 minutes. 
Thursday, June 2, 2011

Russian Eggplant Spread

All photos except the last in this post by Tari Owi

One of my co-workers, Boris, has the most amazing garden in his backyard.  In the summertime, he brings us the most best tomatoes and pickles I've ever had.  I was very upset to hear that he might not be able to make pickles this year because his crop isn't big enough. Still, we're eagerly awaiting the rest of his bounty.


Other than his amazing pickles, the best thing he ever made was for our International Potluck Lunch last summer.  We had colleagues who work in our office in India visiting, so as a way to coerce them to cook Indian food for us (which was INCREDIBLE by the way) we all made our favorite dishes from our ethnic backgrounds.  Fortunately, our office is very diverse.


Boris is from Russia (in case his name didn't give it away), and for the Potluck he made a Russian Eggplant Spread with fresh ingredients from his garden.  Apparently it is a common dish that many people of Russian descent can throw together without a recipe. It was one of the best things at the lunch and we haven't stopped talking about it since!


This week, for my other coworker's baby shower, my friend Tari offered to try to replicate the eggplant spread.  She also offered to take pictures so share with all of you - so please thank her very much!

(You'll have to stay tuned to see what I made!)


She also asked me to share a few comments with you about the preparation and history of the dish:
This is a delicious spread for bread and parties but one can get creative with how its served. There's a similar indian dish, Baingan Bharta, (actually where I got the idea to grill the eggplant first) that serves this spread with naan or over rice. Eggplants are also great with other cuisines - italian seasoning, curry, even greek yogurt may go well on this! 


This spread was AMAZING. We ate it on pita chips and pretzel chips, but when Boris made it we ate it on bread.  Either way it was so fantastic. The extra spice Tari added with the red pepper flakes really made it, but you know how much I love red pepper flakes.  It's spicy and hearty, with a spreadable texture.  This would be a great spread to bring to a BBQ this summer!


Russian Eggplant Spread
Slightly adapted from Ashbury's Aubergines

(adaptations and comments from Tari Owi)
note: the recipe below was doubled in these images


Ingredients
eggplant, (about 1 pound)
1 green pepper
1 onion, chopped
2 cloves garlic, finely chopped
1 tablespoon sugar
1 tablespoon lemon juice
1 tablespoon salt
1/8 tablespoon pepper
1 teaspoon of red chili pepper flakes (optional)
¼ cup of vegetable oil
2 chopped medium tomatoes
1/2 tablespoon flour
1/4 cup tomato paste
French bread


Instructions
1. Preheat oven to 400F.

2. Pierce eggplant 3 or 4 times with fork and grill for about 6 minutes (rotating the eggplant every 2 minutes to get an even smoky flavor - grilling it isnt necessary but the smoky flavor adds to the dish especially with the pepper flakes.)


3. Wrap green pepper in foil and place peppers and eggplant in shallow baking dish. Bake in shallow dish for about 35-40 minutes until eggplant is very soft (skin should look easy to peel off). Set aside until cool enough to handle (about 10 minutes). Remove skin from eggplant and seeds from green pepper. (Eggplant seeds can be odd for those not used to cooking with eggplant but they are left in, pepper seeds however should not be!)


4. Heat oil in 10-inch skillet over medium heat. Saute onion and garlic until onion is tender. 


5. Chop eggplant, green pepper, and tomatoes. Add to onion and garlic. (Boris recommended using real tomatoes instead of tomato paste. I think it makes all the difference. However, if there are no fresh tomatoes around or seemingly not enough to balance the dish then definitely increase the amount of paste/diced tomatoes)


6. Add the remaining ingredients (except bread) and heat to boiling.


7. Reduce heat. Simmer, uncovered, stirring occasionally for 30 minutes. (You could skip boiling for cooking in the Crockpot on high for 1-2 hours so you don't have to stand over the stove forever.)


8. Place mixture in blender container (or use an immersion blender in the pot). Cover and blend on high speed for about 1 minute, stop blender half way to scrape spread down sides. Taste the dish after the first blend. (I noticed it needed more salt and then had the idea to add chili peppers for a kick! It improved significantly afterwards.)


9. Cover and refrigerate until very cold, at least 4 hours. Serve with bread.