Showing posts with label asian. Show all posts

Wednesday, April 24, 2013

Bulgogi Style Salmon with Bok Choy and Shitake Mushrooms

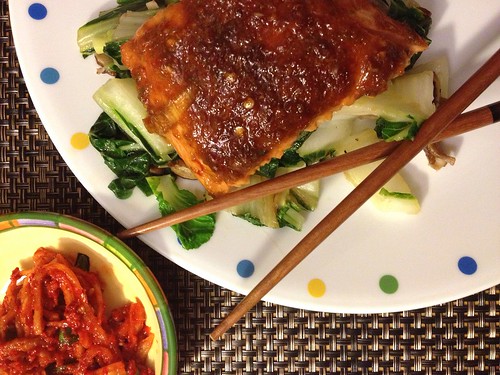
bulgogi-style salmon

This weekend we finally made a trip up to my favorite type of grocery store - the Asian market.  We hadn't been in so many months, I was running low on lots of my staple ingredients!  Although there are a few Asian markets on the north side of Chicago, I haven't found any Korean markets, and I hadn't found any markets that were very big.  So this weekend was the grand adventure - we went up to the HMart in Niles.
Untitled

I've been to HMart's in Maryland and Massachusetts, so I knew generally what I could expect.  But the one in Niles is a Super HMart which means it's the size of the Home Depot next door.  We were literally lost in there for hours.  We watched folks making kimchi, tried lots of samples (except the blood sausage... the woman handing out samples didn't think it was a good idea to offer me any), and loaded up on some of our favorite ingredients.
Making kimchi

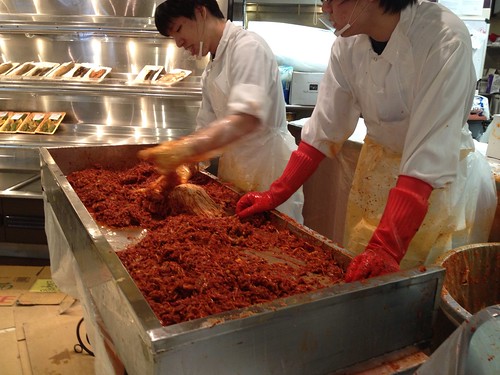
One fun part of the trip was watching the men at HMart making fresh kimchi.  For those of you who aren't familiar with kimchi, it's a spicy fermented cabbage dish.  It's almost similar to a good half sour pickle.  In Korean restaurants, they often start the meal with a variety of very small side dishes that can include tofu, a type of Korean potato salad, broccoli, and always kimchi.  I'd never seen anyone make it before so this was a special treat for me.  They pull the cabbage to shreds while they're mixing it with the spices and vinegar.  Pretty cool!
Untitled

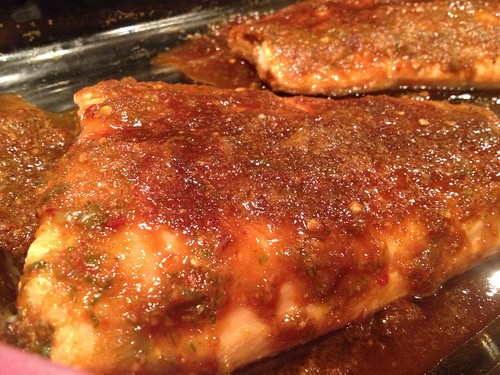
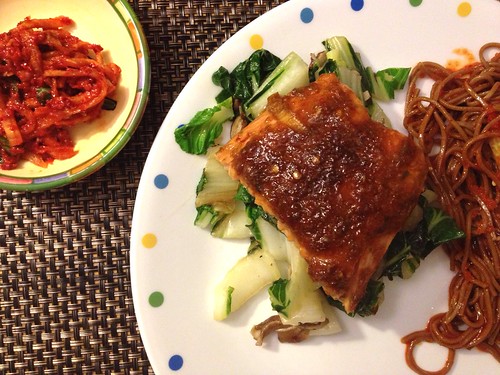
This salmon dish was really delicious. It was a nice change of pace from our usual lemon juice and garlic salt preparation.  It was just a little bit spicy from the sambal oelek and was sweetened by the sherry and sugar.  The ginger, garlic, and soy sauce rounded out the traditional Asian flavors.  In Korean tradition, I served a side of the freshly made kimchi along with our meal, which was spicy and pungent.  My favorite!  I especially liked the bed of bok choy and mushrooms under the salmon.  Stay tuned for the final component of the meal!
bulgogi-style salmon

Bulgogi-Style Salmon with Bok Choy and Shitake Mushrooms
slightly adapted from WeHeartFood

Ingredients
3 large garlic cloves, peeled, divided
1/3 cup chopped green onions
1/4 cup low-sodium soy sauce
1 tbsp cooking sherry (Chinese rice wine would work, too)
2 tsp minced fresh ginger, divided
2 tsp sugar
1 tsp sesame oil
2 tsp chili-garlic sauce (sambal oelek)
2 salmon fillets, 0.5-1 lb each
1 tbsp olive oil (or chili-infused olive oil)
1 bunch bok choy, bottoms removed and cut crosswise into 1/2-inch-wide strips
8 oz fresh shiitake mushrooms, sliced

Instructions
1. Preheat the oven to 500 degrees F.
2. Combine 2 of the garlic cloves (I broke them up slightly but didn't bother mincing), green onions, soy sauce, sherry, 1 tsp of ginger, sugar, sesame oil, and chili-garlic sauce.  Blend using either your immersion blender or food processor until smooth to create your marinade.
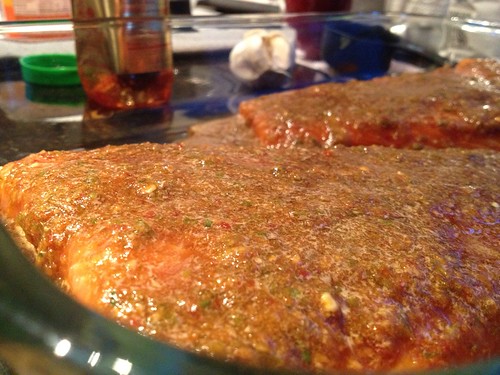
3. Place the salmon in a glass baking dish.  Pour the marinade evenly over the salmon fillets and allow to marinate for at least 5 minutes.  Bake for 8 to 12 minutes, or until the salmon is just opaque at the center.
4. Meanwhile, place the olive in a wok and heat over medium high heat.  Add the remaining clove of garlic, minced, and 1 tsp of ginger to the oil and heat until fragrant.
5. Add the bok choy and mushrooms and saute until the mushrooms are soft and the bok choy is wilted.
6. Serve the salmon over a bed of bok choy and mushrooms.

Wednesday, April 10, 2013

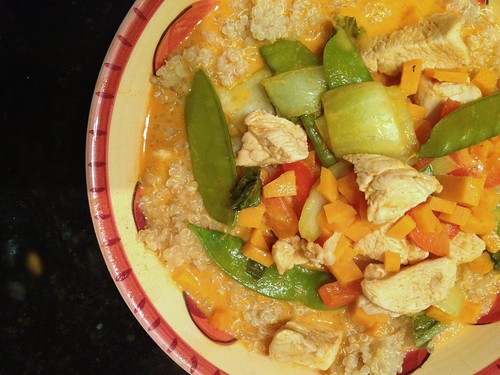
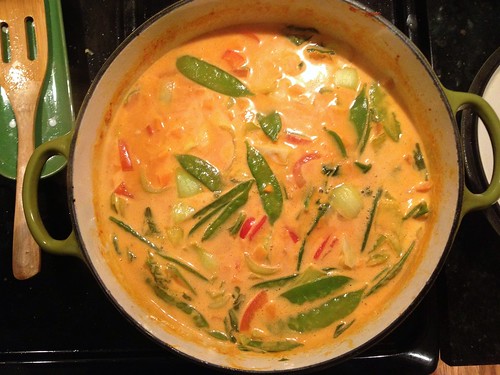
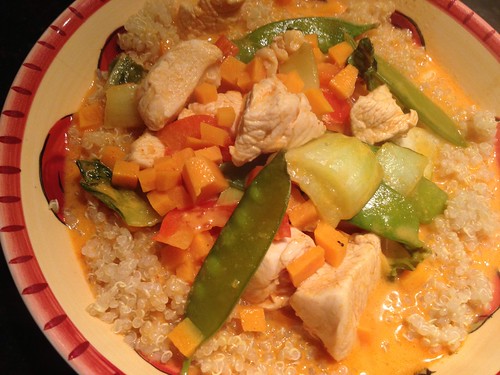
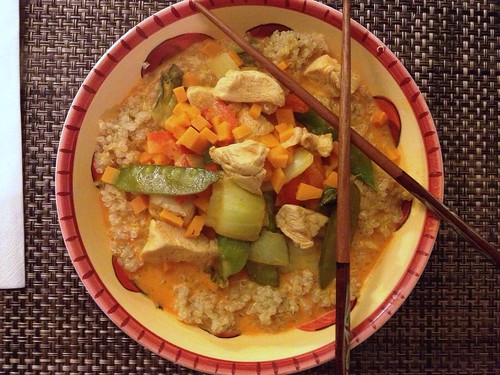
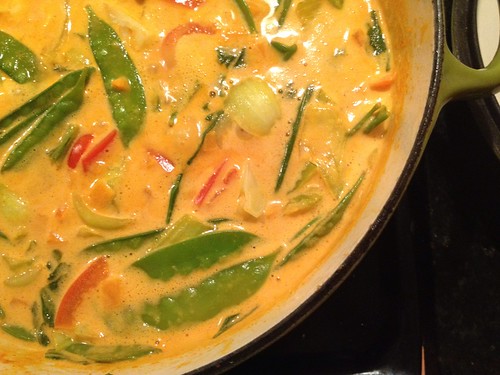
Thai Red Curry Chicken

Thai Red Curry

I'm just going to not talk about my lack of frequent posting today and instead talk about yoga.  Just for a quick change of pace, and because this dinner was eaten at 10 pm so that I could go to yoga before I ate.  I'm lucky the Monkey Scientist grew up in a household where they almost always eat late dinners because this is becoming a more and more frequent occurrence for us, especially since my Tuesday and Thursday yoga classes are at 8.

Thai Red Curry

Like this blog, my yoga journey started in DC.  When I was living in DC for my "intern summer" (my DC readers know what I'm talking about), I was working in a government affairs lobbying office on F Street for a huge IT company.  My family friends have always been huge into yoga, but I'd never been to a real class of my own.  I discovered this amazing yoga studio in Dupont Circle that I would walk to once or twice a week for class.  More importantly, I discovered a yoga teacher who was patient and wise and made me leave with such a sense of calm and happiness that I had never felt in any other type of exercise.  I dragged others to her class with me and enjoyed it all summer long.

I moved back to Michigan at the end of the summer to finish school and tried a yoga class here and there.  In January, I moved back to DC to find that my yoga teacher was off on a long journey that would eventually bring her to settle in Costa Rica.  My yoga studio had been turned into a nail salon (like seemingly many storefronts in DC).  I tried a few other studios, but they were so crowded that I didn't feel the personal centering I had felt before. And then I joined Stroga.

Thai Red Curry

Stroga is meant to bring together strength and yoga.  Instead, I felt like it pulled them apart for me.  When I was going there, there was a big divide between the "strength people" who did group fitness classes and the "yoga people".  We were on different floors and there didn't seem to be a lot of overlap between people taking the different classes.  And so I got really into group fitness.  I learned to love (and hate) kettlebells, medicine balls, and TRX.  And I never ventured down to the yoga floor - in fact I kind of drew away from yoga.  By the time the infamous NY Times article came out, I was done with yoga.  Me and my kettlebells had moved on.

And then I moved to Chicago.  I was dying to join a studio with group fitness classes, like Stroga had been for me in DC.  There is actually a studio that's really similar to Stroga right across the street from my house, but I couldn't justify spending hundreds of dollars per month on a gym membership.  So I joined the regular gym across the street (for less than $40 per month) and tried to bring everything I'd learned at Stroga to my own gym routine.  I saw yoga classes on the schedule, but until I had a big push from my roommate, I had no interest.  But he pushed me, and I'm glad he did.

Thai Red Curry

I am so lucky that yoga at my gym is wonderful.  I've been to what I call "gym yoga" classes at other gyms where they push you and don't correct you, and I think these are the types of injury-laden classes the NY Times was talking about.  Even though one of our weekly classes is yoga sculpt, our wonderful instructors correct me constantly and have pushed me far beyond any limits I felt before.  In fact, my yoga sculpt class is where I am CONSTANTLY being yelled at to plug my shoulders into my back, which has improved my arms stands and head stands tremendously.

So I'm back into yoga.  I feel like I'm getting a lot stronger from it and I'm starting to find that peace of mind back that brought me to love yoga in the first place.  Still, some weeks, I have no interest in going. But others I find myself on the mat three times a week.  For someone who has never been big into working out, that's huge for me.  It makes me earn this curry dish.  With regular coconut milk.

Thai Red Curry

Thai Red Curry Chicken
from Eat, Live, Run

Ingredients:
1 tbsp coconut oil
1″ knob ginger, peeled and grated
1 lb boneless skinless chicken breast, cut into bite-sized chunks
3 tbsp red curry paste
3 cups coconut milk, light or regular
1 1/2 cups water
2 baby bok choy, chopped
1 red bell pepper, thinly sliced
1 cup chopped snow peas
2 sweet potatoes, peeled and julienned or diced into 1/4″ thick pieces
1 1/2 tsp sugar
2 tsp fish sauce
juice of 1 lime
1 tsp salt
cooked rice or quinoa for serving

Instructions
1. In a dutch oven over medium high heat, melt the coconut oil.
2. Add the grated ginger and saute until fragrant, 1-2 minutes.  Don't let it start to brown.
3. Throw in the chicken and cook, stirring frequently, until the chicken is seared on all sides but not cooked through.  Add the curry paste and continue cooking and stirring for 2 minutes.
4. Pour in the water and coconut milk (be sure to shake or stir the coconut milk before adding) along with the bok choy, bell pepper, snow peas, and sweet potatoes.  Bring to a boil.
5.  Once boiling, add the sugar, fish sauce, lime, and salt.  Turn the heat down to medium or low and allow it to simmer for 10 minutes.
6. Serve over rice or quinoa.

Thursday, May 3, 2012

What we had for dinner this week

OK I'm still behind on blogging.  I have no pretty pictures for you.  But I wanted to share the recipes we made this week to give you cooking inspiration!

Sunday night: Bibimbop from Cooking Light  We used steak instead of tofu (the Monkey Scientist is from the Midwest, I can't just be feeding him tofu!).  Bibimbop is my favorite Korean dish.  My favorite is from Kang's in Ann Arbor - I love how the hot stone makes the rice at the bottom crispy.  This recipe simulated it well by crisping up the rice in the cast iron skillet.  Lots of wonderful Asian flavors.

Monday night: Roasted Chicken with Red-Skinned Potatoes and Carrots
Washed a 5 1/2 lb chicken, covered in olive oil, chicken seasoning from the Christmas Tree Shop, and freshly ground black pepper, inside and out. Stuffed it with a lemon, cut in half.  Filled a dish with quartered potatoes and carrots (did nothing else to them beside clean and cut) and then put the chicken on top.  Baked at 475 for 25 minutes and then at 400 for 45 minutes.  I cooked it breast-side up for the first 45 minutes and then flipped it for the last 25.  Perfection, and still eating leftovers for lunch.

Tuesday night: We ate at Tesoro in Van Ness.  Not overly impressed.

Wednesday night: Spicy Chicken Thighs with Cucumber Avocado Salsa from Cookin' Canuck  - I'm now completely obsessed with this recipe.  Took 15 minutes to throw together, including cooking time, and tastes AMAZING.  The ancho chili powder (which I got at World Market) and cumin have almost a cinnamon-like spice to them.  The honey in the salsa is the perfect amount of sweetness and the lime gives just the right tang.  I loved the load of vegetables on top of the chicken - I didn't even need to make a grain to fill us up.  We made it on a cookie sheet with sprayed with olive oil rather than a rack and it was fine.  Definitely give this one a try!

Thursday night:  BBQ night!  Our friends have been organizing barbecues every Thursday at my apartment building.  This week I'm bringing Peanut Butter Cup S'mores Bars from Mel's Sweet Life.  The assembly wasn't so easy (forming that last bit into an 8x8 square? All I had was crumbs.)  But they've been sitting on my counter overnight and I'm quite confident they'll be delicious.

Hopefully I can get you some full recipes and pics over the weekend... I will do my best!

Tuesday, March 13, 2012

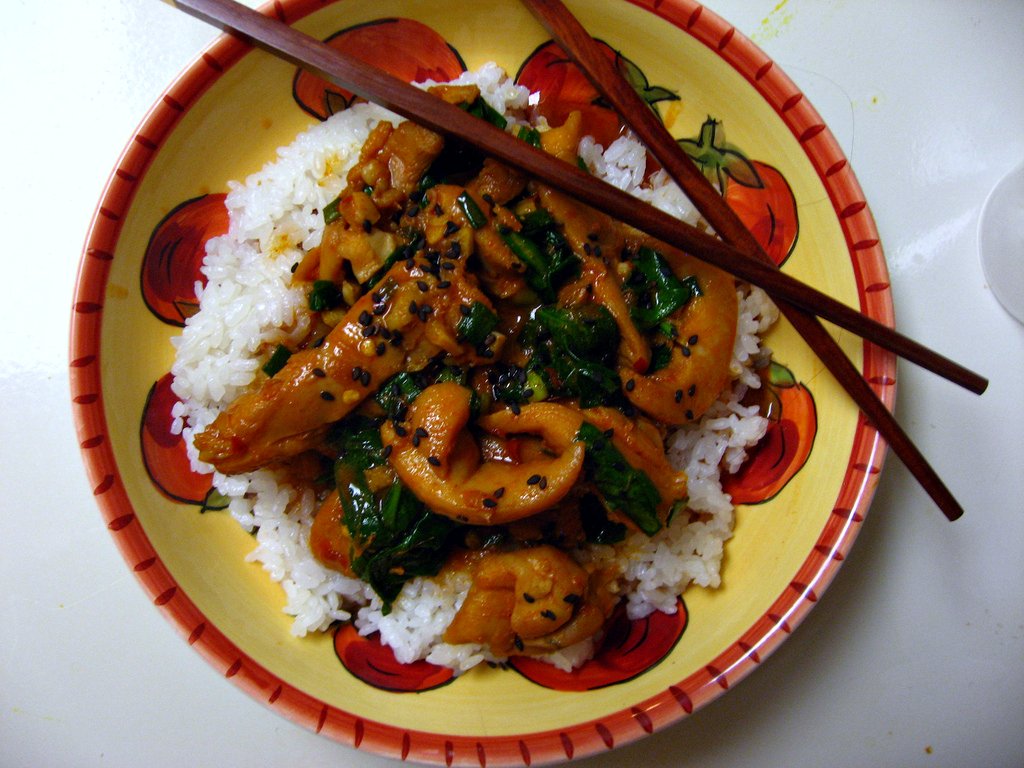
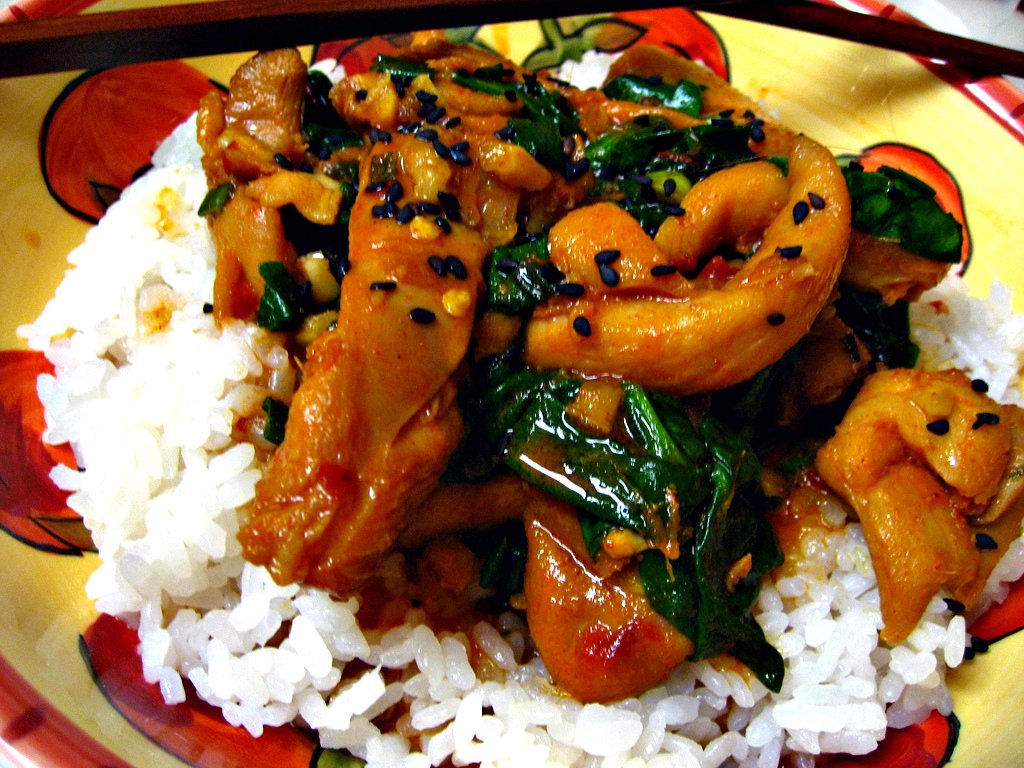
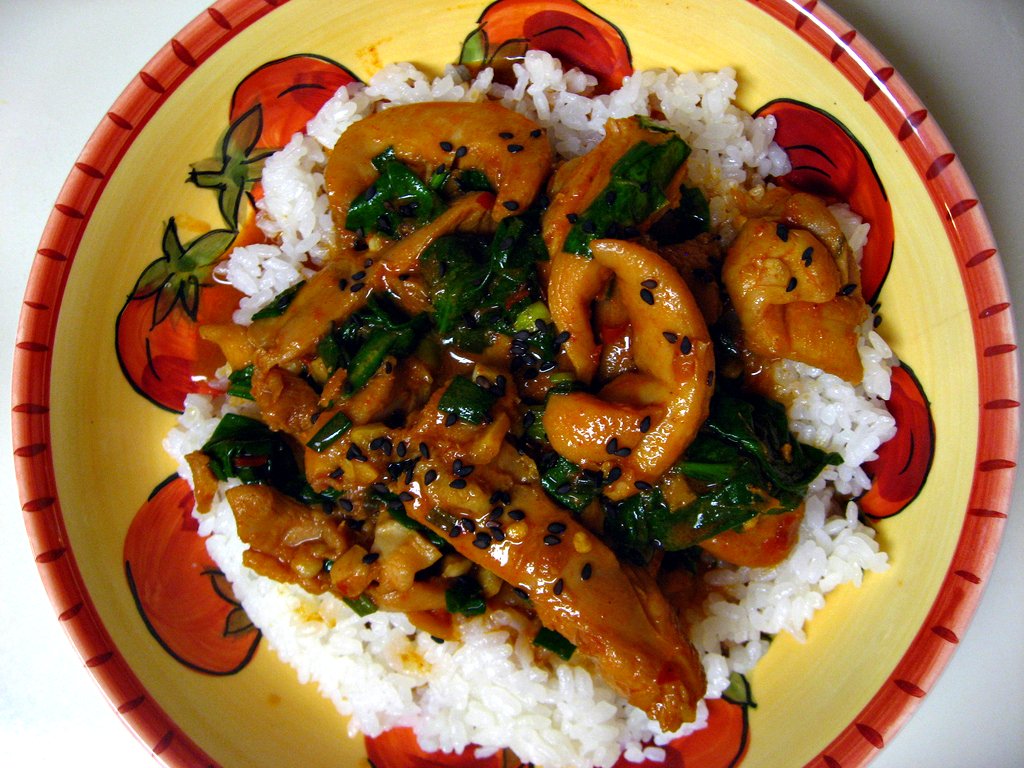
Dak Bokkeum with Spinach (Korean Stewed Chicken with Spinach)

Dak Bokkeum with Spinach

About a year ago, my coworker took me on a trip up to Maryland for what we called "Coworker's Without Cars Day".  It was my first trip ever to H-Mart and I was so excited to find all of the Asian ingredients I couldn't get at my local grocery store.  One of those ingredients was gochujang, a fermented Korean chile sauce.  Of course, being the klutz that I am, I dumped an entire container of gochujang on my foot while we were in the store and made quite the scene.  I was cleaning it out of my flip flop for months.

Dak Bokkeum with Spinach

Despite the scene, I never got around using the gochujang until now! I know - a total shame and I had promised a recipe last April that I never got around to making.  My gochujang actually technically expired since then, but I looked online and there seems to be some consensus that this stuff never really expires and the date on the back is more a "best by" date (had to look online, all of the description around the date was in Korean).  The top layer did turn a little bit brown rather than bright red, but it tasted fine and we didn't get sick so it seemed good to me.

Dak Bokkeum with Spinach

When you go to buy this, there is a huge aisle of H-Mart with different heat intensities of gochujang. It comes in a rectangular red tupperware and on the back right upper corner it will say gochujang in English in itsy bitsy font and it should say in English just how spicy it is. I think mine is the regular spice level and it was very spicy!  For those of you without an H-Mart or other Asian market, I hear a rumor that Annie Chung has a version of gochujang that's sold in regular grocery stores, though I've yet to see it.  Or, if you live in DC, they actually sell it at Tenley Mini Market, oddly enough.  Not exactly what you expect to see in a liquor store but they have it!

Dak Bokkeum with Spinach

With all of this talk about gochujang, you probably want to know if it's worth it, right?  Man, oh man is it worth it.  This is one of my favorite recipes I've made in a long time and the whole time I was eating it I kept remarking to the Monkey Scientist how much I enjoyed it.  If you cook Asian food frequently, you might even have everything you need at home already so you can make this tonight.  You make the whole dish in basically one pot (and your rice cooker) which makes for fairly easy clean up.  The dish doesn't even need to be babysat while it cooks - you just throw it in and walk away.  That's my favorite kind of meal to make!  And the taste is out of this world! It's got a hefty spice level (the Monkey Scientist barely added any sriracha on top) and is packed with flavor.  It's super filling and healthy (just make sure you trim the fat off of the chicken thighs) as well!  It's a total win-win-win dinner - the two of us couldn't praise it enough.

Dak Bokkeum with Spinach

Dak Bokkeum with Spinach
Korean Stewed Chicken with Spinach
from Cooking Light

Ingredients
1/3 cup gochujang (Korean chile sauce)
1/4 cup (1/2-inch) slices green onion bottoms
2 1/2 tablespoons lower-sodium soy sauce
2 tablespoons minced fresh garlic
2 tablespoons minced peeled ginger
2 tablespoons dark sesame oil
1 tablespoon brown sugar
3/4 teaspoon crushed red pepper
2 pounds skinless, boneless chicken thighs, cut into 1/2-inch strips
1 1/2 cups uncooked short-grain white rice (sushi rice)
1 1/2 cups water
1/3 cup water
3/4 cup (1 1/2-inch) slices green onion tops
1 (5-ounce) bag fresh baby spinach
1 tablespoon toasted sesame seeds

Instructions
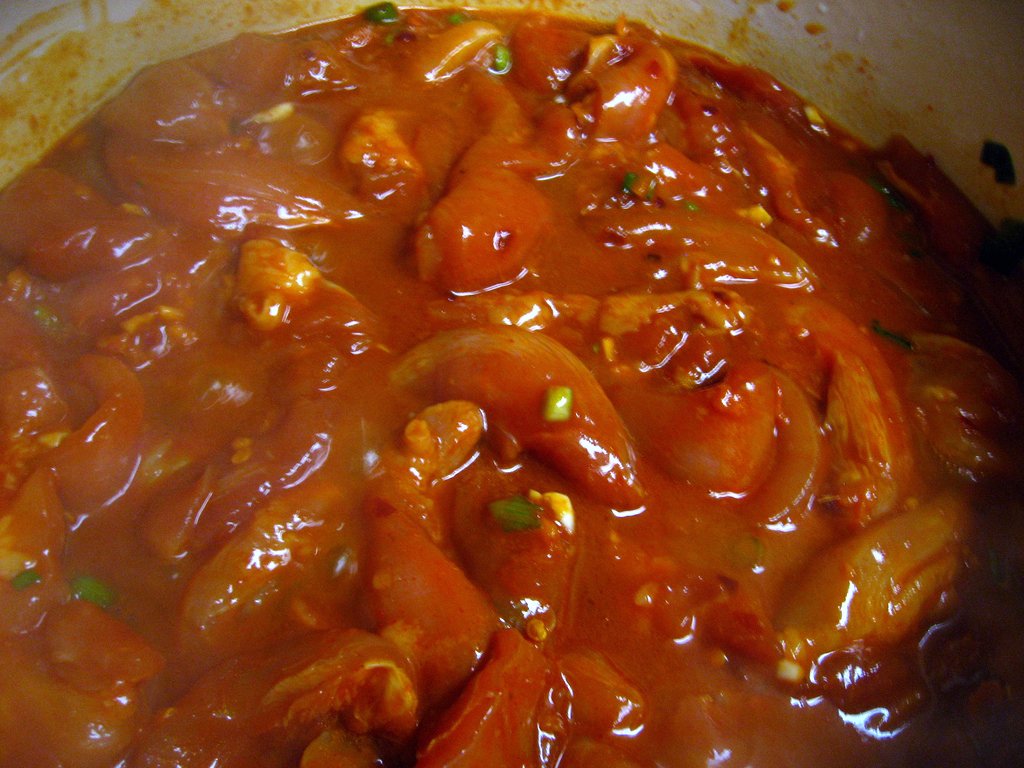
1. In a large bowl, combine gochujang, green onion bottoms, soy sauce, garlic, ginger, sesame oil, brown sugar, and crushed red pepper. Add in strips of chicken thighs, cover, and put in the refrigerator to marinate for at least 30 minutes.
2. Place the rice in a mesh strainer. Fill a large bowl with cold water and place the mesh strainer in the water so that the water covers the rice. Stir the rice gently and then remove from water. The water will be milky. Drain water and then repeat 2-3 times until the water comes out nearly clear.
3. Cook the rice with 1 1/2 cups water in a rice cooker. If you don't have a rice cooker, place water and rice in a pot, and bring to a boil. Reduce to a simmer and cover and allow to cook for 20 minutes. Remove from heat and let stand 20 minutes. (I actually added a pinch of sea salt to my rice cooker as well.)
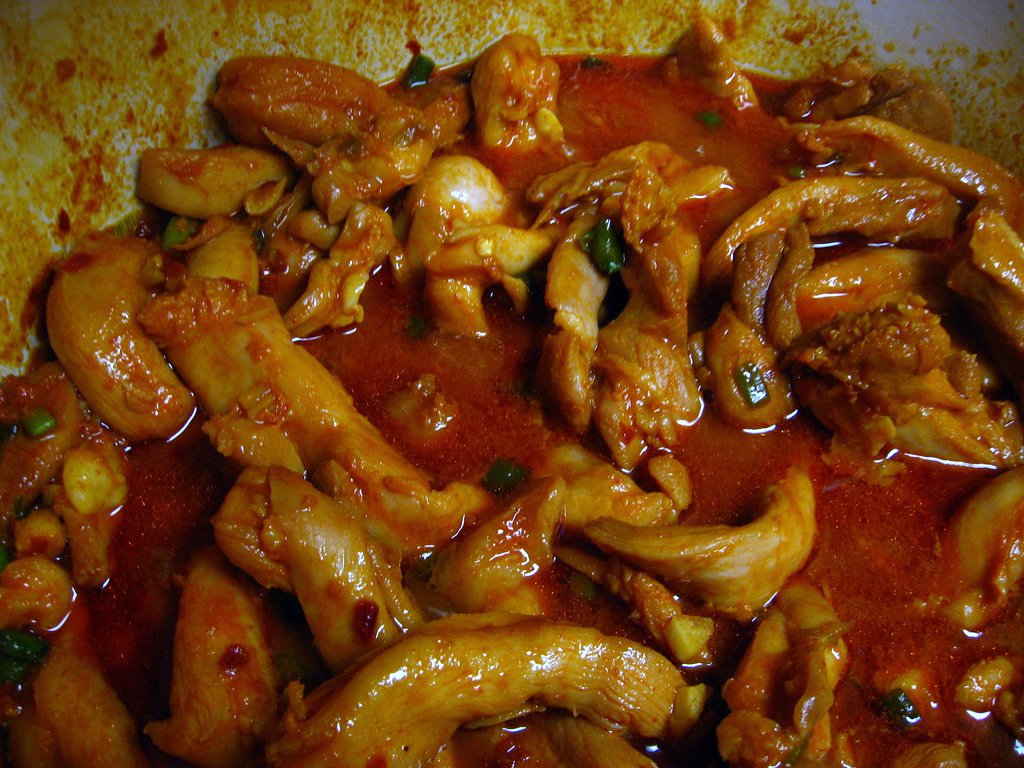
4. While the rice is cooking, add 1/3 cup water to a dutch oven and bring to a boil. Add the chicken mixture and bring to a simmer. Reduce heat, cover, and allow to simmer for 20 minutes.
5. Uncover and allow to simmer for an additional 10 minutes or until the mixture reduces, stirring occasionally.
6. Remove from heat. Stir in green onion tops and spinach and allow the spinach to wilt. Sprinkle with sesame seeds and serve over the rice.

Thursday, March 8, 2012

Thai Beef Tacos

Thai Beef Tacos

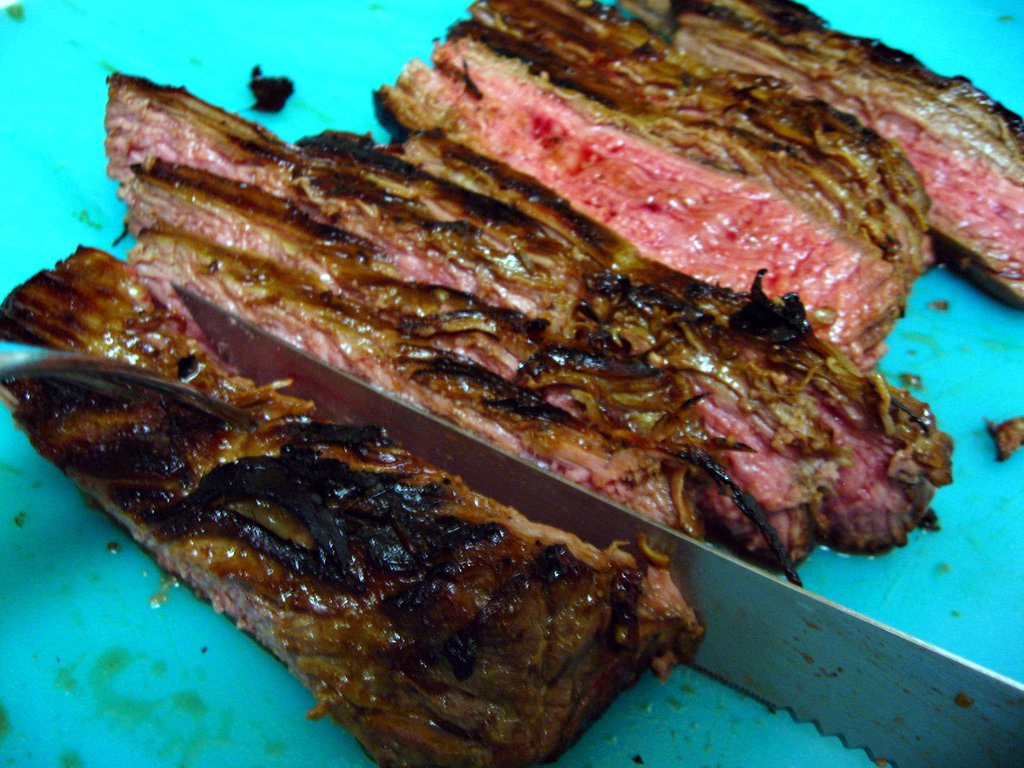
You might have noticed, we aren't big red meat eaters.  I don't have anything in particular against beef, and I'm pretty sure the Monkey Scientist grew up eating loads of steaks (he is from Chicago), but it has some drawbacks.  It really isn't that good for you.  And more importantly, it's expensive.  So when we do have beef, it's a special treat and we usually buy pretty cheap cuts.

Thai Beef Tacos

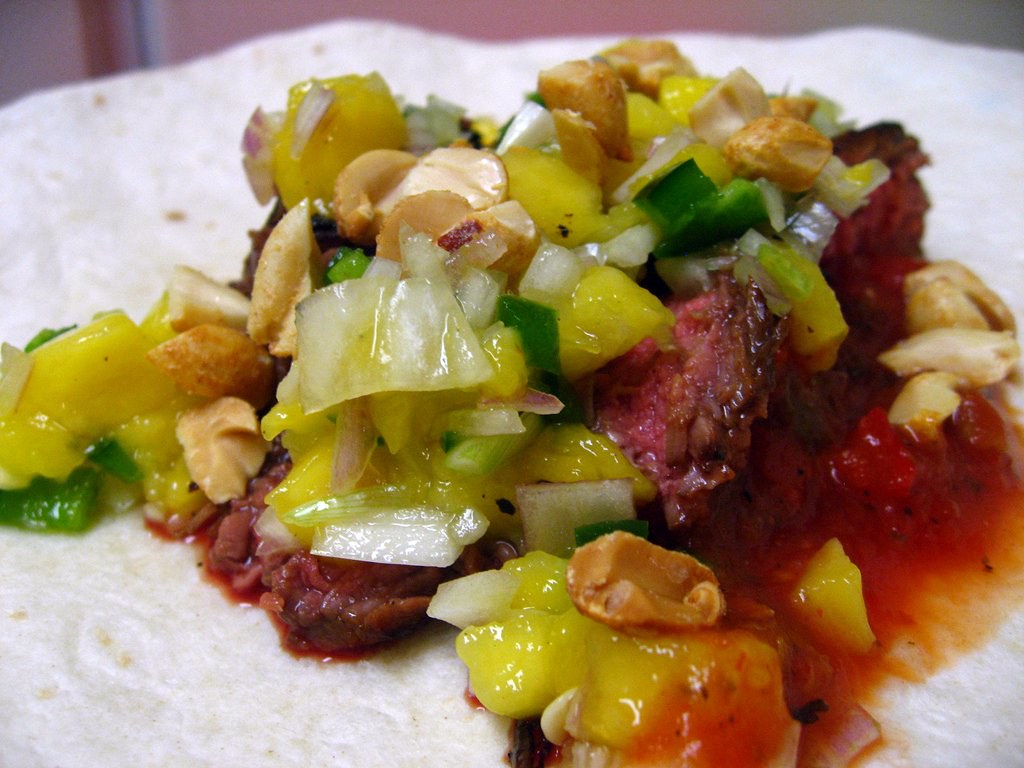
The key to enjoying these cheaper cuts is not to eat them in a steak-and-potatoes kind of way.  While the Monkey Scientist does broil a mean teriyaki flank steak, tacos might just be the best way to eat flank steak. Tacos are such a simple recipe to throw together on a weeknight, and I loved the Asian twist in this recipe.  Definitely made for a unique dinner!

Thai Beef Tacos

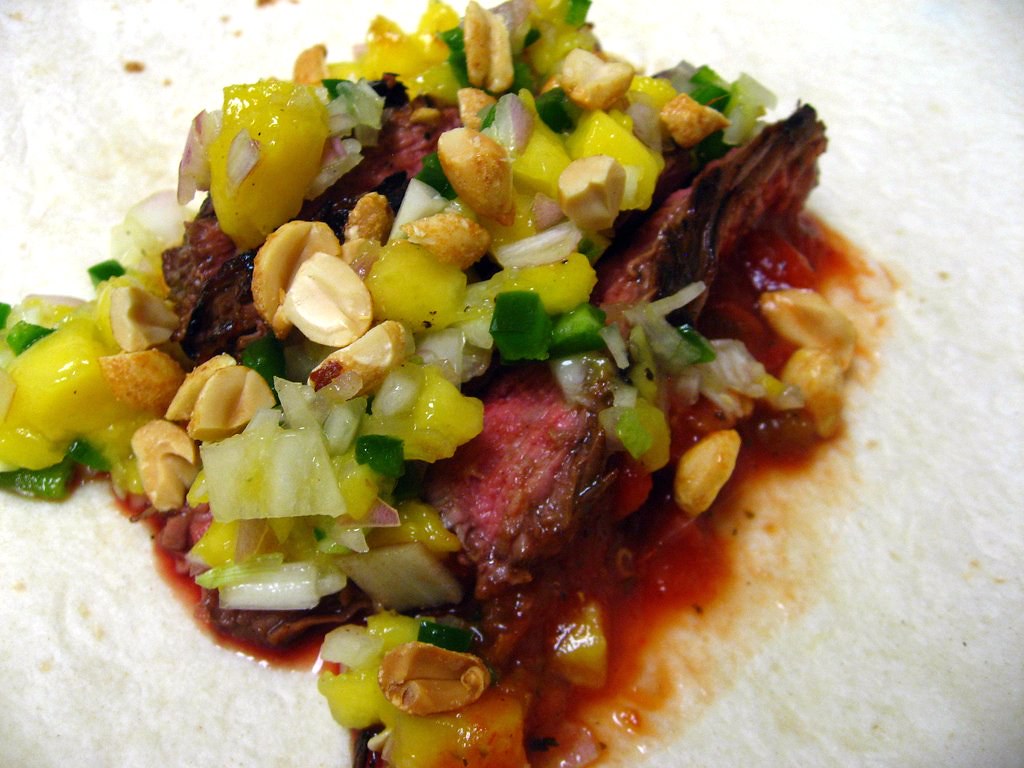
The Monkey Scientist did a lot of work to help me put this recipe together.  He made the mango salsa!  Since the mango salsa on our pork tenderloin a few weeks ago was too spicy, we left the jalapeno seeds out  this time around.  I liked it so much better!  The shallots were much milder than onions and the mango brought out the sweetness of the coconut milk in the marinade.  It was a great addition to the tacos.

Thai Beef Tacos

These were some of the best tacos I've ever made.  The Monkey Scientist said this was one of his favorite dinners - I think he was happy to have some red meat, plus he's a big Chipotle lover.  I think marinading for longer than 2 hours (I should learn to prep ahead of time a little better) would have been a good idea, but it was still great.  I particularly liked the peanuts on top.  They brought out the Asian flavors from the marinade while adding a nice crunch.  This is an easy weeknight meal that you will really enjoy!

Thai Beef Tacos

Thai Beef Tacos
every so slighty adapted from How Sweet It Is

Ingredients
1-1 1/2 pounds flank steak
1 teaspoon salt
1 teaspoon pepper
3/4 cup light (canned) coconut milk
4 garlic cloves, minced or pressed
2 teaspoons freshly grated ginger
2 tablespoons brown sugar
1/3 cup sweet chili sauce
1/2 mango, chopped
1 shallot, diced
1 jalapeno, diced (seeds removed)
a sprinkle each of sugar, salt & pepper
1 teaspoon vegetable oil
8-10 flour tortillas (I used burrito sized, but you could go smaller)
1/2 cup sweet chili sauce or hot salsa
1/4 cup peanuts, chopped

Instructions
1. Sprinkle flank steak with salt and pepper. Combine coconut milk, chili sauce, garlic, ginger, and sugar in a bowl and whisk.
2. Add flank steak to a ziplock bag or a shallow baking dish and pour marinade overtop. Refrigerate and let sit for 6-24 hours. (I only waited about 2 hours because I don't plan ahead well)
3. When ready to prepare, remove steak from fridge and let sit for 20-30 minutes. (Yep, I skipped this)
4. In a bowl, combine mango, shallot, jalapeno, salt, sugar and pepper, mix thoroughly, then set aside.
5. Heat a large oven-safe skillet (like cast iron) over high heat. At the same time, preheat the broiler in your oven. (You can also grill the steak if you wish.)
6. Using a pastry brush, brush oil onto the skillet so there is only a very thin layer. (CAREFUL! The oil may jump when you start to brush it!)
7. Remove steak from marinade with kitchen tongs, placing in the skillet. Sear on both sides for 1-2 minutes per side.
8. Remove skillet and place is the oven directly under the broiler. Cook for 3 minutes, then flip and cook for 3 minutes more. (Less time if you like it rarer, more if you like it more well done.)
9. Remove skillet from over, and place steak on a cutting board to rest for 15-20 minutes.
10. At this time, assemble your tortillas (warm them if desired), salsa, extra chili sauce for drizzling and peanuts. After the steak has rested, slice it into thin strips. Assemble tacos as desired and eat!

Tuesday, February 7, 2012

Sushi Making Class

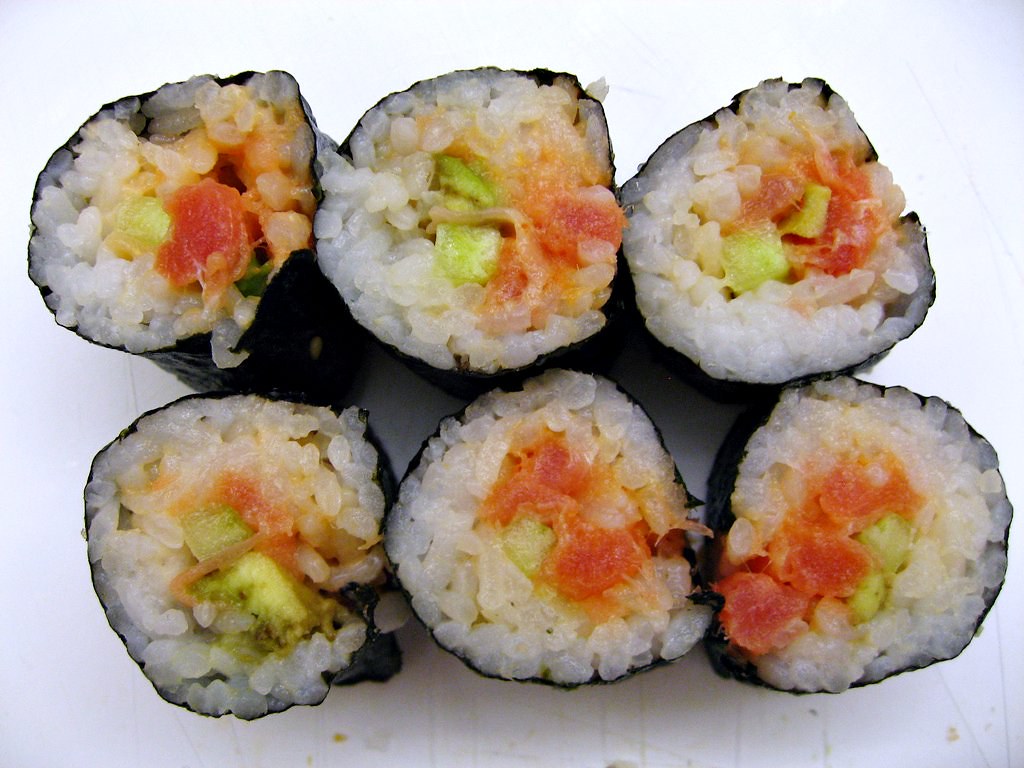
Sushi Class - my spicy tuna roll

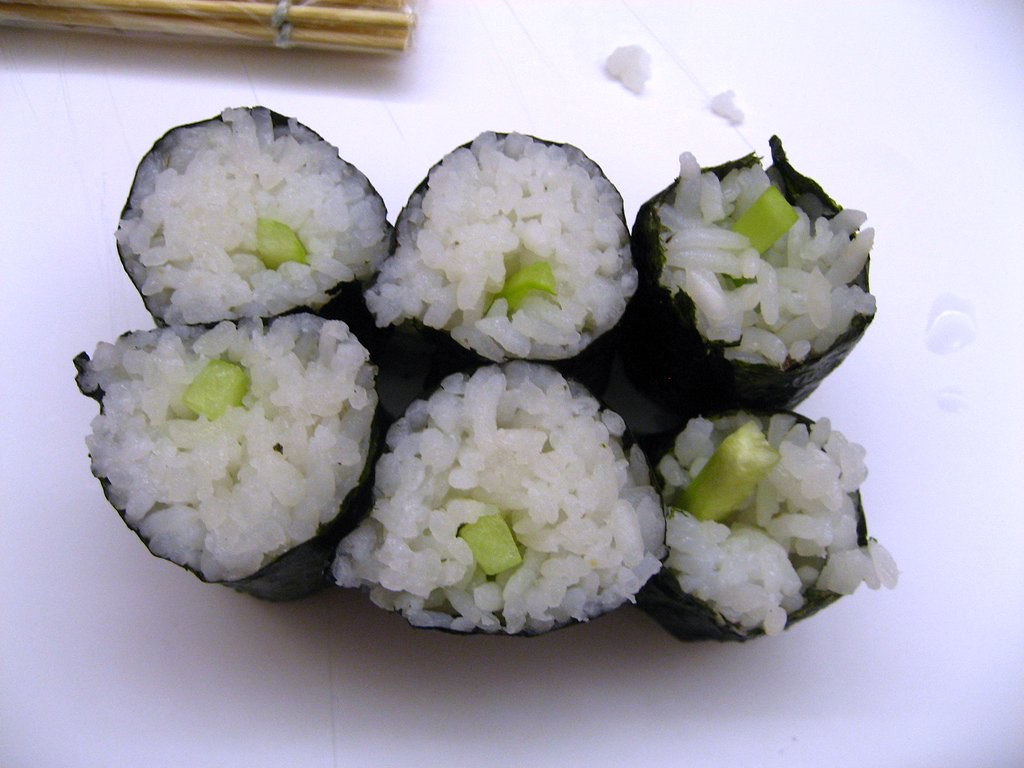
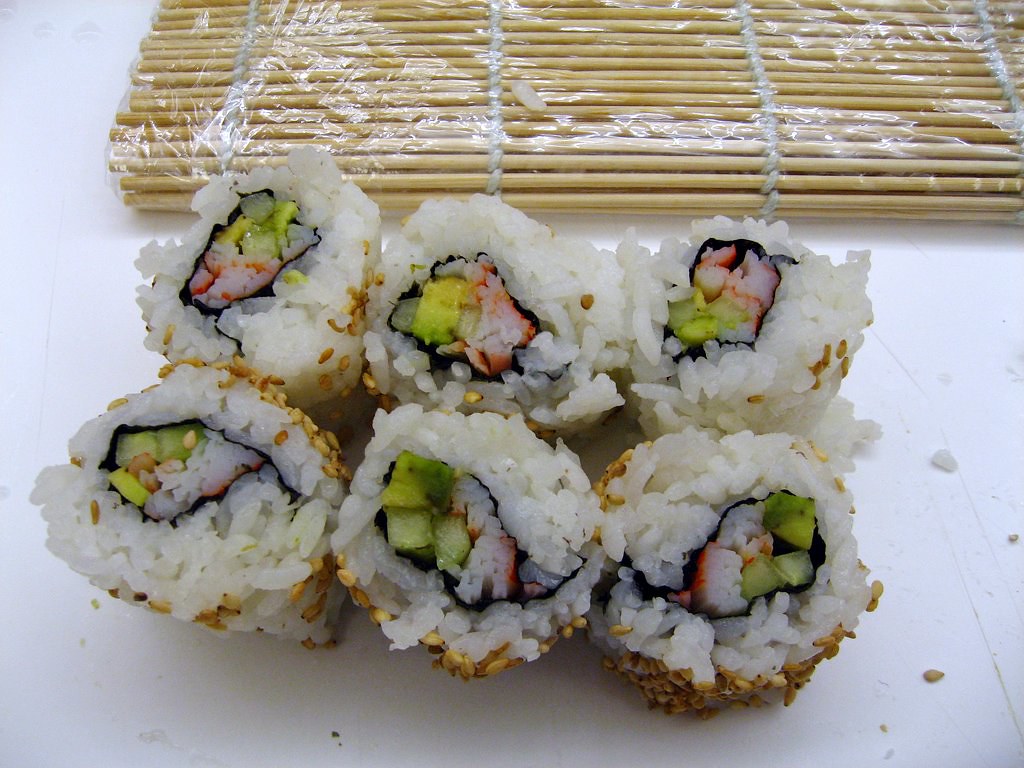
Last week, my camp friend, her younger sister and I went to an i wish... lessons' sushi making class at the Hill Center in Eastern Market.  We had bought the class on Living Social months ago, so I had been looking forward to this for a long time!  The class taught basic sushi making technique including how to make 3 rolls - cucumber, California, and spicy tuna.  We made a regular Maki roll as well as an "inside out" Maki roll.

Sushi ClassSushi Class - cucumber rollSushi Class - cucumber roll

Here is what I learned:

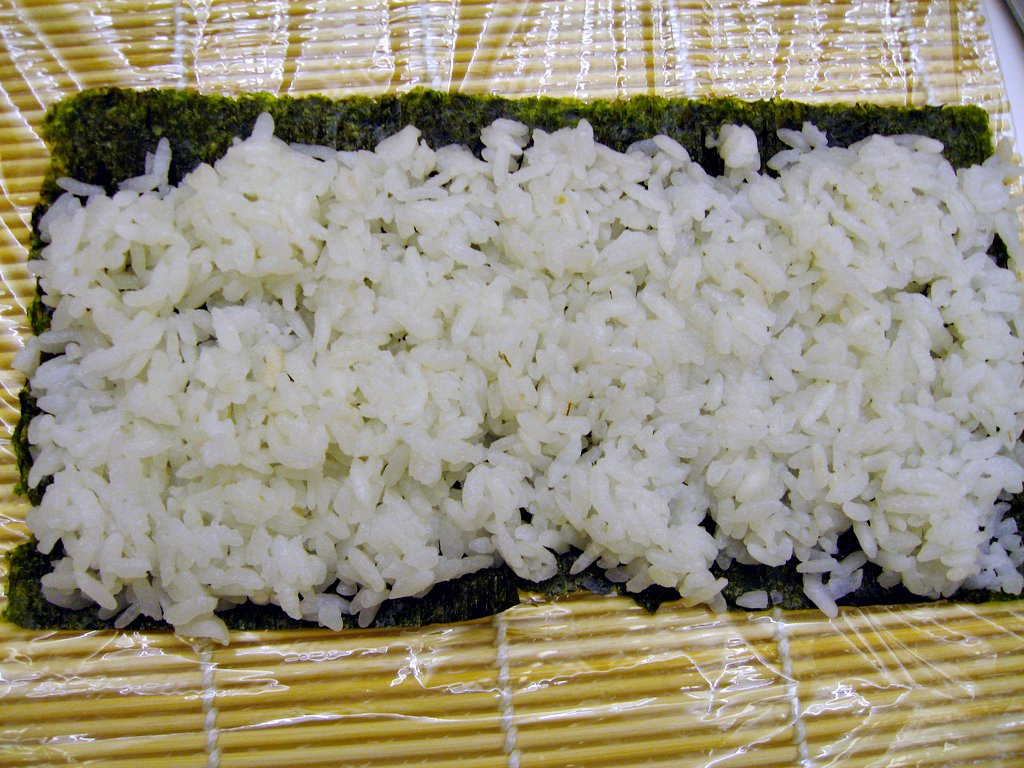
When you spread the sushi on the rice, make it a THIN layer, without crushing the grains.  Then you won't overfill your sushi.
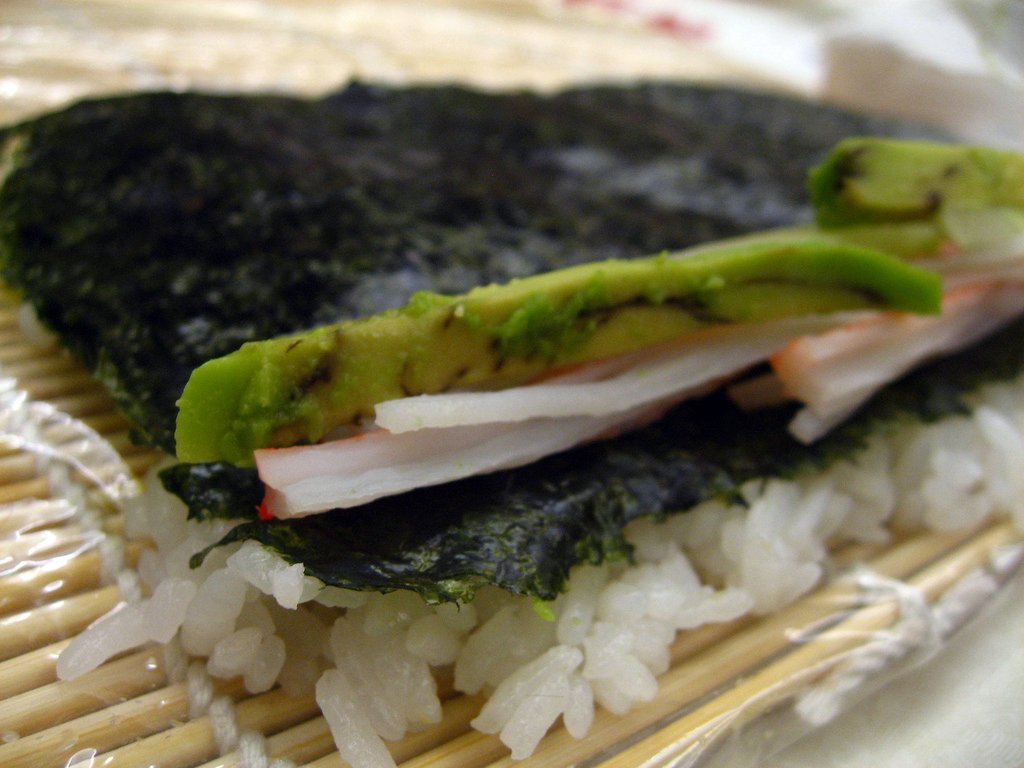
Stack your filling only at the bottom of the roll, then roll up around it.
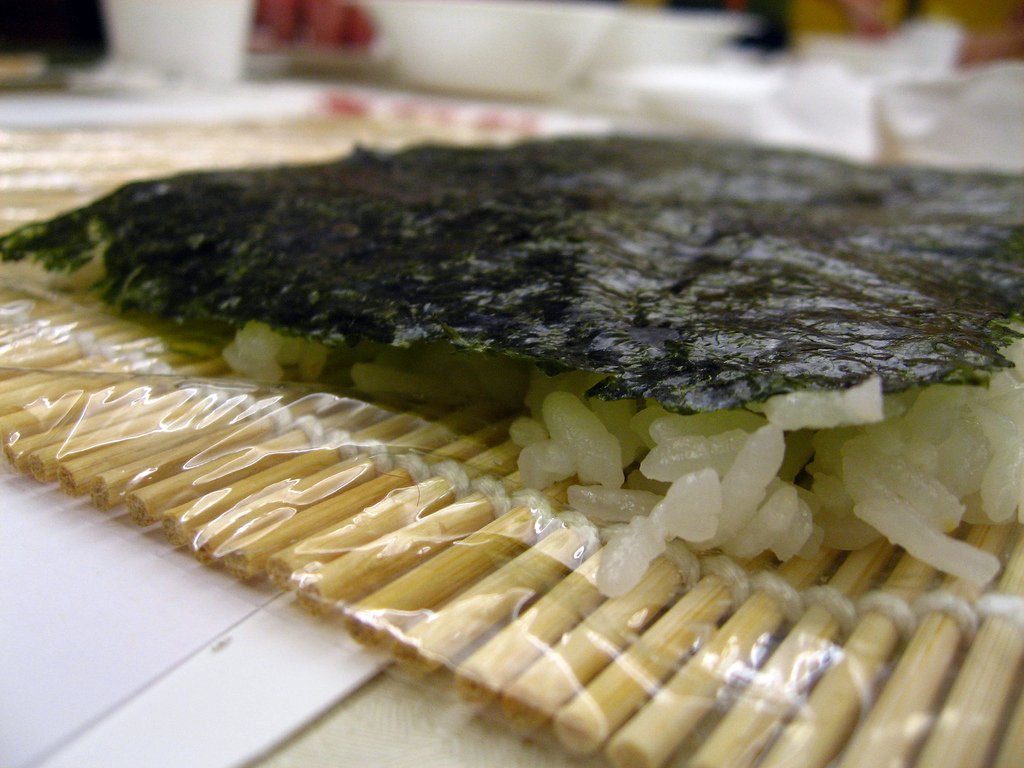
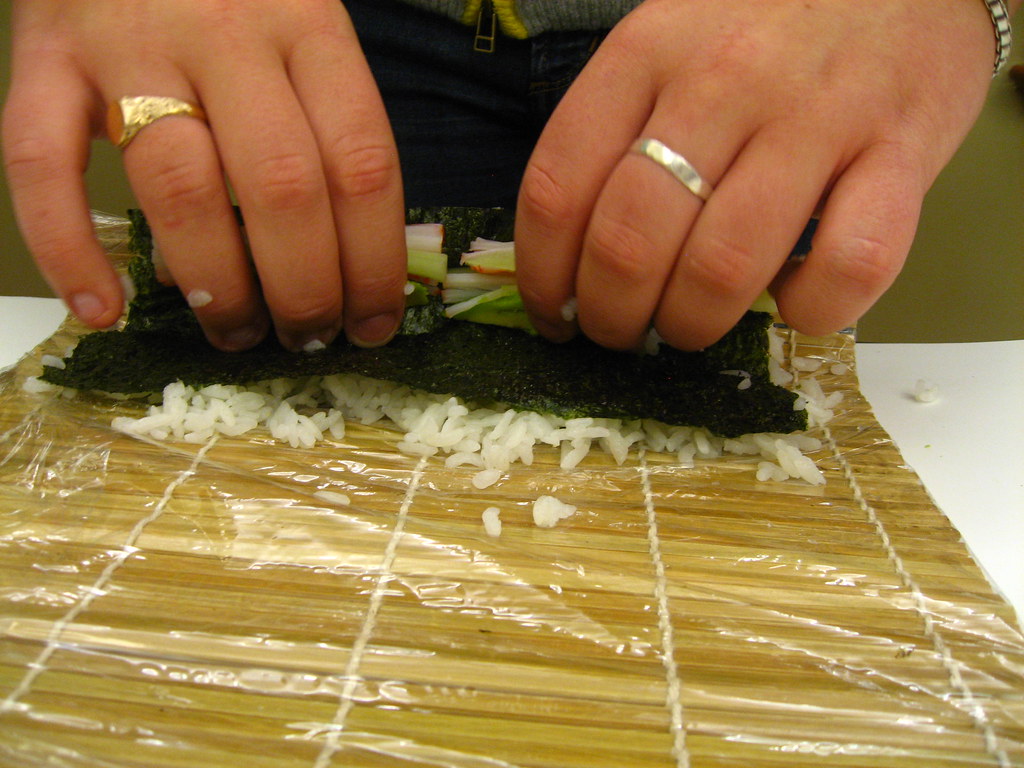
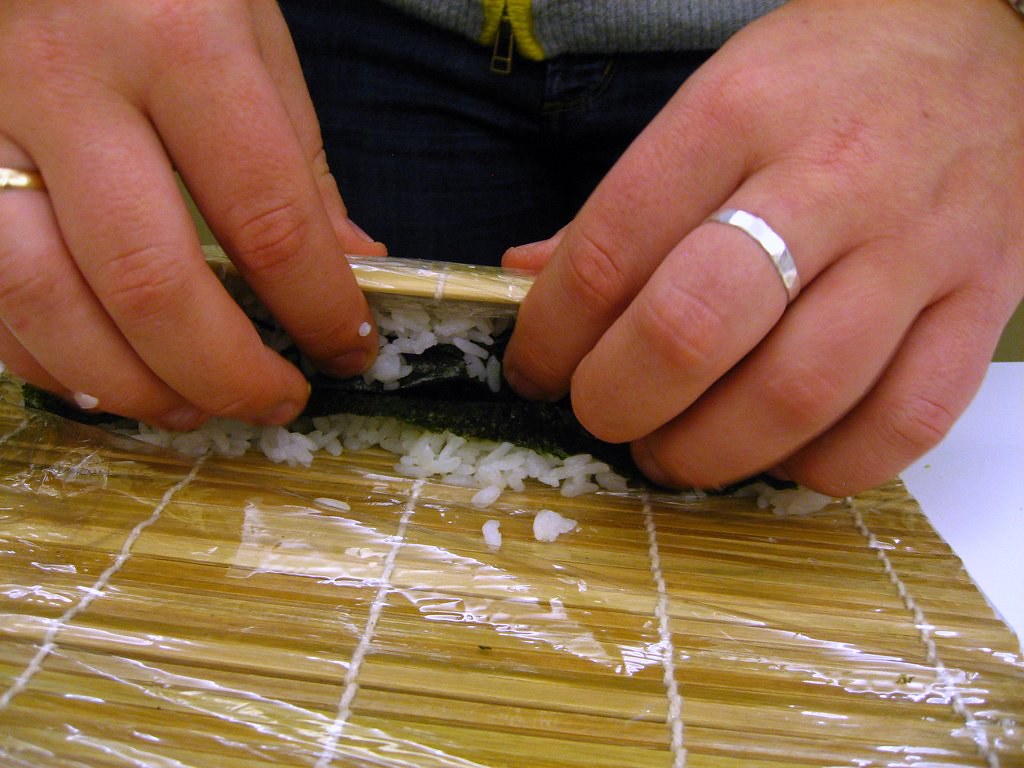
Hold the back of the mat with your thumbs while holding the filling with your fingers until you've gotten over the first roll.  Then pull back the mat while you roll, so it doesn't get wrapped in your maki.

Sushi making takes practice! It's hard to figure out what the right amount of rice and filling is so that you don't over or underfill your roll.

Sushi grade tuna isn't regulated by the FDA like meat.  It means that it was frozen at -31°F to prevent parasites from growing.  It can be purchased at Whole Foods or other high-end markets, and buying it frozen is probably better than "fresh".

Sushi Class - inside out rollSushi Class - california rollSushi ClassSushi ClassSushi ClassSushi Class - ella

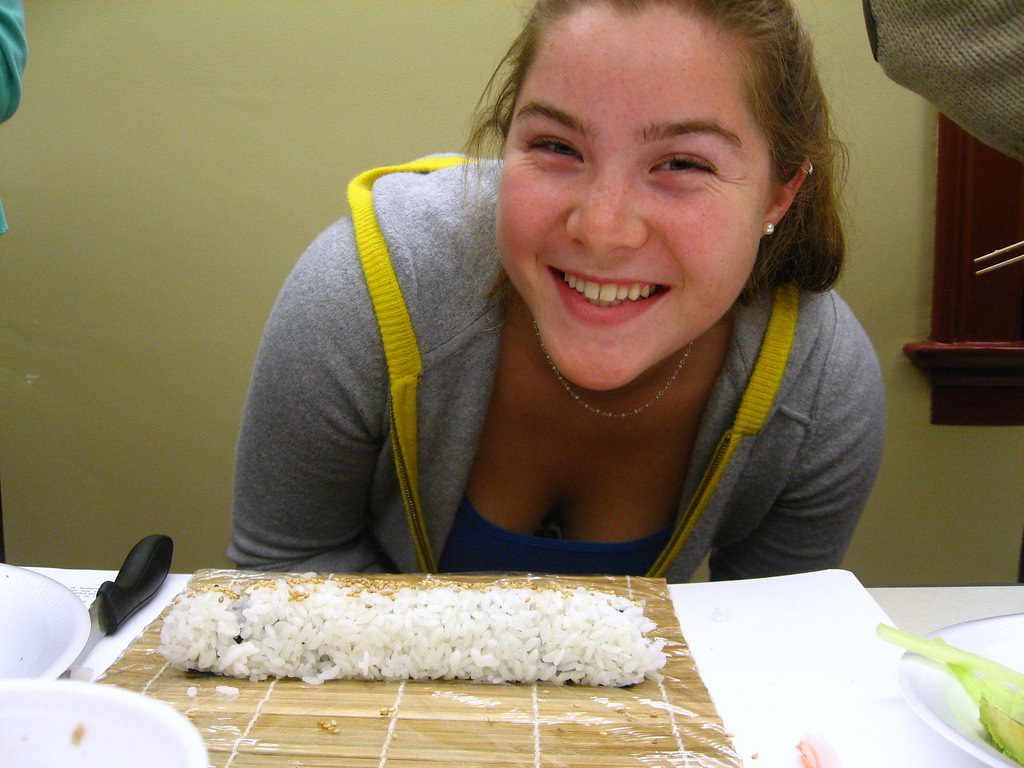
We were all quite proud of the skills we developed.  Some of our rolls came out better than others (my California and little sister's Spicy Tuna rolls were a bit of a flop) but I think with practice we could get pretty good at this!  No matter how floppy they looked, they were all super delicious.  Now that I have the basic idea, I want to go to H Mart for the mat and rice and then make some more "American" sushi.  I'm thinking about BBQ pork, mango and kiwi, maybe even chorizo sushi!  So many possibilities!!

If you want to learn how to make sushi, you should check out an i wish... lessons class.  They have classes in DC, Chicago, Boston, and Detroit (which covers about 90% of my friends and likely readers).  It's a bit expensive, but watch for a Living Social or Groupon and it could be as affordable as going out to eat!

Sushi Class - MJ's roll

Sushi Rice
from i wish... lessons


Ingredients
3 c sushi rice, uncooked (you can buy this at an Asian market or most grocery stores)
1/2 c rice vinegar
3 tbsp sugar (or more to taste)
1/2 tsp salt
note: instead of the rice vinegar, sugar, and salt, you can alternatively buy sushi vinegar at an Asian market

Instructions
1. Wash rice - rinse in cold water repeatedly until the water is nearly clear (it will be very cloudy the first few times).
2. Cook rice according to package instructions (preferably in a rice cooker)
3. Make rice vinegar mixture by mixing salt and sugar into the rice vinegar until fully dissolved.  Add more sugar until you've reached your preferred balance of sweet and tart.
4. Place rice in a large bowl or bin for mixing and slowly pour rice vinegar as evenly as possible over rice surface.
5. Mix rice by tossing and slicing with rice paddle (or spatula).
6. Allow to cool for 20 minutes under moist rags before use.

Sushi Class - cucumber roll

Cucumber Roll
from i wish... lessons

Ingredients
3 cups prepared sushi rice (see above)
3 sheets nori (dried seaweed)
1 cucumber (sliced into strips lengthwise with a julienne cut)

Instructions
1. Prep nori by cutting sheets in half.
2. Place nori half-sheet at the very bottom of the rolling mat and spread a thin layer of sushi rice on top without pressing too hard on the grains.  Only cover 3/4 of the nori, leaving a clean strip along top (side furthest from you).
3. Line a couple of slices of cucumber alone the bottom edge of the nori (only go up about 1/2 inch).
4. Start rolling from the edge closest to you, using the bamboo mat to press the roll together as you go.  Once you have rolled it all the way, wrap the mat around it and give it a squeeze to give it a nice round shape.
5. Move to a cutting board and cut into 6-8 evenly sized pieces (don't cut on the mat!).

Sushi Class - mj's California roll

California Roll
from i wish... lessons

Ingredients
3 cups prepared sushi rice (see above)
3 sheets nori (dried seaweed)
1 tbsp white sesame seeds
3 crabsticks
1/4 cucumber (sliced into strips lengthwise with a julienne cut)
1/4 avocado (sliced into strip lengthwise with a julienne cut)

Instructions
1. Prep nori by cutting sheets in half.
2. Spread the sushi rice in a thin layer directly on the mat in a square slightly larger than the nori, then place the nori on top.
3. Place cucumber and avocado stacked along the bottom end of the nori (only go up about 1/2 inch). Split the crabstick in half and add on top of the cucumber and avocado. (It will peel apart like string cheese)
4. Start rolling from the edge closest to you using the bamboo mat to press the roll together as you go.  Once you have rolled it all the way, wrap the mat around it and give it a squeeze to give it a nice round shape.
5. Release it from the mat, sprinkle some sesame seeds on your cutting board, and roll the whole roll through the seeds to coat evenly.
6. Move to a cutting board and cut into 6-8 evenly sized pieces (don't cut on the mat!).

Sushi Class - my spicy tuna roll


Spicy Tuna Roll
from i wish... lessons


Ingredients
3 cups prepared sushi rice (see above)
3 sheets nori (dried seaweed)
1/2 lb raw sushi-grade tuna
1 tbsp mayo
1 tsp sriracha or other hot sauce
1/4 cucumber (sliced into strips lengthwise with a julienne cut), optional
1/4 avocado (sliced into strip lengthwise with a julienne cut), optional

Instructions
1. Mix mayo and sriracha in a bowl.  Add more sriracha until reaching your preferred spiciness level.  Chop tuna and mix with spicy mayo.
2. Prep nori by cutting sheets in half.
3. Place nori half-sheet at the very bottom of the rolling mat and spread a thin layer of sushi rice on top without pressing too hard on the grains.  Only cover 3/4 of the nori, leaving a clean strip along top (side furthest from you).
4. Place spicy tuna mixture, cucumber, and avocado (if using) along the bottom edge of the nori, stacked (only go up about 1/2 inch).
5. Start rolling from the edge closest to you, using the bamboo mat to press the roll together as you go.  Once you have rolled it all the way, wrap the mat around it and give it a squeeze to give it a nice round shape.
6. Move to a cutting board and cut into 6-8 evenly sized pieces (don't cut on the mat!).

Note: this is not a paid post.  i wish... lessons doesn't know who I am or that I'm posting.  I just had a great time!

Sunday, January 29, 2012

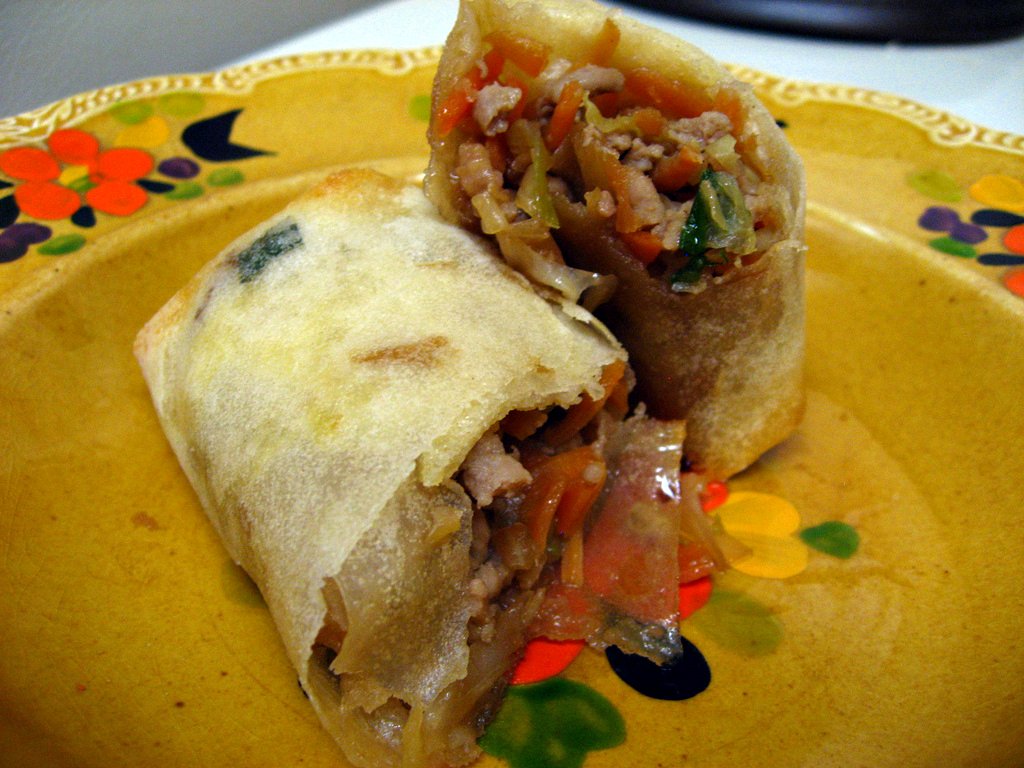
Baked Pork Egg Rolls

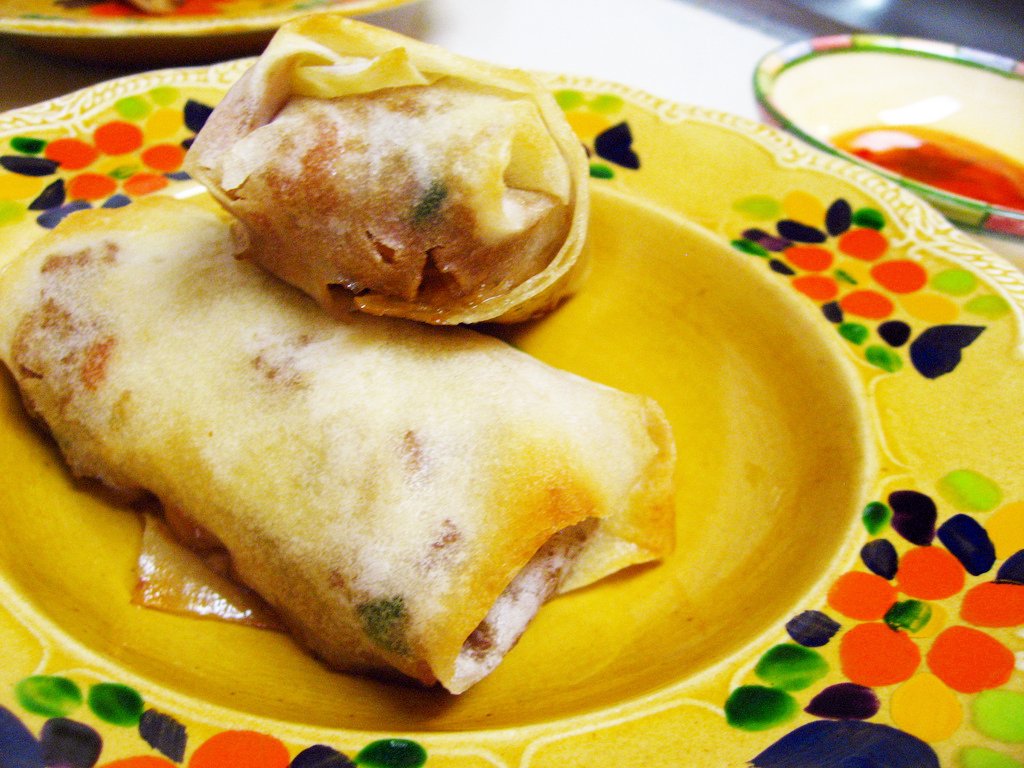
Baked Pork Egg Rolls

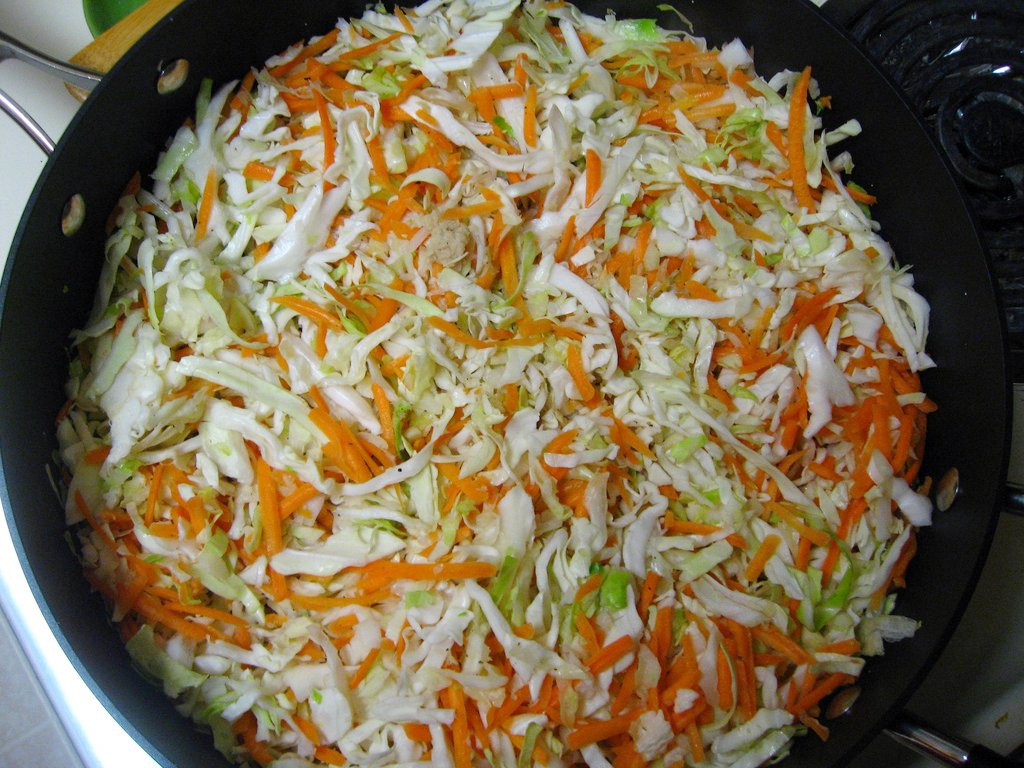
On our last trip to H-Mart, I picked up a package of egg roll wrappers.  I wasn't quite sure what I wanted to do with them, but after the Chinese New Year, I thought it may be fun to try a more traditional egg roll recipe - filled with pork and cabbage.

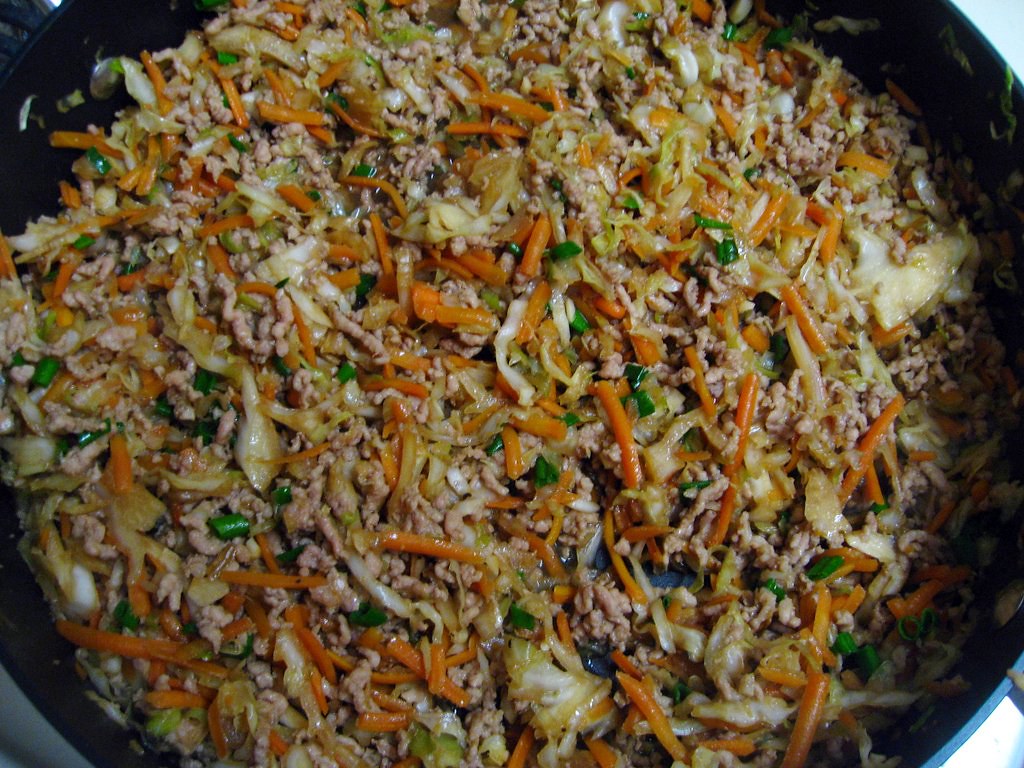
Cabbage and CarrotsEgg Roll Filling

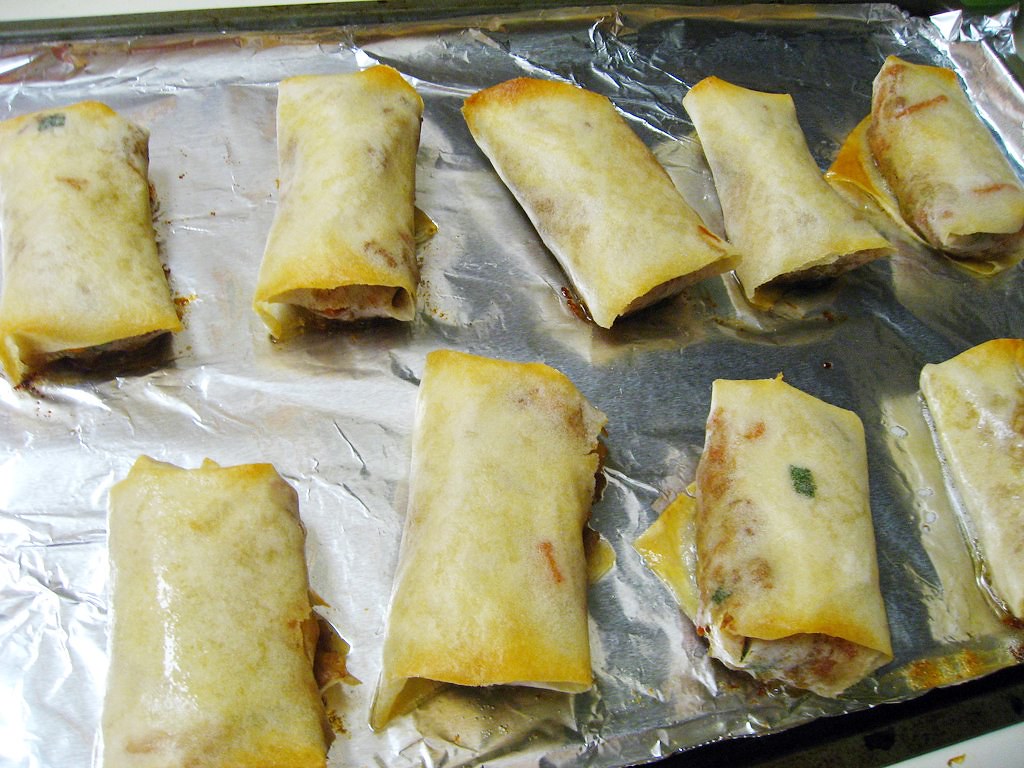
It turns out, making egg rolls is HARD!  I have instructions below on how to roll them, but it really isn't that simple.  I kept ripping the wrappers (maybe I needed to spread the filling out more?) and getting very frustrated.  I hate to admit it, but this might be my only egg roll adventure in the foreseeable future.  It's just so easy to buy them!

Egg RollsEgg Rolls

The taste, though, was really outstanding.  I was shocked how much the filling tasted like egg roll filling at a Chinese restaurant!  It was sweet and salty, just a little bit spicy, and I enjoyed the cabbage in it. I actually really liked eating the filling on its own (or over some white rice) just as much as in the egg rolls, so I may do that in the future as a quick throw together meal.  If you try this, let me know how it goes for you.  Do you have any tricks for rolling egg rolls?

Egg Rolls

Baked Pork Egg Rolls
from Ezra Pound Cake

Ingredients
1/4 c soy sauce
2 tbsp rice vinegar
1 tbsp light brown sugar
vegetable oil, for brushing on rolls
4 c cabbage coleslaw mix
1/2 c shredded carrots (I bought them pre-shredded)
4 garlic cloves, minched
1 tbsp fresh ginger, grated
sea salt and freshly ground pepper
1 lb ground pork
6 scallions, thinly sliced
16 egg roll wrappers (6-7" square)
1 large egg, lightly beaten
sweet-and-sour sauce or sweet red chili sauce for dipping

Instructions
1. In a small bowl, combine soy sauce, vinegar, and sugar. Set aside.
2. In a large skillet, heat 1 tablespoon oil over medium-high. Add coleslaw mix, carrots (if using), garlic, and ginger; season with salt and pepper. Cook, tossing, until vegetables are tender, 3 to 5 minutes.
3. Raise heat to high; add pork and soy mixture. Cook, tossing, until pork is no longer pink and liquid has evaporated, 5 to 7 minutes. Mix in scallions. Transfer mixture to a plate to cool.
4. Lay wrappers flat on a work surface, and assemble egg rolls. (See “how to” below.)
5. Preheat oven to 400 degrees F. Lightly oil a rimmed baking sheet; place egg rolls on sheet and brush with cup oil. Bake until golden, about 10 minutes. Serve with sweet-and-sour sauce and Chinese hot mustard.
Note: If baking from frozen, bake about 15 minutes.


How to Roll an Egg Roll
How roll and egg roll - step 1
How to roll and egg roll step 3
How to roll and egg roll step 4
Egg roll - final


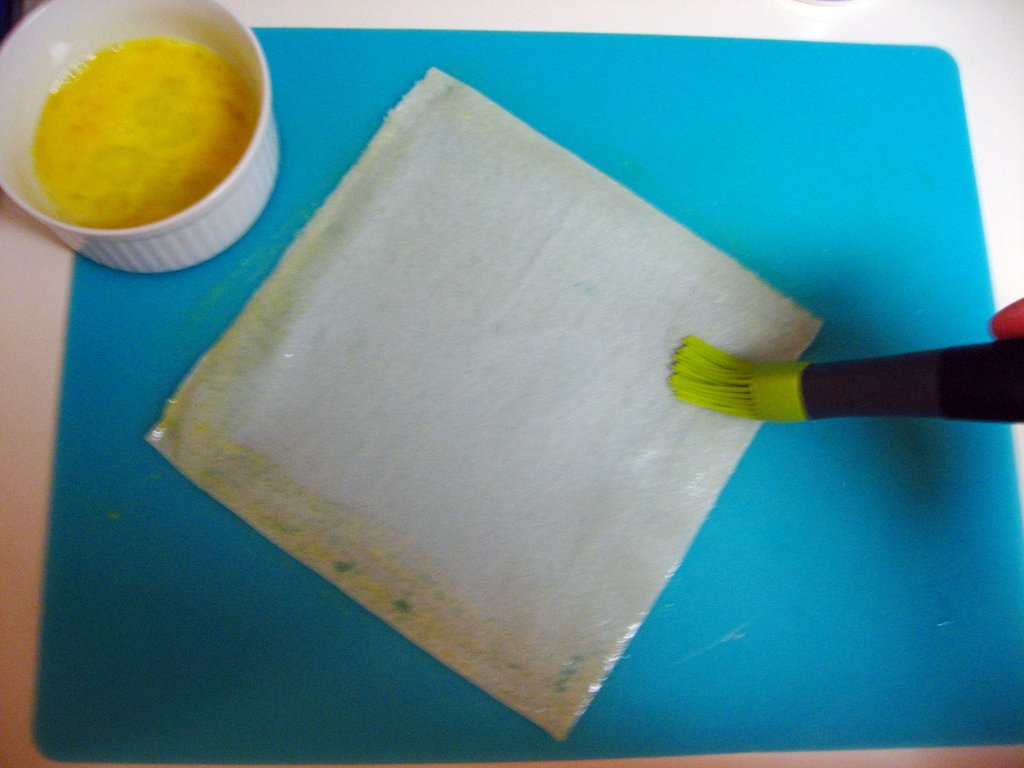
1. Place an egg-roll wrapper flat with one corner facing you.
2. Using a pastry brush, brush all four sides of the wrapper with egg.
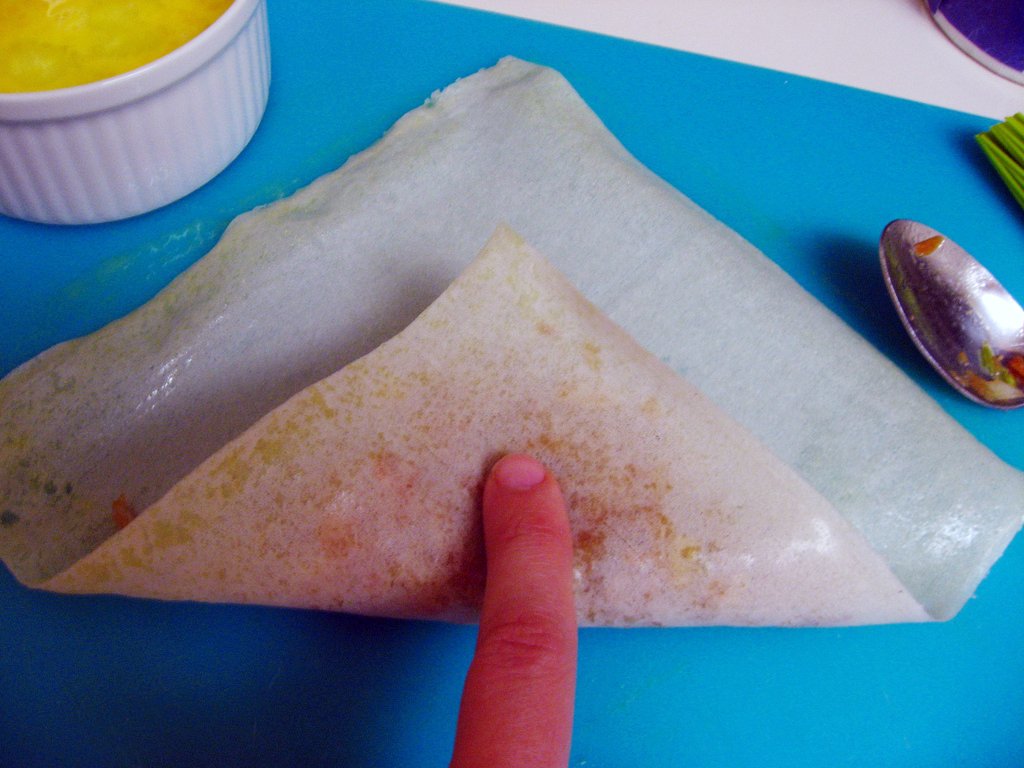
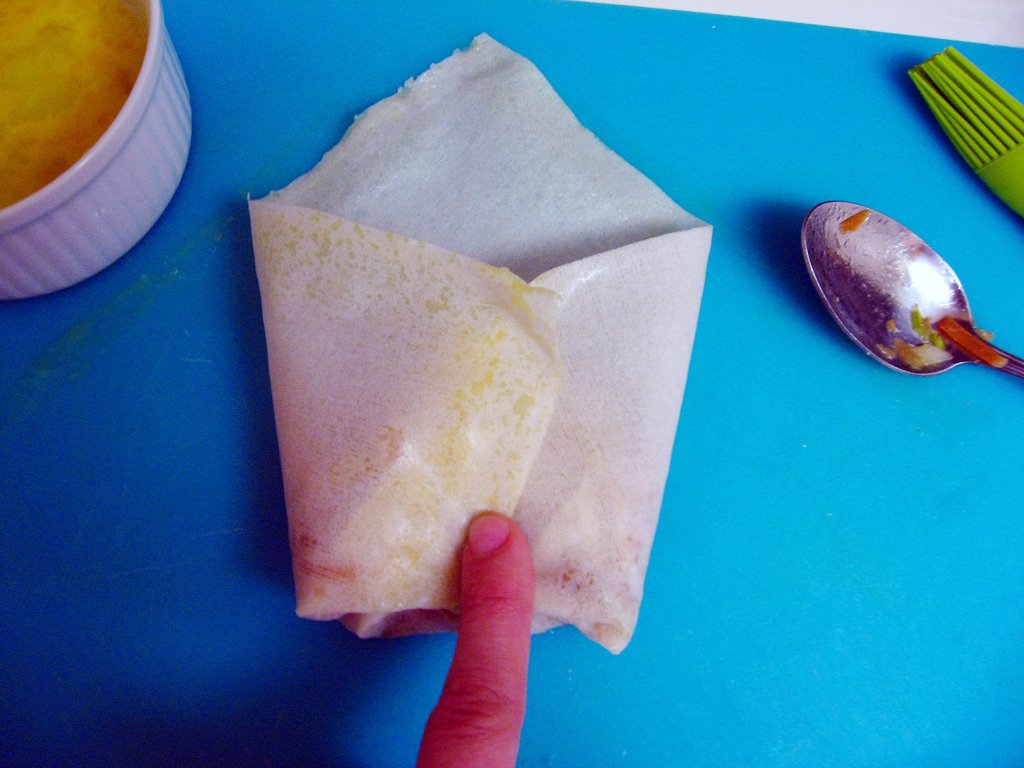
3. Spoon 1/3 cup pork mixture near the corner closest to you. Fold that corner over the filling, and fold both side corners toward center of wrapper. (It should look like an open envelope.)
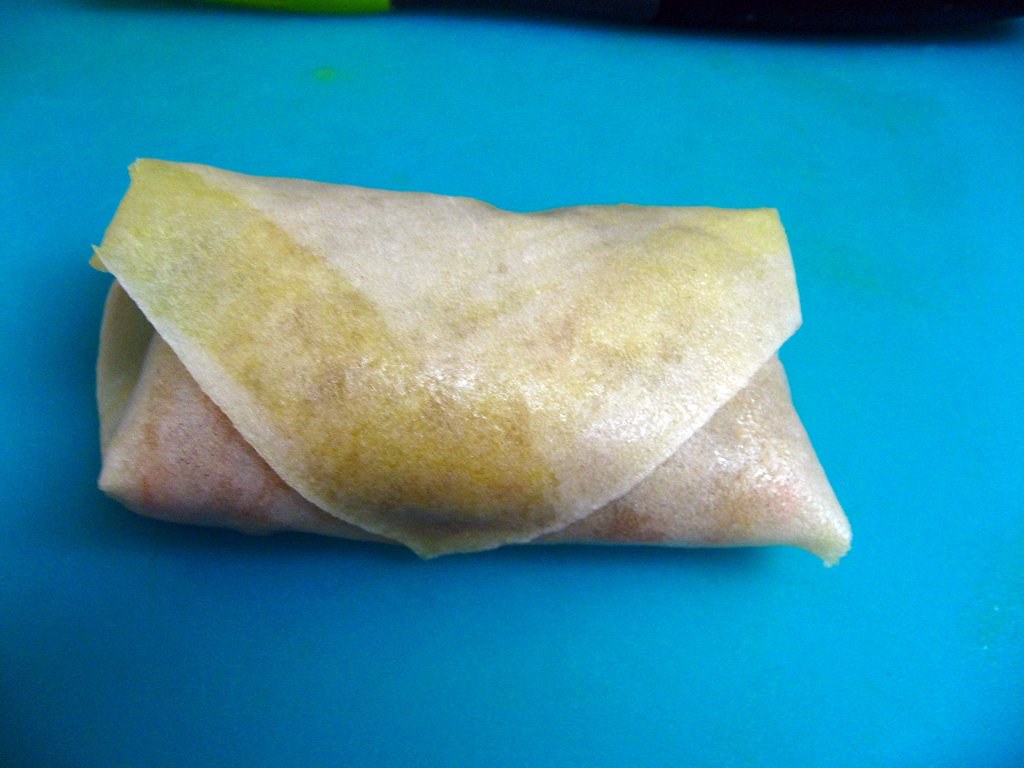
4. Tightly roll up filled pocket toward the far corner to close wrapper. Gently press down to seal the edges.
5. Repeat the process until you run out of filling or wrappers. Feel free to assemble up to 4 egg rolls at a time when you feel comfortable with the process.

Monday, January 23, 2012

Sweet and Fiery Pork Tenderloin with Mango Salsa

Sweet and Fiery Pork Tenderloin with Mango Salsa

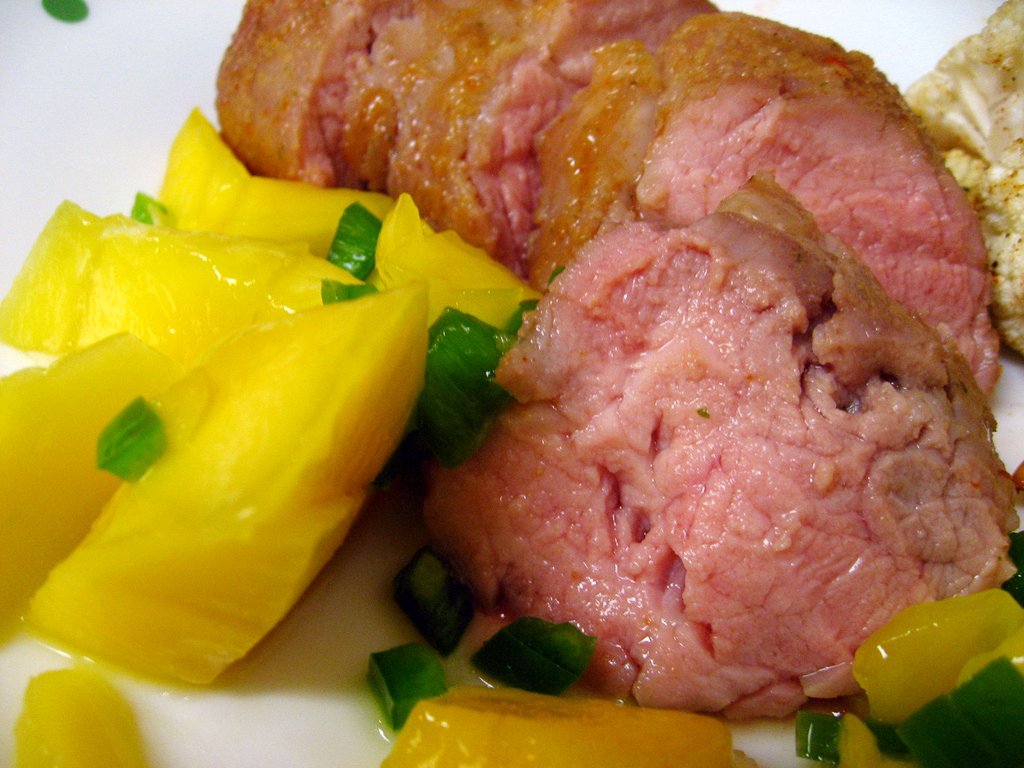
The Chinese New Year is today!  The blogosphere has been blowing up with lots of fun recipes for the Chinese New Year, so I thought it might be fun to bring you one.  I chose this recipe because it was healthy (I love Skinny Taste!), can be eaten all year long, and was a little bit outside of my comfort zone.

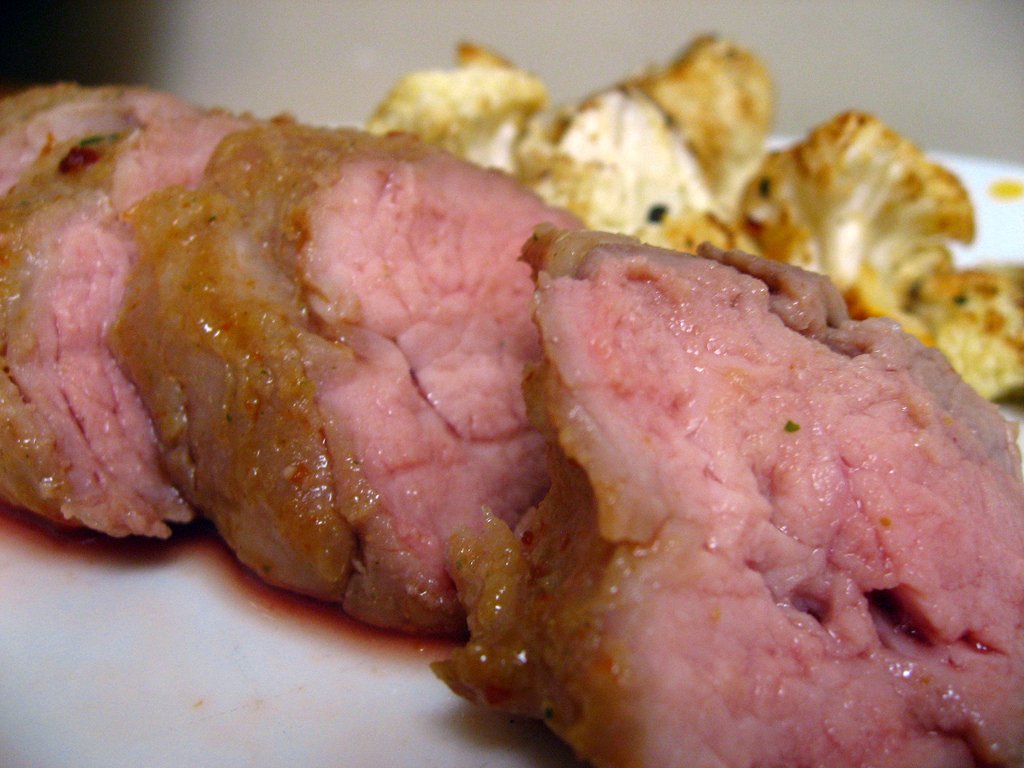
To be honest, I have never made pork tenderloin in my life.  I think I've only eaten it once before and it was so overcooked that I though I just didn't like pork tenderloin.  I'm the type of girl who orders my steaks on the rare side of medium rare.  I'm glad that I finally made it myself, because it turns out pork tenderloin is awesome!

Sweet and Fiery Pork Tenderloin

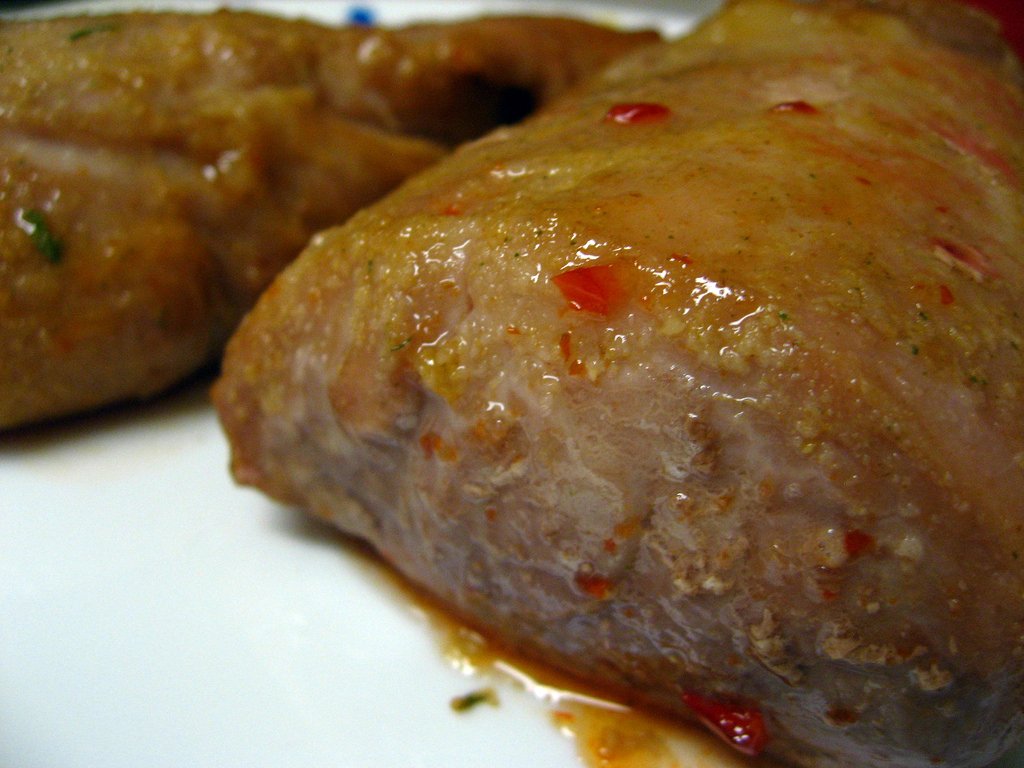
I knew the Monkey Scientist would enjoy this recipe because it called for his favorite - Sriracha.  For Christmas, I got him the Sriracha cookbook.  We've only tried one recipe so far and it was so-so, but we're aiming to try many more.  Sriracha is so good on any type of meat, and this pork was no exception.  We also may or may not have drizzled more Sriracha on top of the meat before we ate it... and the Monkey Scientist might have also zipped his pork in even more like ketchup...don't judge us.  (But if you want to ship us a few more bottles, we are running low!)

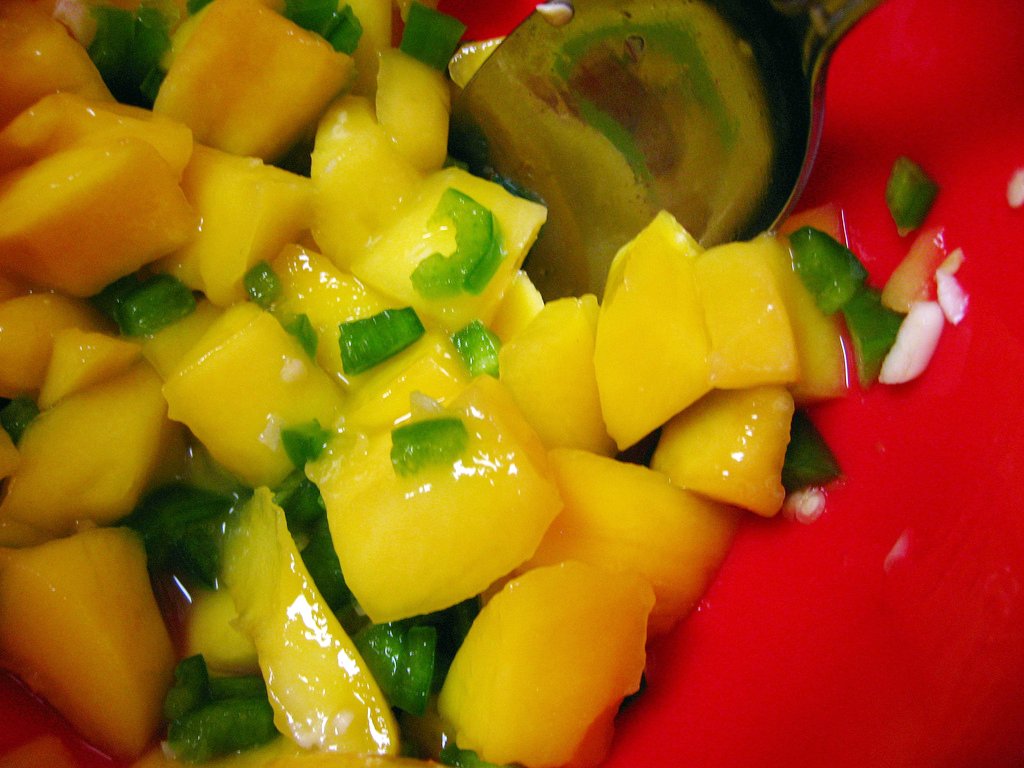
Mango Salsa

So honestly, I didn't like the mango salsa in this.  I left out the cilantro because it's the worst herb ever I don't like it, but the Monkey Scientist convinced me to leave some jalapeno seeds in and it was way too spicy for me.  Also, I had lemon juice instead of lime juice and really that isn't a valid substitution.  I liked the idea of the mango salsa, but I need to work on the execution.  The Monkey Scientist liked it though, which means if you have a high tolerance for heat, you will too!

Sweet and Fiery Pork Tenderloin

Even though the salsa wasn't great, I loved the pork tenderloin.  It was moist, sweet, a bit spicy, and absolute perfection.  This was such a great substitute for steak, which I almost never make because of cost and lack of nutrition.  I don't love to have a big hunk of meat every night, but sometimes I just crave something medium rare that I can sink my teeth into, and this totally did the trick.  I absolutely recommend drizzling it in some extra Sriracha and serving it up with a roasted veggie, like cauliflower.  I also think this is one you can trick your picky-eater kids to eat - it really isn't that spicy and you can always cut off the outside if they're super particular (and then you get to eat it, because it's totally the best part!).  Now I want to try more pork tenderloin recipes!

Sweet and Fiery Pork Tenderloin

Sweet and Fiery Pork Tenderloin with Mango Salsa
From Skinny Taste

Ingredients:
for the salsa:
1 large ripe mango, peeled, seeded and coarsely chopped
1-2 tbsp chopped fresh cilantro (I obviously left this out because it's soapy and gross)
1 small clove garlic, minced
1 tbsp minced jalapeño, seeds removed and diced
2 tbsp fresh lime juice
for the pork:
1 tsp garlic salt
1/2 tsp ground ginger
1 lb pork tenderloin
1/4 cup Sweet Red Chili Sauce (I used Taste of Thai)
1 tbsp honey
1/2 tsp Sriracha sauce (or more to taste)

Directions:
for the salsa:
Combine all the ingredients in a bowl, season to taste with salt and pepper. Refrigerate salsa until ready to serve.
for the pork:
1. Preheat oven to 375°.
2. Mix garlic salt and ginger in small bowl. Rub evenly over pork. Place pork on rack in foil-lined roasting pan. (I just used a tin foil roasting pan - easy clean up!)
3. Mix chili sauce, honey and sriracha in small bowl.
4. Roast pork in preheated oven 40 to 45 minutes* or until desired pork is cooked to your liking.  About 10 minutes before it is done (when your pork is maybe 5° away from the temperature you want it), brush the entire loin with the chili sauce mixture. (New pork guidelines allow pork to cook to 145°, if you prefer it cooked well, cook it until the internal temp reads is 160° with a meat thermometer.)  *My 1 lb loin was actually split in half, and it was cooked to between 145-150° after about 25-30 minutes.  It was medium rare perfection!
5. Slice pork and serve with pan juices and mango salsa on the side. (I also served with some roasted cauliflower)

Wednesday, January 11, 2012

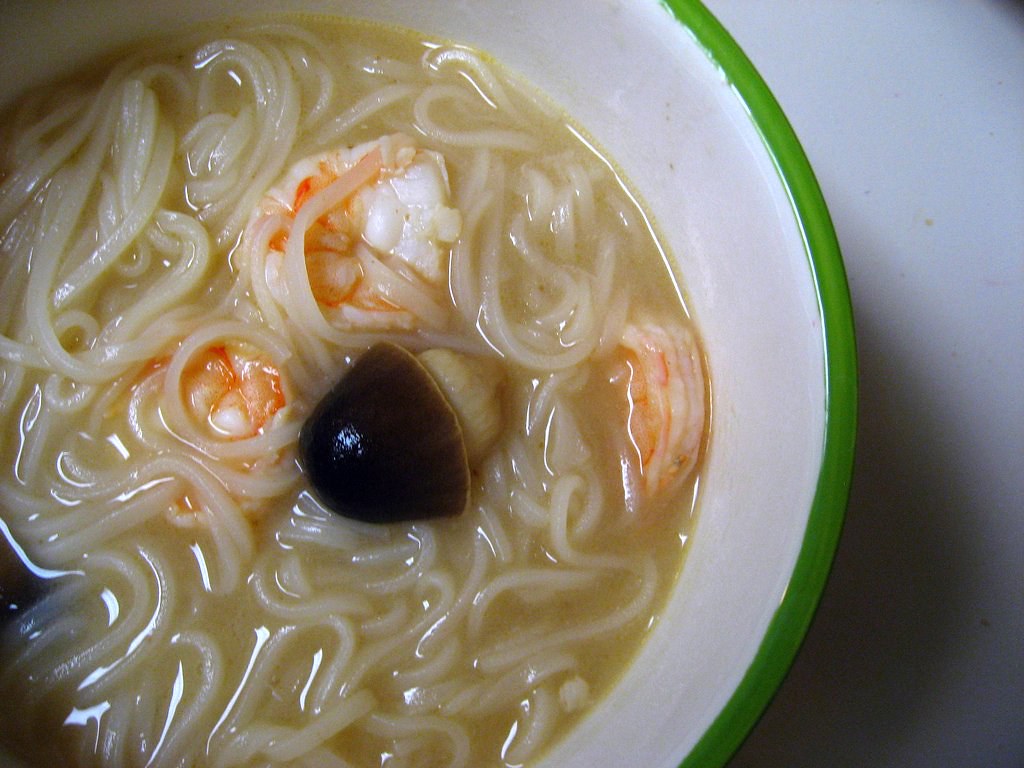
Tom Yom Shrimp and Noodle Soup

Tom Yom Soup

Something that's always disappointed me about DC has been the lack of ethnic culture in the city.  Sure, we have some really great restaurants, but where am I supposed to get my chopped liver? Where can I get a hot stone bi bim bop? And, maybe I'm just from Boston and have always been spoiled, but I've yet to have a really good (and not overpriced) Italian meal - with homemade pasta, fresh seafood, and way over-sized portions.

Tom Yom Soup

After being here for a while, I found that there is one ethnic fix that I can't get in the District - but exists just a short drive away (when someone's willing to take me).  Fantastic, authentic (I don't mean orange flavored chicken) Chinese food.  "Chinatown" in DC is a hoax - it mostly has a bunch of chain stores and restaurants (like Legal Seafood and Clyde's) with their names in Chinese.  The real Chinatown exists just north of the District in southern Maryland.

Tom Yom Soup

This weekend, the Monkey Scientist and I took a trip up to Wheaton, MD.  We had some really good dim sum at Hollywood East and then made a trip to the H Mart there.  I have to admit, not the best H Mart I've ever been to, but I found nearly everything I needed for several dishes - including this Tom Yom soup.  Tom Yom is one of my favorite soups - Paragon Thai and Spices in Cleveland Park make delicious versions.  I've been wanting to try making my own for a few months now, so I got all of the ingredients I could at H Mart to make it this week!

Tom Yom Soup

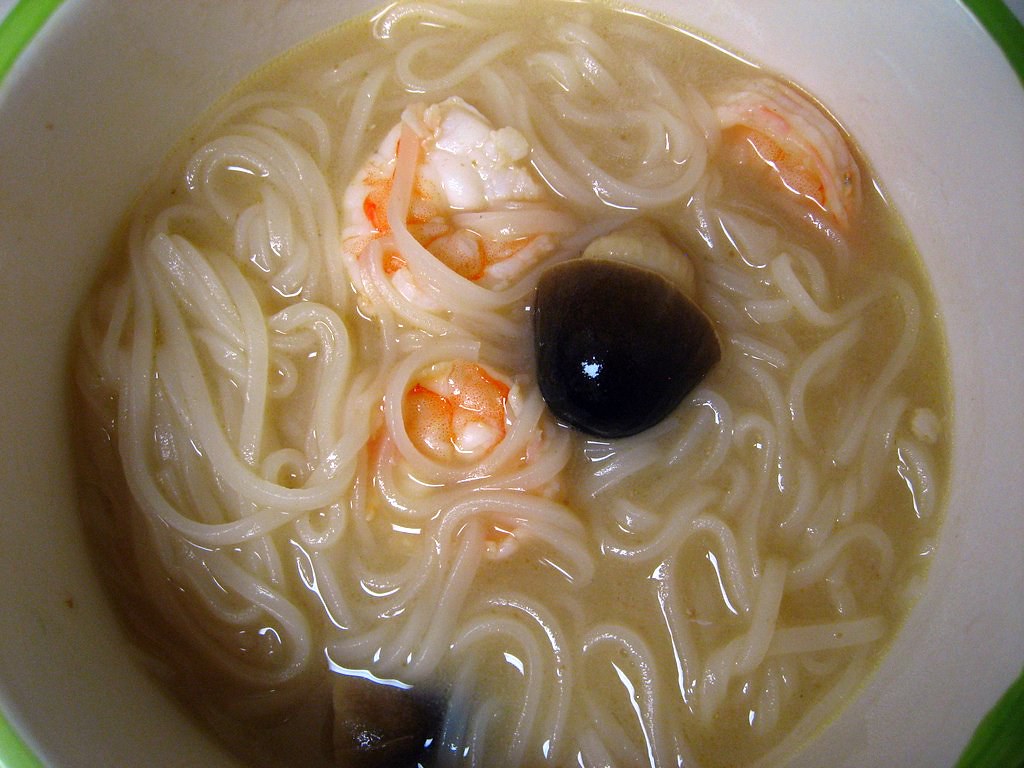
My Tom Yom Soup broth wasn't as dark or red as the versions I've eaten in restaurants.  I think that this color may come from using dried chilis and frying them with the shallots at the beginning - I'd like to try making this again to see if that works.  The flavor however, was really close - I was actually surprised!  And man oh man is this broth good - sweet, sour, a little bit spicy, and the lemongrass is so unique and brings great depth of flavor.

I decided to add rice noodles to give this soup a little more substance so that we could have it as dinner - Paragon Thai has a version similar to this that they serve as a meal - but if you wanted to serve this as an appetizer you could leave them out.  I also changed the recipe below to use about half as many noodles as I actually used, since they soaked up almost all of the broth, and the broth really is the best part.

You could also add more vegetables at the end if you wanted, but I like the simplicity of this soup with such a complex broth.  Other things that may make sense to add would be chicken and green onions (my store has been out of green onions for a while).  My final review?  This a really great soup that will impress your family and friends.  Take a trip to your local Asian market and make this - you won't regret it!

Tom Yom Soup

Tom Yom Shrimp and Noodle Soup
Adapted from Wandering Chopsticks and Tyler Florence

Ingredients
1 lb shrimp with shells and heads
2 tbsp olive oil
1 large shallot, sliced
2 cloves garlic, minced
2 inch knob galangal or ginger, minced
2 quarts fish stock (water or chicken stock would work, too)
2 tsp tamarind paste (optional, but add umami)
2 stalks lemongrass, bruised
1 tsp salt
2 tsp sugar (white or brown)
1 tbsp fish sauce
3 small Vietnamese red chili peppers, diced (more if you like it hot)
2 limes, zested and juiced
4 oz small-width rice stick noodles
1 15-oz can straw mushrooms, drained

Instructions
1. Peel and de-vein shrimp. Set aside both shrimp and the shells in separate bowls.
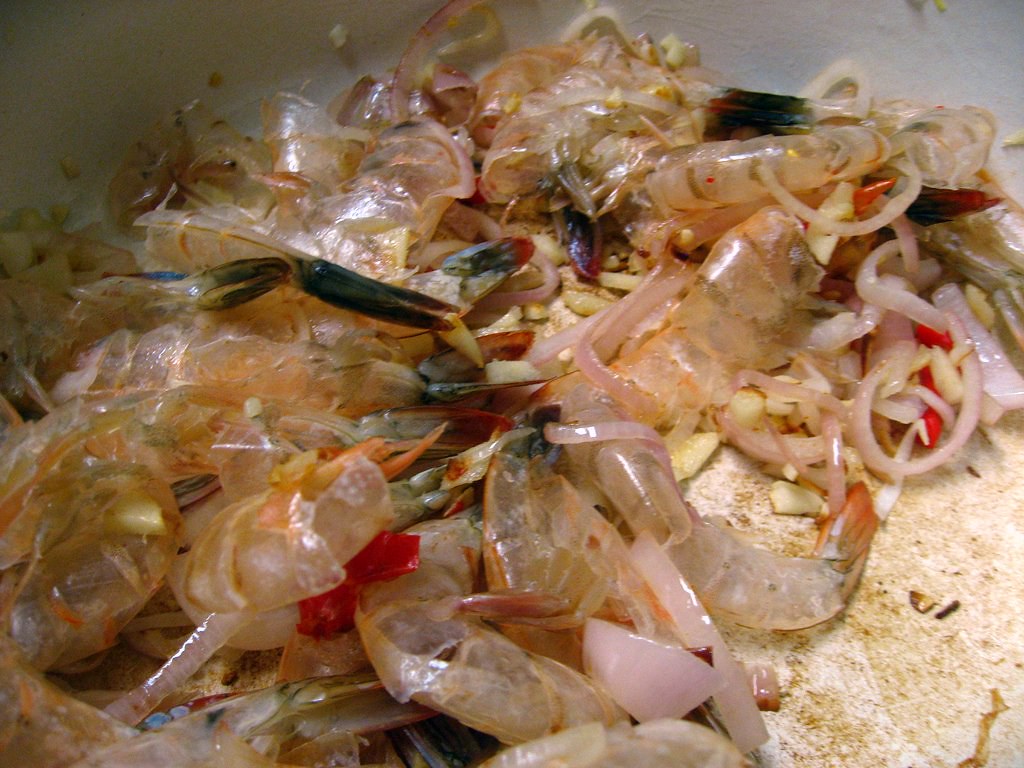
2. In a heavy pot over medium heat, heat oil. Once hot, add shallots, garlic, and galangal or ginger. Sauté until edges begin turning brown.
3. Add shrimp heads and sauté until pink. Add stock.
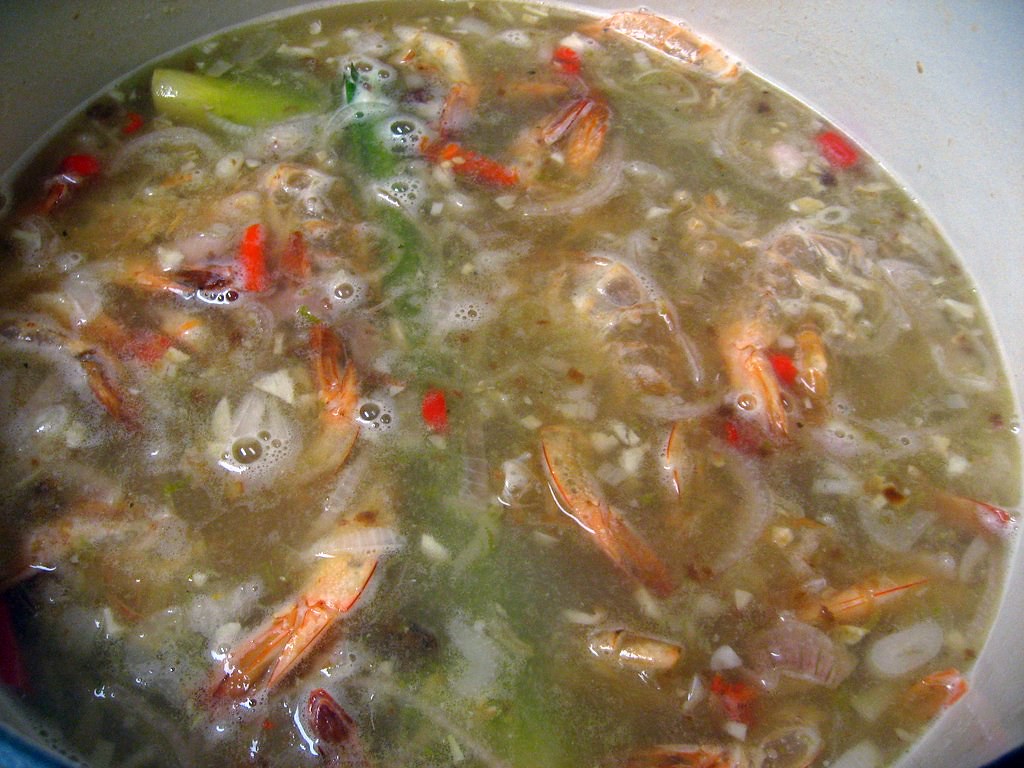
4. Mix in tamarind paste, lemongrass, salt, sugar, fish sauce, chili peppers, lime juice and zest. Simmer 1/2 hour.
5. Meanwhile, soak noodles in warm water for 5-10 minutes. Strain.
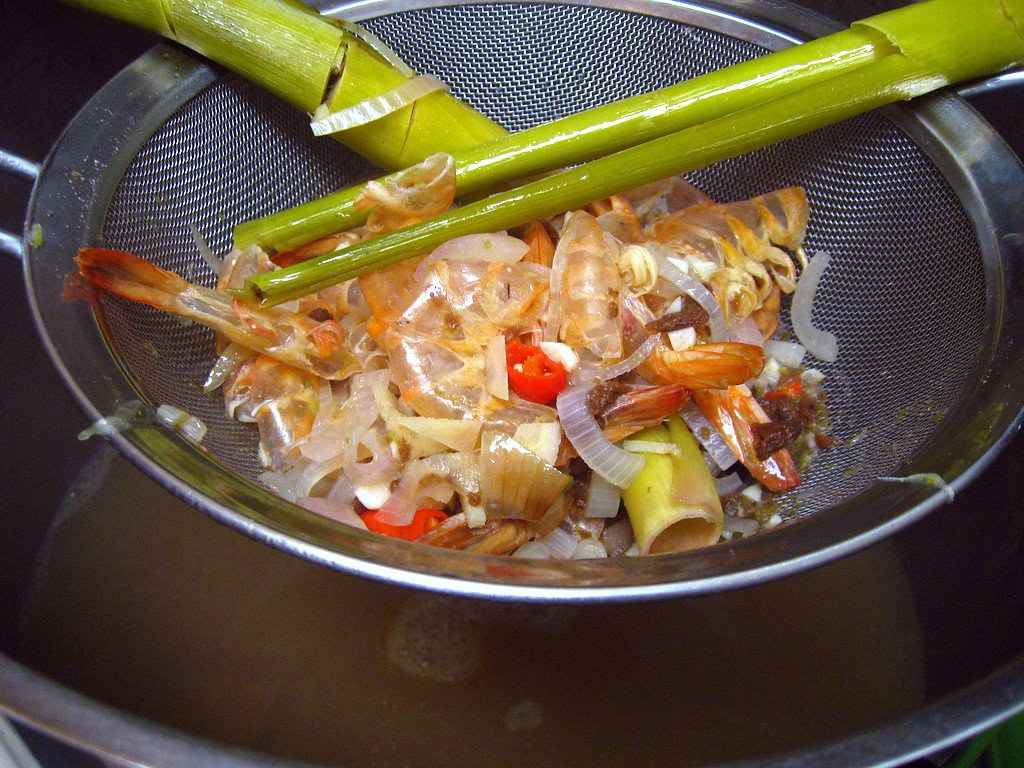
6. Strain out all of the ingredients from the soup to get a clean broth. Return to a simmer/gentle boil then add shrimp, noodles, and mushrooms. Cook for 5-8 minutes until noodles are soft and shrimp is cooked through. Serve immediately.