Wednesday, May 25, 2011

Lamb Stew


We just got back from a weekend in NH with my folks, and brought a little bit of a cold home with us.  I really wanted to make a spicy soup to clear the sinuses and I thought this would do the trick... 


It ended up soaking up almost all the liquid and wasn't quite as spicy as I would have liked, but that doesn't mean it wasn't so tasty! The original recipe called it "Spicy Lamb Stew" - I didn't have Hungarian Paprika so instead I mixed sweet paprika, cayenne, and chile powder - I should have added red pepper flakes too.  Next time!


It was super easy to make too!  It called for pureed tomatoes.  Since I didn't have any, I bought whole tomatoes and pureed them with my immersion blender.  That thing is amazing - no splatter!


Also, I already had ground lamb in the freezer (I bought in on sale before I left) so I used that instead of stew meat.  I'd definitely recommend going the stew meat route if you are going to the store to buy it. I think it would add another texture element.


We really did enjoy this recipe.  I served it over short grain brown rice and it was filling. I do find that lamb is a little greasier than most other meats.  I wonder if it would be less greasy with stew meat.  Also, those aren't beans - they're raisins.  The raisins add a great bit of sweetness to complement all of the savory flavors.  I think you'll really enjoy this one!


Lamb Stew
from Simply Recipes
Serves 4

Ingredients

2-3 lbs of lamb shoulder stew meat, cut into 1½-inch cubes
Olive oil
2 yellow onions, chopped
4 cloves garlic, minced
2 red bell peppers, chopped
2 dry pasilla chiles, chopped, stems and most seeds removed
1 Tbsp hot Hungarian paprika*
1½ teaspoon ground cumin
Pinch of ground cardamon
1½ cups chicken stock (use gluten-free stock for gluten-free version)
14 oz of canned whole tomatoes, put through a food mill, or puréed
8-10 sprigs fresh flat leaf parsley
4-5 sprigs of thyme
1 bay leaf
2/3 cup raisins
Salt and pepper
* Hot Hungarian paprika is not the regular Hungarian paprika which is sweet and mild. It is even hotter than cayenne. If you don't have access to hot paprika, I would substitute 1/2 with sweet paprika and 1/2 with chili powder.

Instructions

1. Pat the lamb dry with a paper towel. Drying the lamb this way first will help the lamb pieces brown. Heat 2 tablespoons of olive oil in a large, heavy, high-sided pot, such as a Dutch oven, over medium high heat. When the pot is hot, add the lamb pieces in batches, being careful not to crowd them. Cook, turning as needed so that the lamb pieces brown evenly on all sides, for 6-8 minutes. Transfer to a bowl.

2. Return the pot to medium-high heat. Add the onions, dried peppers and red bell peppers and stir to coat with the oil in the pot. Cook, stirring occasionally, for 5 minutes. Add the garlic and cook 1 more minute.

3. Make a bouquet garni by placing the parsley, thyme and bay leaf in the center of a doubled over cheesecloth square. Gather the ends and secure with kitchen string.

4. Stir in the paprika, cumin, and cardamom and cook for a minute. Add the puréed (or cooked tomatoes put through a food mill) tomatoes, lamb, chicken stock, raisins and bouquet garni. Bring to a boil over high heat, decrease heat to low. Cook, partially covered, for about 3 hours, or until lamb is tender.
Season to taste with salt and pepper.

Serve over couscous or rice.

Friday, May 20, 2011

Poor Man's Vegetarian Shepherd's Pie


I've mentioned before that I'm all about budget grocery shopping and using coupons.  For me, just the idea of saving money can be inspiration.  And this recipe is the ultimate low budget dinner.

The whole shepherd's pie - which fed 4 of us and I ate for lunch the next day - only cost $5.17 (not including pantry items like spices, milk and butter).  Seriously - 4 dinners and 1 lunch for $5.17.  How amazing is that?!  The asparagus I served with it cost almost that much!


One of my closest friends in DC is an old friend from summer camp.  She happens to be a vegetarian/pescatarian, so I wanted to make a dinner that I could feed her.  I loved the idea of taking an unhealthy, meaty comfort food and turning it into a healthy, low cost comfort food.


One of the major ingredients in the low-budget, high-nutrient version were sweet potatoes.  Sweet potatoes are actually cheaper than white potatoes (at least at my grocery store) and they're full of great nutrients including carotene.  Plus, they have so much more flavor!


The other alternative ingredient of course are the lentils.  Lentils are $0.89 for a 16 oz bag at my grocery store.  And I never thought I liked lentils - I'm not that into lentil soup - but they are SO good when you prepare them well!


I actually ended up mixing about 70% sweet potato and 30% white - but next time I definitely could go all sweet potato.  I think this just made it a little more mild.

Also, I don't own a potato masher, so I used my pastry blender to mash the potatoes.  I realize more people probably own a potato masher than a pastry blender, but if you love baking like me this is a great way to have more than one use for a single tool.  And it worked great!!


I also got the frozen corn on sale for $1.  I may have even used a little more than the recipe called for.  I realize corn doesn't have the MOST nutrients - so you could replace with something like peas if you wanted to step up the nutrients.  Still, I just love corn and it makes it taste like the Shepherd's Pie you remember from childhood.


I am absolutely obsessed with this recipe.  It is so darn delicious I could have eaten the whole pan.  It has tons of flavor - sweet, spicy, and salty - and I didn't miss the meat at all.  It was even wonderful heated up the next day.  Definitely as comforting as the original but I think I like it even better.  The only complaint I might have had was that it wasn't as filling as the meat version (or maybe I was just starving from a long run) so I ended up eating a good amount of it.  I think this also was because I made it in the flat dish rather than a round casserole so what looked like a portion was actually pretty small.  I will absolutely make this again!!


Poor Man's Vegetarian Shepherd's Pie
very slightly adapted (to be spicier) from Simple Bites

Ingredients

1 cup lentils, green or French, rinsed
2 lbs potatoes or sweet potato (I used 3 sweet potatoes and 2 very small white potatoes)
2 Tablespoons butter
1/4 cup milk
1 teaspoon olive oil
1 small onion, finely chopped
1/2 teaspoon ground cumin
1/2 teaspoon dried Herbs de Provence
1/2 teaspoon cayenne, divided
1 teaspooon apple cider vinegar
1 Tablespoon ketchup
5 drops hot sauce (I used Chulula)
1 cup frozen sweet corn
Salt and freshly ground black pepper

Instructions

Place lentils in a medium pot and cover with an inch of cold water. Add a pinch of salt, cover and bring to a boil. Reduce heat to medium low and simmer for 20 minutes until cooked. It is okay if they are not completely cooked, they will cook further later. Drain.

While lentils are cooking, peel and roughly chop potatoes. Place in a pot and cover with cold water. Add a teaspoon of salt to the water and bring to a boil. Simmer until potatoes are tender.

Drain potatoes and mash. Add butter and milk and season with 1/4 teaspoon cayenne pepper, salt and freshly ground black pepper. Cover and set aside.

Heat oil in a medium pot and add chopped onion. Sautée for a few minutes until soft. Add cumin, Herbs de Provence, 1/4 tsp cayenne pepper, cooked lentils, vinegar, ketchup, hot sauce, 1/2 teaspoon salt and pepper to taste. Stir to combine.

Add 1/2 cup of water and bring lentils to a simmer. Cook for another five minutes or so, stirring often, to let the flavors come together.

Preheat oven to 375°F. Place seasoned lentils in the bottom of a medium baking dish. Spread to cover the bottom. Top with corn kernels. Add mashed potatoes on top and spread evenly. Bake for about 30 minutes until heated through. Serve hot.

Serves 4.

Thursday, May 19, 2011

Cadbury Mini Eggs Cookies


It's been a while since I made cookies!  My baby brother was studying for midterms (OK, he's in college, he's not quite a baby anymore) - yes midterms now, after Michigan graduated, Northwestern has a crazy schedule - and so I thought it'd be a nice treat to send him a box of cookies to pump some sugar into those late nights studying.


Also, my amazing coworker brought me back some of the good stuff from Mexico.

No, not drugs or tequila - vanilla!


Do you know about Mexican vanilla?  My mom taught me about it and MAN is it good.

I'm not gonna lie, I usually buy imitation vanilla, so this stuff was like gold for me.  I probably ate a full cookie worth of batter. And by that I mean 4 cookies worth of batter.


But the real secret ingredient to these cookies? My absolute favorite candy of all time - Cadbury Mini Eggs.  I used to keep these in my car in high school to much on and because they'd fill my car with the most wonderful scent in the whole world - way better than any air freshner.


Now, I realize I'm doing something very cruel to you. I'm giving you a recipe that you really can't make right now - Cadbury Mini Eggs are only sold during Easter.  I got the last couple bags at the CVS near me on sale (a different coworker actually picked them up for me) and I saved them to make these cookies.  I still have one more bag - but I have to make it last all year until next easter!  I guess you could replace them with chocolate chunks or M&Ms, but the shell just isn't as wonderful and the chocolate isn't as fantastic.


When you chop up the mini eggs, it ends up being like chocolate chunks.  I threw in all the extra shell dust on my cutting board, which you could definitely taste throughout the cookies.  I think this made them extra buttery and sugary - and who ever said that was a bad thing?


Now my intention was to bang these cookies against the oven when they were halfway done.  This is a trick my mom's best friend taught me to make chocolate chip cookies extra flat and crispy.

But halfway through cooking I opened the oven door and saw this...


They were totally flattening out on their own.  I think this recipe might be a little bit off in the baking soda/powder department.  The cookies came out really crumbly and flat.  But still - man they were good.  They were so buttery, even though I halved the recipe so I only had 1 stick of butter in about 18 cookies.  Baby brother loved them and said his college buddies did as well.  I ate about 3 of the cookies that fell apart on the spot and I probably would have eaten all 18 within 24 hours if I hadn't shipped them off to Evanston.  Save this recipe for next Easter - you won't regret it!


Cadbury Mini Egg Cookies
from Itty Bitty Bakes

Ingredients

2 cups all-purpose flour
1 1/2 tsp salt
3/4 tsp baking soda
2 sticks unsalted butter, at room temperature
1 cup granulated sugar
2/3 cup packed light brown sugar
2 tsp vanilla extract (use Mexican vanilla if you can!)
2 large eggs
2 bags (20 ounces) Cadbury mini eggs, chopped (2 of the bags I had only added to 16 oz, and that was fine)

Instructions
Preheat the oven to 375 degrees, and line 2 baking sheets with parchment paper. In a medium bowl, whisk together the flour, salt, and baking soda. In a large bowl, beat the butter on medium speed until smooth. Add in the sugars and beat for another two minutes, and then beat in the vanilla. Add in the eggs one at a time, beating for a minute after each addition. Reduce the mixer speed to low and add in the dry ingredients gradually. Stir in the chopped Cadbury mini eggs. Spoon the dough by rounded tablespoonfuls on to the baking sheets about 2 inches apart.

Bake the cookies, one sheet at a time, for 10-12 minutes or until the edges are brown and the centers are golden. Remove them from the oven and let them rest for one minute; then carefully remove them to a wire rack to cool. Repeat with the remainder of the dough.

Makes about 3 1/2 dozen cookies.

Wednesday, May 18, 2011

Cayenne Cinnamon Ribs with Maple Glaze


Last week, before this rain storm hit, the Monkey Scientist and I decided to have a little BBQ.  Outside of my apartment building we have 2 grills by the pool - it's one of my favorite amenities in the summer when it's too hot to cook indoors.  I also got a new grill kit from our Wellness program at work in January - so I was excited to finally get to use it.


I think you might have heard, but I'm a huge maple fan.  So when this recipe came up for a maple glazed rib, I was intrigued.  Then I realized it was kicked up with some spicy pepper and I was sold.  The rub was super easy to throw together and full of our favorite spice - crushed red pepper flakes.


We rubbed the ribs down well on both sides.  We couldn't figure out how to remove the membrane from the bottom, so we didn't.  You still can.  I bet your ribs will be tender deliciousness.


Now, here is the part where I wouldn't follow my instructions at all.  If you're making these on the grill, DON'T put it on foil.  The foil stuck all to the bottom of the ribs and we definitely ended up eating a lot of it.  Not good eats.


To make matters worse, we're not grilling pros.  Turns out you need to turn the grill down to low after you light it.  Otherwise you will totally burn your ribs to a crisp after 20 minutes.  Trust me.  I completely blame the Monkey Scientist.  (except that he went upstairs while they were burning, and I saw the smoke and did nothing about it.  still his fault right?)

Despite how charred and foily they were, they were still pretty darn good.  I need to try to make them again in the oven because I know they'd be totally delicious.  Will you try and let me know?  Thanks :)


Cayenne Cinnamon Ribs with Maple Glaze
from Steamy Kitchen

Ingredients

1/3 cup firmly packed brown sugar
1 tablespoon garlic powder
1 tablespoon paprika
1 teaspoon ground cinnamon
1 teaspoon crushed red pepper
1 teaspoon sea salt (or 1/2 teaspoon table salt)
3 pounds pork baby back ribs
1/4 cup maple syrup

Instructions

1. Preheat oven to 375F (or prepare your grill). Remove the tough membrane from the underside of the ribs.

2. In a small bowl, mix together the brown sugar, garlic powder, paprika, ground cinnamon, creuhed red pepper and salt.. Place ribs on a double layer of tin foil (large enough to wrap around ribs) and season the ribs on both sides with the rub. Fold over foil and completely cover ribs. Place ribs on baking sheet or roasting pan.

3. Bake 1 hour or until meat starts to pull away from bones.

4. Turn broiler on to high and move rack to upper-mid position. Carefully open foil. Brush ribs with maple syrup. Broil ribs 3-4 minutes until browned. Take care not to burn the ribs like me!

Tuesday, May 17, 2011

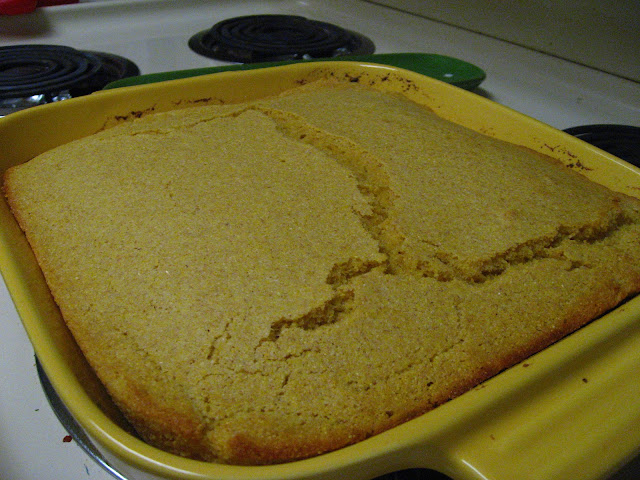
Yankee Maple Cornbread


I LOVE cornbread.  On Thanksgiving, I've been known to only eat cornbread and my grandmother's homemade apple sauce.  I'll eat just about any type.


But when I saw this recipe, I knew it had to be made. MAPLE? Sold. Growing up in New England, I've always been a huge maple junkie.  I love maple candy (you know, the kind that's basically just sugar in the shape of a maple leaf? YUMMM!!) and when I eat waffles they're 90% maple syrup and 10% waffle.  I'd never settle for Aunt Jemima.


Someday, I'd love to have a little farm to grow my own ingredients and raise my own animals.  Or at least my own hens to lay eggs. And DEFINITELY would love to have some maple trees so that I could make my own syrup.  How great does that sound?


This recipe was super easy to make.  The taste, unfortunately, was not quite what I had hoped.  I used sprouted whole wheat flour and I think it gave it a grainy taste.  It also wasn't as moist as I'd hoped.  Also, I stored it in a tupperware and it went bad in only a couple of days which surprised me! I'd like to try again with AP or whole wheat pastry flour.  It definitely warrants a second try based on how easy this was!


Yankee Maple Cornbread
from ericalea on Tasty Kitchen

Ingredients
1 cup whole wheat pastry flour
1 cup stone ground or yellow cornmeal
1 tablespoon baking powder
1/2 teaspoon salt
1 cup whole milk
1/4 cup maple syrup
6 tablespoons butter, melted and cooled
2 eggs, lightly beaten

Instructions

Preheat the oven to 425° F. Pour 2 tablespoons of the melted butter into an 8 or 9-inch square or round baking pan.
In a medium mixing bowl, whisk the flour, cornmeal, baking powder, and salt. In a small bowl, whisk the milk, maple syrup, remaining butter, and eggs. Add the liquid ingredients to the dry ingredients and gently stir together just until moistened.
Pour the batter into the prepared pan and bake for 20-25 minutes, or until golden brown and a toothpick inserted in the middle comes out clean. Serve warm with butter and maple syrup.

Saturday, May 14, 2011

Vegetable Fried Rice


This recipe is my favorite way to use leftovers.  After I made the Salmon and Veggies in Parchment Packets, I had a bunch of leftover veggies.  I also had a bunch of plain brown rice that was a day or two old.


The veggies just need to be cooked through on the stovetop.  Then I push them aside and scramble an egg on the side.


Leftover brown rice does work much better than freshly cooked, but if you don't have any you can always cook some up.  I totally undercooked mine and it was hard, but we still gobbled it up.


I absolutely love this dish.  It's so easy to throw together, and I don't have to go out to the store to buy anything.  Feel free to use any vegetables you have in the fridge - minced carrots work great, I just didn't have any. It's way lower fat than the version from the Chinese restaurant as well.  You can throw in some cooked chicken, steak, or shrimp if you wanted some protein.  You can also add some ginger for a little more flavor if you'd like. I promise, you'll enjoy it!


Vegetable Fried Rice
serves 2

Ingredients
1 tablespoon peanut oil, divided
1/4 cup onion, diced
1 clove garlic, minced
1/2 bell pepper, diced
1/4 cup peas, fresh or frozen
1/4 cup string beans, cut into 1 inch pieces
1 egg
1/2 cup cooked brown rice (I used short grain, but long grain works fine)
1 tablespoon light soy sauce
1 teaspoon dark soy sauce
salt, red pepper flakes & pepper to season
Sriracha for serving

Instructions
Heat 1/2 tablespoon peanut oil over medium high heat.  Add the garlic and onions and cook until soft and the garlic becomes fragrant.
Add the pepper, peas, and beans, and cook 2 minutes.
Push the vegetables aside, and add the egg. Break the yolk and scramble as thin as possible. Once cooked, incorporate in with veggies.
Create a hole in the middle and add remaining oil.  Add the cooked rice and fry to incorporate with veggies.  Add the soy sauces and season with salt, pepper, and red pepper flakes.
Serve with sriracha.

Friday, May 13, 2011

Salmon and Veggies in a Parchment Packet


This recipe is something you can find all over the web.  It's an easy dinner to throw together any night of the week very quickly! And it has loads of nutrients while staying low fat and low carb.


I love the heart shaped packet. I think it's just adorable!


After using Cavender's Greek Seasoning for my chicken souvlaki, I couldn't wait to use it again! It was fantastic and easy in this recipe - I didn't even need any other seasoning!


I really should have sprung for the wild caught salmon, but it was a little more expensive and it really didn't look very good at my market.  Still, if you care about sustainability, I recommend going that route.


Overall, we loved this meal. It was so simple and absolutely delicious! I meant to serve it with Israeli Cous Cous, but I forgot to make it.  Still, this was plenty for us when we just wanted a simple dinner.  Feel free to mix up the type of fish or veggies - it would work with anything! Next time I might try a spicy version with cayenne!


Salmon and Veggies in a Parchment Packet
serves 2

Ingredients:
1 zucchini, sliced
1 summer squash, sliced
1 small Japanese eggplant, sliced
1/4 Vidalia onion, sliced
1 bell pepper (I used orange), sliced
2 pieces of salmon
parchment paper
fresh squeezed lemon juice

Instructions:
Preheat the oven to 400 degrees F.
Cut parchment paper in 2 large hearts (big enough to hold half the veggies and a pieces of salmon), then fold in half. 
Place half of the veggies on each piece of parchment. Sprinkle with greek seasoning.
Place the piece of salmon on top and season with greek seasoning.  Drizzle everything with olive oil. 
Close the parchment packet and seal the edges. Bake 20 minutes or until fish is fully cooked and flakes with a fork.
Open packets and squeeze lemon juice over the top of each piece of salmon/veggies.  
Serve immediately.