Sunday, January 29, 2012

Baked Pork Egg Rolls

Baked Pork Egg Rolls

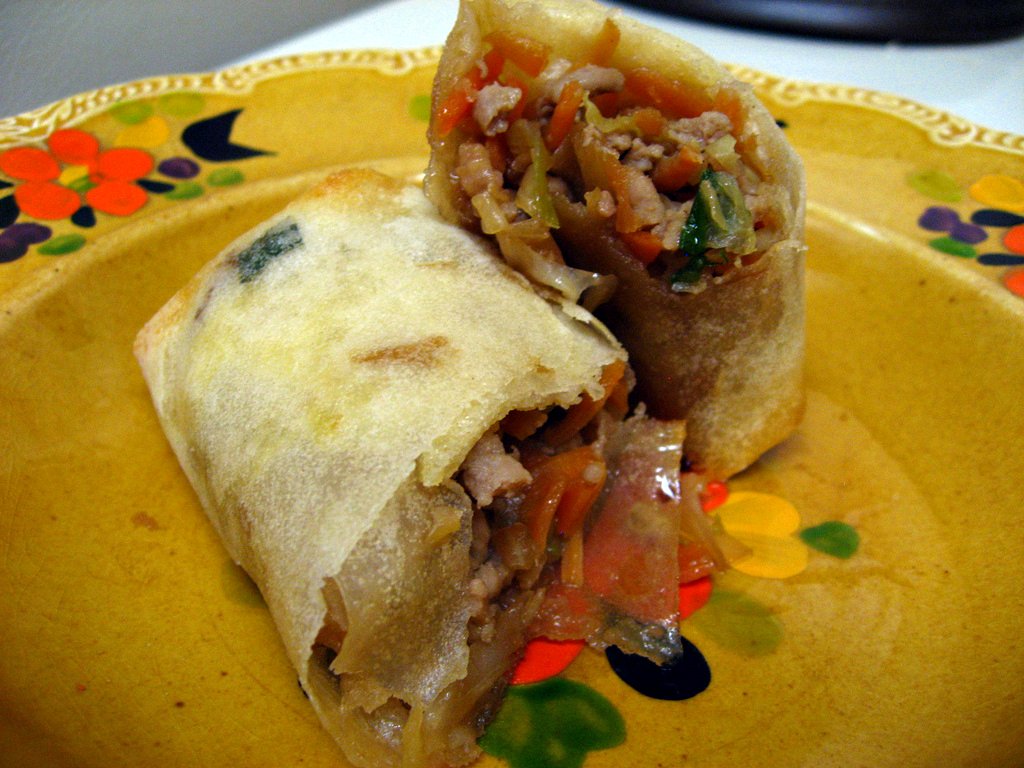
On our last trip to H-Mart, I picked up a package of egg roll wrappers.  I wasn't quite sure what I wanted to do with them, but after the Chinese New Year, I thought it may be fun to try a more traditional egg roll recipe - filled with pork and cabbage.

Cabbage and CarrotsEgg Roll Filling

It turns out, making egg rolls is HARD!  I have instructions below on how to roll them, but it really isn't that simple.  I kept ripping the wrappers (maybe I needed to spread the filling out more?) and getting very frustrated.  I hate to admit it, but this might be my only egg roll adventure in the foreseeable future.  It's just so easy to buy them!

Egg RollsEgg Rolls

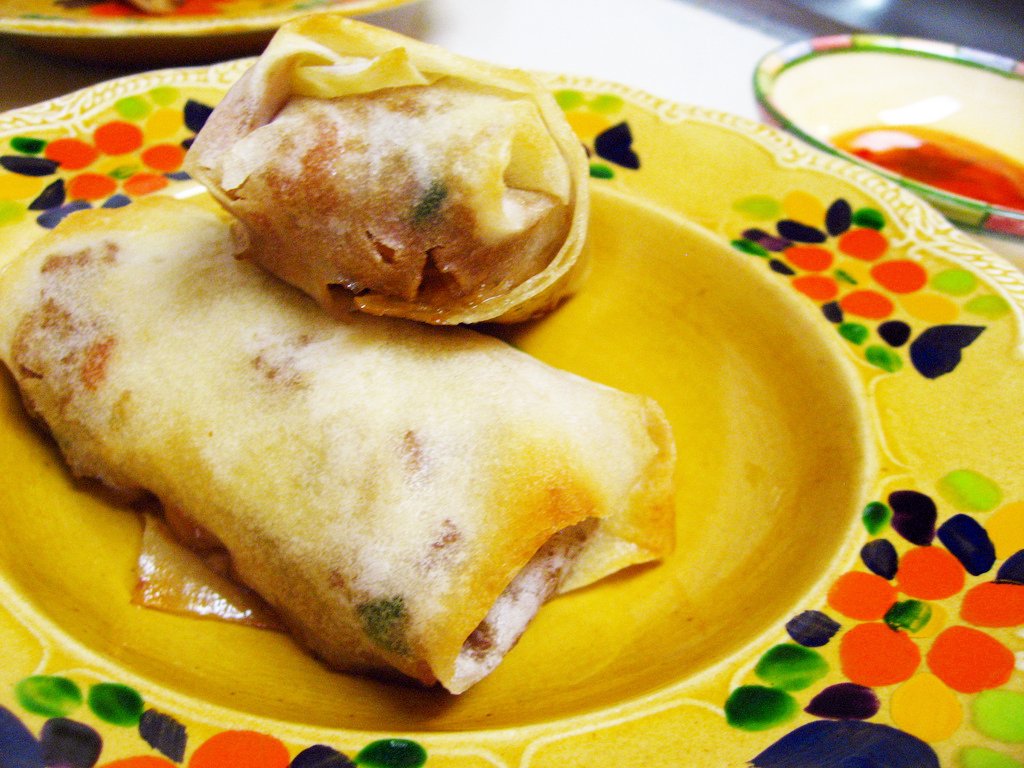
The taste, though, was really outstanding.  I was shocked how much the filling tasted like egg roll filling at a Chinese restaurant!  It was sweet and salty, just a little bit spicy, and I enjoyed the cabbage in it. I actually really liked eating the filling on its own (or over some white rice) just as much as in the egg rolls, so I may do that in the future as a quick throw together meal.  If you try this, let me know how it goes for you.  Do you have any tricks for rolling egg rolls?

Egg Rolls

Baked Pork Egg Rolls
from Ezra Pound Cake

Ingredients
1/4 c soy sauce
2 tbsp rice vinegar
1 tbsp light brown sugar
vegetable oil, for brushing on rolls
4 c cabbage coleslaw mix
1/2 c shredded carrots (I bought them pre-shredded)
4 garlic cloves, minched
1 tbsp fresh ginger, grated
sea salt and freshly ground pepper
1 lb ground pork
6 scallions, thinly sliced
16 egg roll wrappers (6-7" square)
1 large egg, lightly beaten
sweet-and-sour sauce or sweet red chili sauce for dipping

Instructions
1. In a small bowl, combine soy sauce, vinegar, and sugar. Set aside.
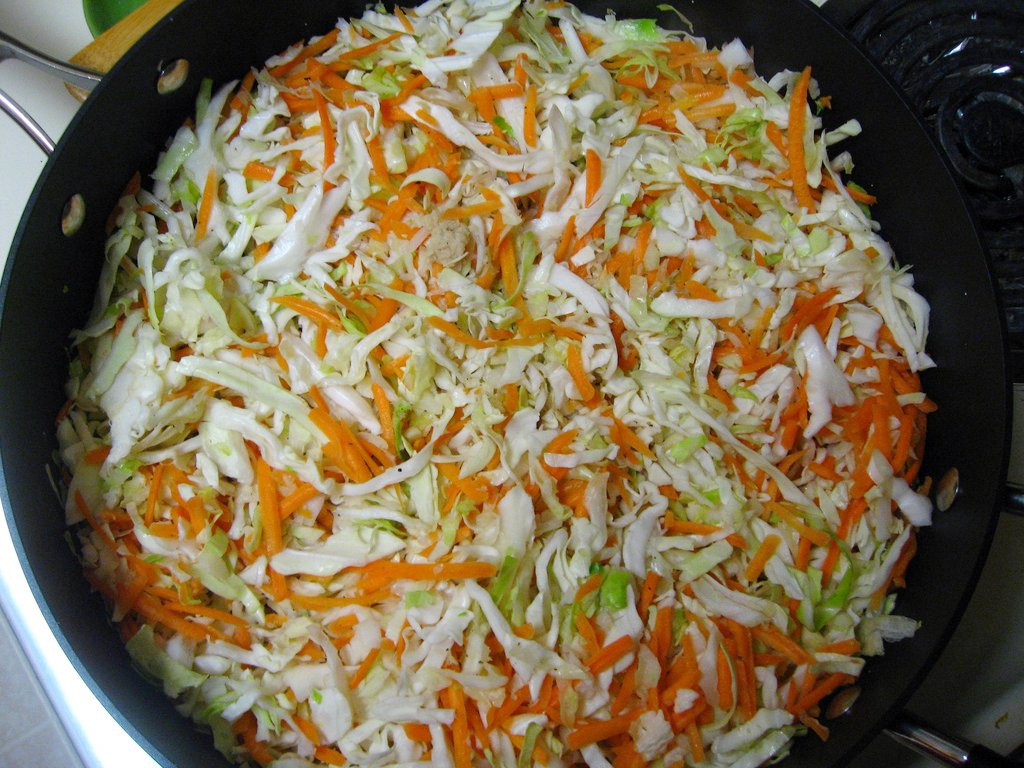
2. In a large skillet, heat 1 tablespoon oil over medium-high. Add coleslaw mix, carrots (if using), garlic, and ginger; season with salt and pepper. Cook, tossing, until vegetables are tender, 3 to 5 minutes.
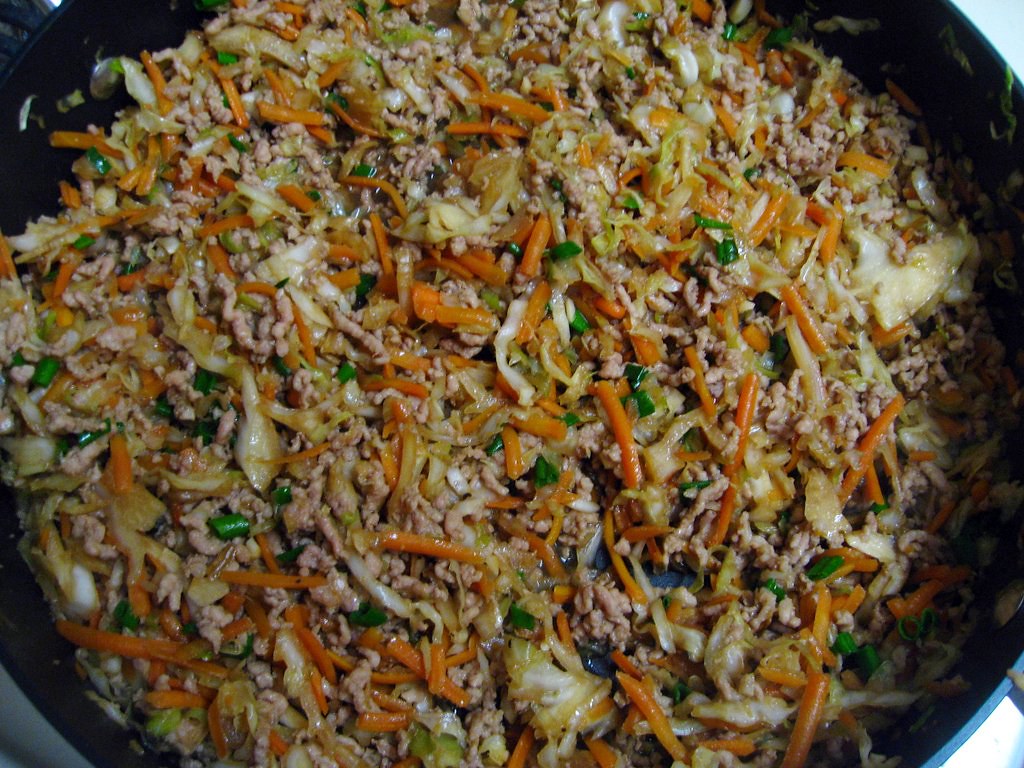
3. Raise heat to high; add pork and soy mixture. Cook, tossing, until pork is no longer pink and liquid has evaporated, 5 to 7 minutes. Mix in scallions. Transfer mixture to a plate to cool.
4. Lay wrappers flat on a work surface, and assemble egg rolls. (See “how to” below.)
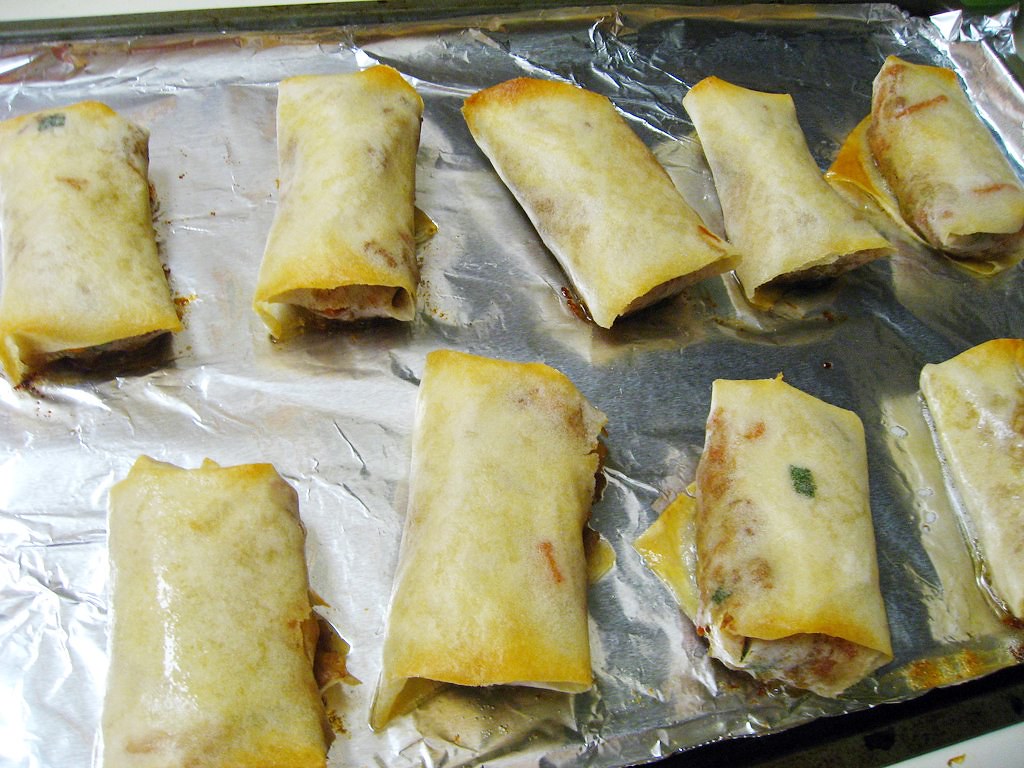
5. Preheat oven to 400 degrees F. Lightly oil a rimmed baking sheet; place egg rolls on sheet and brush with cup oil. Bake until golden, about 10 minutes. Serve with sweet-and-sour sauce and Chinese hot mustard.
Note: If baking from frozen, bake about 15 minutes.


How to Roll an Egg Roll
How roll and egg roll - step 1
How to roll and egg roll step 3
How to roll and egg roll step 4
Egg roll - final


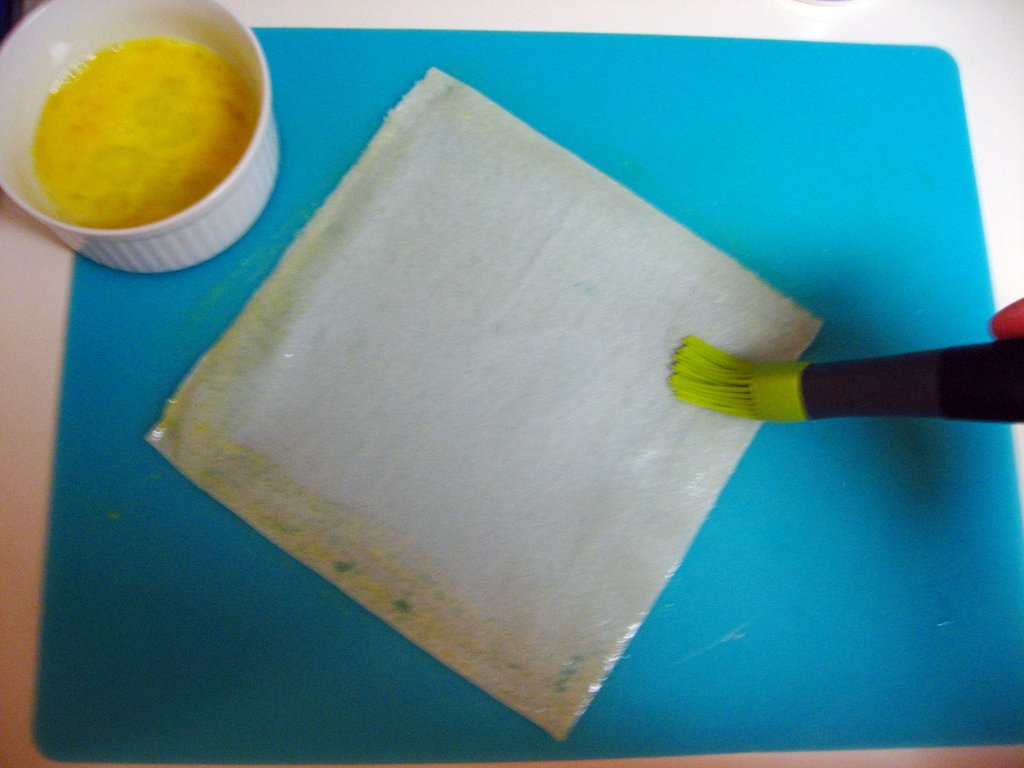
1. Place an egg-roll wrapper flat with one corner facing you.
2. Using a pastry brush, brush all four sides of the wrapper with egg.
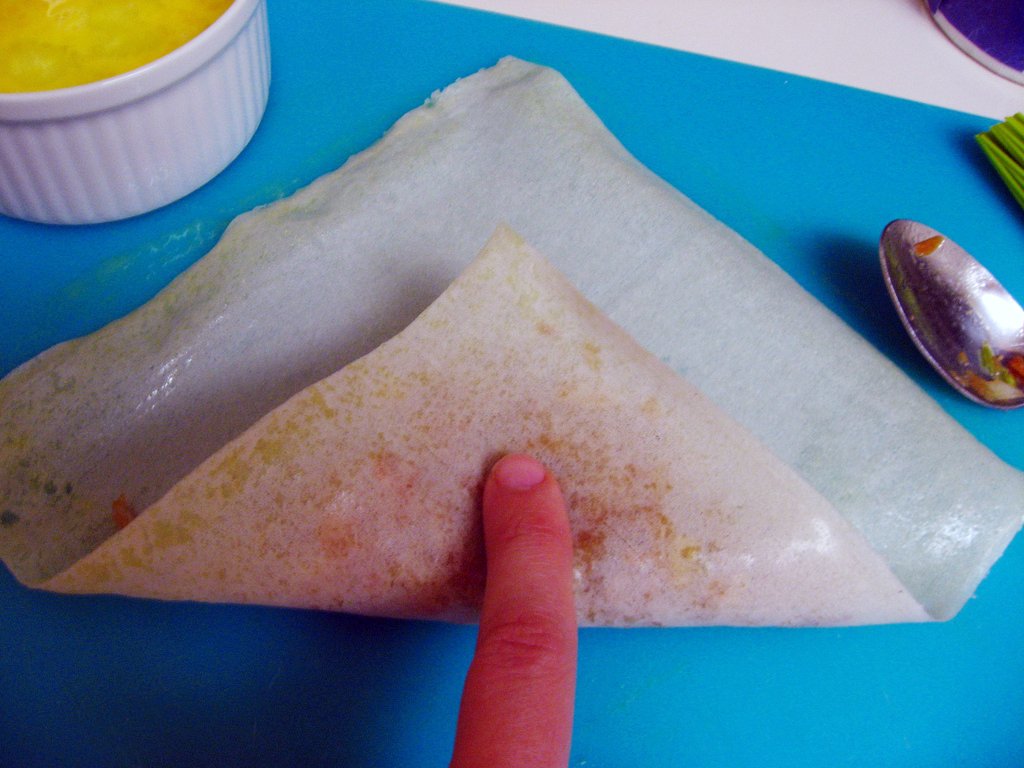
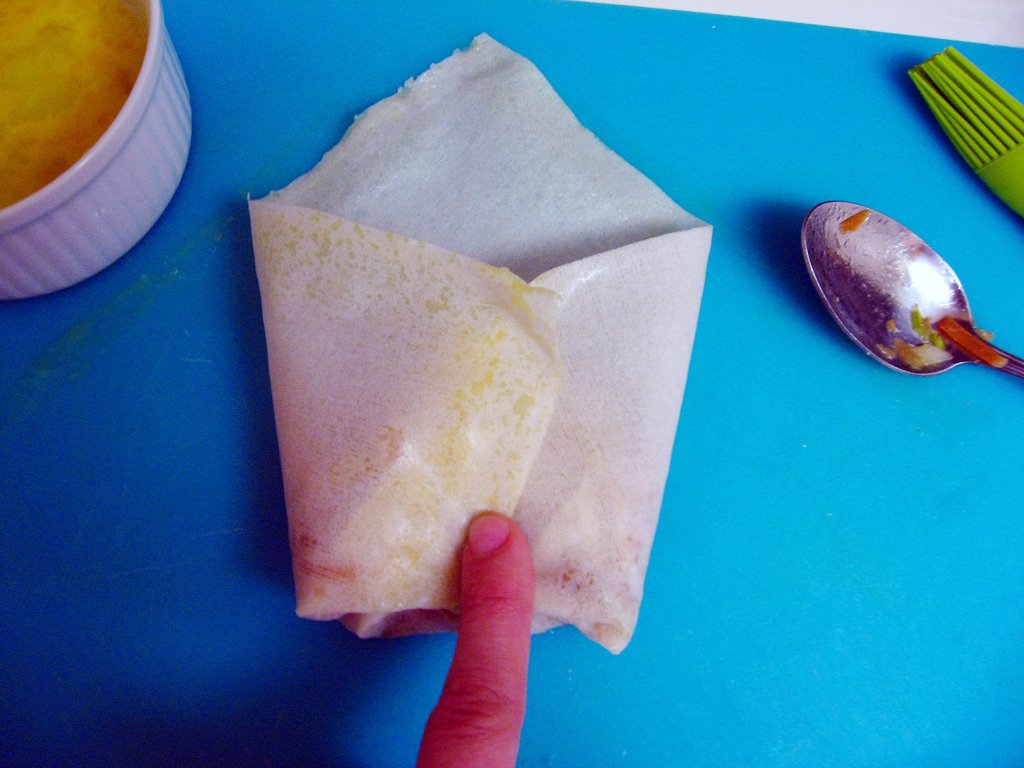
3. Spoon 1/3 cup pork mixture near the corner closest to you. Fold that corner over the filling, and fold both side corners toward center of wrapper. (It should look like an open envelope.)
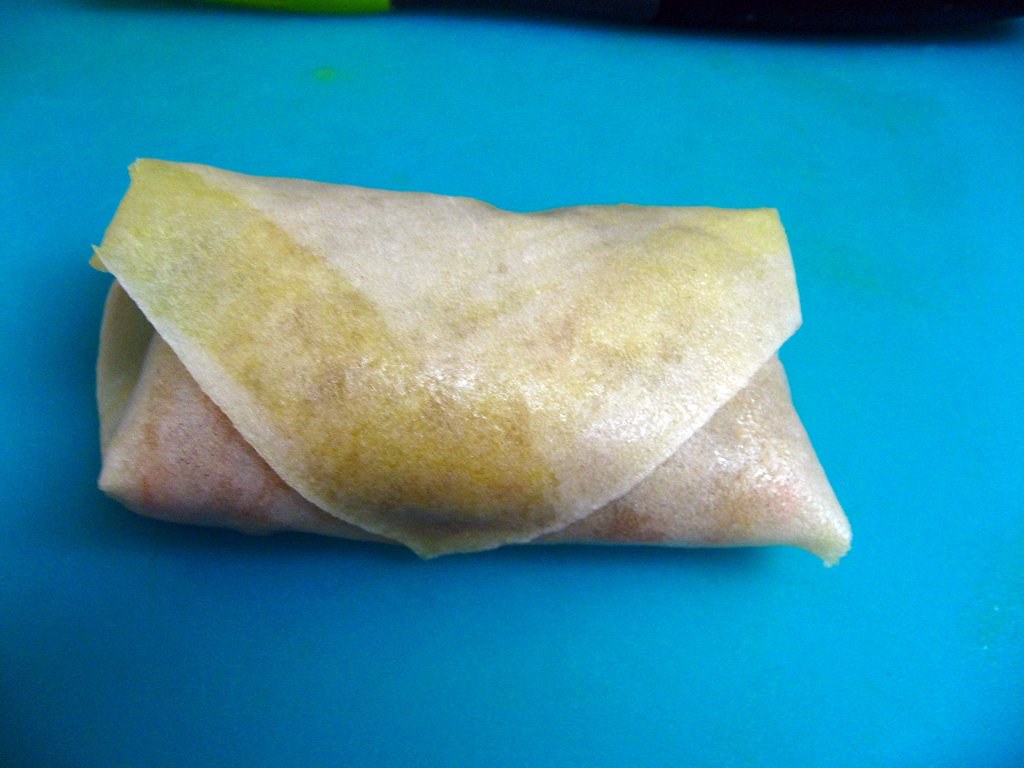
4. Tightly roll up filled pocket toward the far corner to close wrapper. Gently press down to seal the edges.
5. Repeat the process until you run out of filling or wrappers. Feel free to assemble up to 4 egg rolls at a time when you feel comfortable with the process.

Thursday, January 26, 2012

Fresh Pineapple Crisp

Pineapple crisp

Last Friday, my friend invited me over for a small Shabbat dinner and asked me to bring the dessert.  Since snow was in the forecast, I decided to bring something a little bit tropical to make everyone forget the dreary weather outside.  And what's more tropical than a pineapple?

PineapplePineapple crisp

This recipe is a fun twist on the traditional crisp.  I do love a good apple crisp, but the apples at my grocery store are not looking so hot these days, and the berries are expensive this time of year.  Pineapples, on the other hand, must be in season somewhere in the world because they were sweet, juicy, and on sale at my grocery store!  I'd never thought to use them in a crisp before, but they were a fun surprise for everyone at dinner, who'd expected something a bit more traditional.

Pineapple crisp toppingPineapple crisp topping

This dessert definitely turned out good - everyone at the dinner seemed to enjoy it - but it wasn't my favorite of all time.  I found the pineapple to be really sweet - and although I usually enjoy sweet, it was a bit much for me.  I would not recommend using canned pineapple for this because I think it would amplify the sweetness even more.  The ice cream helped to counteract the sweetness a little bit, but if I made this again I'd probably add some fresh mango and papaya, maybe even some kiwi, to keep the tropical theme but cut down on the sweetness.

Pineapple crisp

The topping was also good, but not great.  My mom has a crisp topping somewhere that I need to find - it's thicker and more buttery - which of course means better. The only complaint I got was that there wasn't enough topping (isn't that always the case with crisps?) so I'd probably amp that up a bit as well.  Still, we found our bit of beach on an otherwise snowy night, and I think it was a pretty excellent ending to a delicious Friday night dinner with friends.

Pineapple crisp

Fresh Pineapple Crisp
from Heather's Dish

Ingredients
filling
1 whole pineapple, peeled, cored, and cut into 1-inch pieces
2 Tbsp flour
2 Tbsp brown sugar
1/2 tsp cinnamon
topping
1 cup rolled oats
1/4 cup flour
1/4 cup granulated sugar
4 Tbsp butter (I used it right out of the fridge)
1/2 tsp sea salt

Instructions
1. Preheat your oven to 375.  Butter a 9x9 baking dish.
2. In a big bowl toss together the pineapple, 2 Tbsp flour, brown sugar, and cinnamon and stir until the flour is coating all of the pineapple. Pour into buttered 9×9 dish.
3. In another bowl combine the oats, 1/4 cup flour, sugar, butter and salt, and using your fingers press the butter into the ingredients until the final mixture is crumbly. Sprinkle evenly on top of the pineapple.
4. Bake at 375 for 30-45 minutes until the pineapple is bubbly and the top is golden brown. Serve with vanilla ice cream.

Monday, January 23, 2012

Sweet and Fiery Pork Tenderloin with Mango Salsa

Sweet and Fiery Pork Tenderloin with Mango Salsa

The Chinese New Year is today!  The blogosphere has been blowing up with lots of fun recipes for the Chinese New Year, so I thought it might be fun to bring you one.  I chose this recipe because it was healthy (I love Skinny Taste!), can be eaten all year long, and was a little bit outside of my comfort zone.

To be honest, I have never made pork tenderloin in my life.  I think I've only eaten it once before and it was so overcooked that I though I just didn't like pork tenderloin.  I'm the type of girl who orders my steaks on the rare side of medium rare.  I'm glad that I finally made it myself, because it turns out pork tenderloin is awesome!

Sweet and Fiery Pork Tenderloin

I knew the Monkey Scientist would enjoy this recipe because it called for his favorite - Sriracha.  For Christmas, I got him the Sriracha cookbook.  We've only tried one recipe so far and it was so-so, but we're aiming to try many more.  Sriracha is so good on any type of meat, and this pork was no exception.  We also may or may not have drizzled more Sriracha on top of the meat before we ate it... and the Monkey Scientist might have also zipped his pork in even more like ketchup...don't judge us.  (But if you want to ship us a few more bottles, we are running low!)

Mango Salsa

So honestly, I didn't like the mango salsa in this.  I left out the cilantro because it's the worst herb ever I don't like it, but the Monkey Scientist convinced me to leave some jalapeno seeds in and it was way too spicy for me.  Also, I had lemon juice instead of lime juice and really that isn't a valid substitution.  I liked the idea of the mango salsa, but I need to work on the execution.  The Monkey Scientist liked it though, which means if you have a high tolerance for heat, you will too!

Sweet and Fiery Pork Tenderloin

Even though the salsa wasn't great, I loved the pork tenderloin.  It was moist, sweet, a bit spicy, and absolute perfection.  This was such a great substitute for steak, which I almost never make because of cost and lack of nutrition.  I don't love to have a big hunk of meat every night, but sometimes I just crave something medium rare that I can sink my teeth into, and this totally did the trick.  I absolutely recommend drizzling it in some extra Sriracha and serving it up with a roasted veggie, like cauliflower.  I also think this is one you can trick your picky-eater kids to eat - it really isn't that spicy and you can always cut off the outside if they're super particular (and then you get to eat it, because it's totally the best part!).  Now I want to try more pork tenderloin recipes!

Sweet and Fiery Pork Tenderloin

Sweet and Fiery Pork Tenderloin with Mango Salsa
From Skinny Taste

Ingredients:
for the salsa:
1 large ripe mango, peeled, seeded and coarsely chopped
1-2 tbsp chopped fresh cilantro (I obviously left this out because it's soapy and gross)
1 small clove garlic, minced
1 tbsp minced jalapeño, seeds removed and diced
2 tbsp fresh lime juice
for the pork:
1 tsp garlic salt
1/2 tsp ground ginger
1 lb pork tenderloin
1/4 cup Sweet Red Chili Sauce (I used Taste of Thai)
1 tbsp honey
1/2 tsp Sriracha sauce (or more to taste)

Directions:
for the salsa:
Combine all the ingredients in a bowl, season to taste with salt and pepper. Refrigerate salsa until ready to serve.
for the pork:
1. Preheat oven to 375°.
2. Mix garlic salt and ginger in small bowl. Rub evenly over pork. Place pork on rack in foil-lined roasting pan. (I just used a tin foil roasting pan - easy clean up!)
3. Mix chili sauce, honey and sriracha in small bowl.
4. Roast pork in preheated oven 40 to 45 minutes* or until desired pork is cooked to your liking.  About 10 minutes before it is done (when your pork is maybe 5° away from the temperature you want it), brush the entire loin with the chili sauce mixture. (New pork guidelines allow pork to cook to 145°, if you prefer it cooked well, cook it until the internal temp reads is 160° with a meat thermometer.)  *My 1 lb loin was actually split in half, and it was cooked to between 145-150° after about 25-30 minutes.  It was medium rare perfection!
5. Slice pork and serve with pan juices and mango salsa on the side. (I also served with some roasted cauliflower)

Thursday, January 19, 2012

Picadillo and Eggplant Soup

picadillo and eggplant soup

After I made Stuffed Pepper Soup, I wanted to keep turning my favorite recipes into soup.  So where better to turn next than to one of my favorites - Picadillo Eggplant Boats?  So that's exactly where I headed.

picadillo and eggplant soup

Even though I hate tomato soup, I loved the tomato base of the Stuffed Pepper Soup.  Since the original recipe called for tomato paste, I figured it wouldn't be too far of a stretch to use the same liquid base as in the stuffed pepper soup, while keeping everything else nearly identical to the Picadillo Eggplant Boats.  I also used the same general methods of the Stuffed Pepper Soup, since it was super simple and came out so great.

picadillo and eggplant soup

As for the eggplant, I suppose I could have served the soup in boats - but I felt like that'd be a bit messy.  Instead, I chopped them up... OK, the Monkey Scientist chopped them up... and we threw them in to cook down and add more substance to the soup.  I was nervous at first that they wouldn't cook enough, but they turned out pretty close to perfect.

picadillo and eggplant soup

I was nervous about how this soup would be, but we both ended up loving it!  It was hearty, despite it's lack of a grain, and loaded with a unique flavor.  I would never think to add raisins to soup, but they added the perfect bit of sweetness and puffed up so they actually looked like beans.  The balance of sweet, spicy, and umami made this soup a perfect winner for a winter soup.

picadillo and eggplant soup

Picadillo and Eggplant Soup
adapted from recipes I posted for Picadillo Eggplant Boats and Stuffed Pepper Soup

Ingredients
2 tbsp olive oil
1 lb ground pork
1/2 tsp cinnamon
1/2 tsp oregano
1 tsp crushed red pepper flakes
1 tsp ground allspice
1/4 tsp salt
1/4 tsp garlic powder
1 medium sized yellow onion, diced
2 cloves garlic, minced
1 small graffiti eggplant, diced
2 cans (14.5 oz each) cans petite diced tomatoes
2 cups tomato sauce (I used one 14.5-oz can and 8-oz can of Hunt's)
2 cups reduced sodium, fat-free chicken broth (I used Cottage Inn)
2 tbsp apple cider vinegar
1 tsp molasses (it helps to spray the measuring spoon with Pam)
1/4 c raisins

Instructions
1. Heat olive oil in a dutch oven or large, heavy pot over medium-high to high heat. Add ground pork and cook until brown, seasoning with cinnamon, oregano, red pepper flakes, allspice, salt, and garlic powder.
2. Reduce heat to medium or medium-low and add onion, garlic, and eggplant. Cook for 5-8 minutes until beginning to soften.
3. Add tomatoes, tomato sauce, chicken broth, apple cider vinegar, molasses, and raisins. Cover and simmer on medium-low to low heat for 30 minutes. Serve immediately.

Wednesday, January 11, 2012

Tom Yom Shrimp and Noodle Soup

Tom Yom Soup

Something that's always disappointed me about DC has been the lack of ethnic culture in the city.  Sure, we have some really great restaurants, but where am I supposed to get my chopped liver? Where can I get a hot stone bi bim bop? And, maybe I'm just from Boston and have always been spoiled, but I've yet to have a really good (and not overpriced) Italian meal - with homemade pasta, fresh seafood, and way over-sized portions.

Tom Yom Soup

After being here for a while, I found that there is one ethnic fix that I can't get in the District - but exists just a short drive away (when someone's willing to take me).  Fantastic, authentic (I don't mean orange flavored chicken) Chinese food.  "Chinatown" in DC is a hoax - it mostly has a bunch of chain stores and restaurants (like Legal Seafood and Clyde's) with their names in Chinese.  The real Chinatown exists just north of the District in southern Maryland.

Tom Yom Soup

This weekend, the Monkey Scientist and I took a trip up to Wheaton, MD.  We had some really good dim sum at Hollywood East and then made a trip to the H Mart there.  I have to admit, not the best H Mart I've ever been to, but I found nearly everything I needed for several dishes - including this Tom Yom soup.  Tom Yom is one of my favorite soups - Paragon Thai and Spices in Cleveland Park make delicious versions.  I've been wanting to try making my own for a few months now, so I got all of the ingredients I could at H Mart to make it this week!

Tom Yom Soup

My Tom Yom Soup broth wasn't as dark or red as the versions I've eaten in restaurants.  I think that this color may come from using dried chilis and frying them with the shallots at the beginning - I'd like to try making this again to see if that works.  The flavor however, was really close - I was actually surprised!  And man oh man is this broth good - sweet, sour, a little bit spicy, and the lemongrass is so unique and brings great depth of flavor.

I decided to add rice noodles to give this soup a little more substance so that we could have it as dinner - Paragon Thai has a version similar to this that they serve as a meal - but if you wanted to serve this as an appetizer you could leave them out.  I also changed the recipe below to use about half as many noodles as I actually used, since they soaked up almost all of the broth, and the broth really is the best part.

You could also add more vegetables at the end if you wanted, but I like the simplicity of this soup with such a complex broth.  Other things that may make sense to add would be chicken and green onions (my store has been out of green onions for a while).  My final review?  This a really great soup that will impress your family and friends.  Take a trip to your local Asian market and make this - you won't regret it!

Tom Yom Soup

Tom Yom Shrimp and Noodle Soup
Adapted from Wandering Chopsticks and Tyler Florence

Ingredients
1 lb shrimp with shells and heads
2 tbsp olive oil
1 large shallot, sliced
2 cloves garlic, minced
2 inch knob galangal or ginger, minced
2 quarts fish stock (water or chicken stock would work, too)
2 tsp tamarind paste (optional, but add umami)
2 stalks lemongrass, bruised
1 tsp salt
2 tsp sugar (white or brown)
1 tbsp fish sauce
3 small Vietnamese red chili peppers, diced (more if you like it hot)
2 limes, zested and juiced
4 oz small-width rice stick noodles
1 15-oz can straw mushrooms, drained

Instructions
1. Peel and de-vein shrimp. Set aside both shrimp and the shells in separate bowls.
2. In a heavy pot over medium heat, heat oil. Once hot, add shallots, garlic, and galangal or ginger. Sauté until edges begin turning brown.
3. Add shrimp heads and sauté until pink. Add stock.
4. Mix in tamarind paste, lemongrass, salt, sugar, fish sauce, chili peppers, lime juice and zest. Simmer 1/2 hour.
5. Meanwhile, soak noodles in warm water for 5-10 minutes. Strain.
6. Strain out all of the ingredients from the soup to get a clean broth. Return to a simmer/gentle boil then add shrimp, noodles, and mushrooms. Cook for 5-8 minutes until noodles are soft and shrimp is cooked through. Serve immediately.

Sunday, January 8, 2012

Tortilla Pizzas

Tortilla Pizzas

I have a confession to make.  These are iPhone photos.  And, I was simply the sous chef behind this recipe. It was a Monkey Scientist creation (although I may or may not have emailed him the recipe).  Regardless, this is such an easy, healthy recipe, that I wanted to share it with you despite not having my camera with me when the MS was cooking.  Forgive any lack of quality in photos - it doesn't indicate a lack of quality in the recipe.

Tortilla pizzas

My next warning I should give you, is about the jalapenos. They make this pizza VERY spicy, especially if you use whole slices, with seeds, and as many as we did.  The Monkey Scientist liked it, but my mouth was on fire and I ended up having to peel a lot of them off.  Giardiniera was a little less spicy, although of course it's very regional and you may not be able to find it (the Monkey Scientist may or may not have smuggled a jar back with him from Chicago).  If you're not into spicy (I'm talking to you, Mom and Dad), leave the jalapenos out.  The pizza will still be delicious!

Tortilla Pizzas

I am a huge pizza lover.  I mean seriously, who isn't?  But come New Year's Resolution time, it just doesn't fit the healthy diet I'm striving for.  These tortilla pizzas are such a great alternative.  The carb-filled crust is swapped out for a crispy, crunchy tortilla.  It's no Chicago deep dish, but it turns into almost a sweet cracker - absolutely awesome.  Plus, if you load on enough veggies, you don't need to add nearly as much cheese while maintaining that cheesy taste of a delicious pizza.

Tortilla Pizza

I love this pizza! It can be adapted so many different ways to fit the ingredients you love.  While we pretty much stuck by the original recipe, we added sausage for some extra protein. I absolutely LOVED the white beans in it.  I didn't stick by the proportions of the original recipe, but compared to what you see on my pizza, I wish I'd had a lot more beans.  Per usual, I also dug the artichokes on this pizza - they're one of my favorite things.  As far as portions - I had 1 plus less than 1/4 of a second, and the Monkey Scientist ate 2.  I would aim for 1 for a light (read: female) meal and 2 for a more robust (read: male) meal.  This would also be a really fun recipe to make with your kids - let them load the toppings on themselves! (Just do the "putting in the oven" yourself please!)

Tortilla Pizzas

Tortilla Pizzas
from Eighty Twenty, with some small additions

Ingredients
4 10" whole wheat flour tortillas
3 Tbsp olive oil, divided
1 cup sliced onions
2 tsp minced garlic
1 cup white beans, drained and rinsed well
1 1/3 cups quartered artichoke hearts (patted dry if canned), separated into smaller pieces
1/2 cup low fat, low sodium chicken sausage, sliced (optional)
1 1/3 cups baby spinach leaves, stemmed
2 oz crumbled feta cheese
1 cup shredded part-skim mozzarella cheese
1/4 cup jalapeno slices or giardiniera (optional)

Instructions
1. Preheat oven to 350 degrees.
2. Heat 1 tsp in a skillet over medium heat. Add sliced onions and saute until soft, ~5 minutes. Remove from heat and set aside.
3. On each tortilla, spread 1/2 tsp olive oil. Sprinkle 1/2 tsp minced garlic onto each tortilla, then spread white beans, artichoke pieces, sausage, spinach leaves, sauteed onions, cheeses and jalapenos (if desired) evenly onto tortillas.
4. Place in oven, directly on middle rack or on a cookie sheet, and bake for 10-16 minutes, or until tortilla is crispy and cheese is melted. Remove from oven and allow to cool for ~2 minutes prior to cutting into quarters and serving.

Thursday, January 5, 2012

Roasted Shrimp and Orzo

Roasted Shrimp & Orzo

I'm back!  I had a beautiful holiday full of twirling princesses, a white Christmas, a little skiing, and lots of love in both New Hampshire and Chicago.  I hope you had a great holiday season as well!

Princess twirl

Now that I'm back, it's back to the kitchen!  This week I decided to try out a recipe that you might have seen before.  Apparently, it's made commonly enough that when I brought in leftovers for lunch my coworker knew within minutes which recipe I'd made.  But I made a couple of changes to make it my own, so hopefully it will still be a bit fresh for you!

Roasted Shrimp

One of my favorite gifts this holiday season (though there were many) was from my baby bro, who had just returned from a trip to Israel.  He visited Capernaum Vista Olive Farms on his trip, where he watched olive be pressed fresh, right in front of him! He brought me back a 3 pack of different high end extra virgin olive oils, all of which are delicious, and which were perfect for using in this recipe. (Just don't tell the Kosher Israelis that I put their olive oil on shrimp...)

Orzo

I still had lots of fish stock in my freezer from October, so I decided I'd add a little flavor to my pasta by boiling it in fish stock instead of just water.  I'm not sure it made a whole lot of difference, but gave a nice undertone to the dish.  One of my New Years resolutions will be to experiment with making new types of stock this year - I think that making my own chicken/beef/vegetable/lamb broths will be a lot more versatile than the fish broth, since I can't get the best seafood in DC.  Does anyone have any ideas for what to do with my last 2 quarts?

Roasted Shrimp & Orzo

We really enjoyed this dish overall!  I can't say it was my favorite dish of all time - it doesn't quite have our usual high impact flavor profile - but it was easy to throw together, tasty, and healthy.  It was lemony, fresh, with some light protein from the shrimp (which were cooked to perfection after ~5 minutes), and I adore eating orzo.  It'd be a great dish to bring to a potluck or on a picnic. It's also a pretty ideal dish to throw together when you need to eat a quick dinner so you can snuggle into bed to watch your team win the Sugar Bowl.  And on that note, GO BLUE!

Roasted Shrimp & Orzo

Roasted Shrimp and Orzo
adapted from the Barefoot Contessa

Ingredients
1 quart fish stock (optional)
1/2 box orzo pasta (I like Barilla)
Kosher salt
Good olive oil (like this)
1/2 cup freshly squeezed lemon juice (1 1/2 lemons)
Freshly ground black pepper
1 pound shrimp, peeled and deveined
1/2 cup freshly chopped mint
1/2 cucumber, unpeeled, seeded, and medium-diced
1/4 cup small-diced red onion
1 cup feta cheese, large diced

Instructions
1. Preheat the oven to 400 degrees F.
2. Fill a large pot with fish stock or water (fish stock just adds extra flavor! If using water, add 1 tablespoon of salt and a splash of oil), and bring to a boil. Add the orzo and cook until al dente (follow your package instructions). Drain and pour into a large bowl. Whisk together the lemon juice, 1/2 cup olive oil, 2 teaspoons salt and 1 teaspoon of pepper. Pour over the hot pasta and stir well.
3. Meanwhile, place the shrimp on a sheet pan, drizzle with olive oil, and sprinkle with salt and pepper. Toss to combine and spread out in a single layer. Roast for 5 to 6 minutes, until the shrimp are cooked through. Don't overcook!
4. Add the shrimp to the orzo and then add the mint, cucumber, onion, 2 teaspoons salt, and 1 teaspoon pepper. Toss well. Add the feta and stir carefully. Unless you're totally impatient like me, set aside at room temperature for 1 hour to allow the flavors to blend, or refrigerate overnight. If refrigerated, taste again for seasonings and bring back to room temperature before serving.