Showing posts with label garlic. Show all posts

Friday, July 5, 2013

Guacamole

Guacamole

I hope you had a wonderful 4th of July!  We spent the evening on a friend's rooftop, where we could see fireworks in every direction.  It was spectacular!  And all of the fireworks were just far enough away that I wasn't irrationally afraid of them, like I often am.  Win!

Guacamole

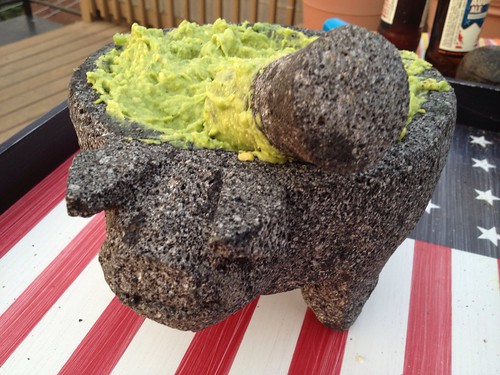
The 4th is a particularly big celebration in the Monkey Scientist's family because so many family birthdays fall right around the holiday.  We've had a blast celebrating all week long, and it will continue this weekend!  For our birthday gift to the Monkey Scientist's brother and his girlfriend, we gave them this mortar and pestle from Sur la Table that I just love!  Not only is it made of volcanic rock, it's a little pig! Too cute. Of course we gave it to them on the 4th so that we could make guac for the party.

Guacamole

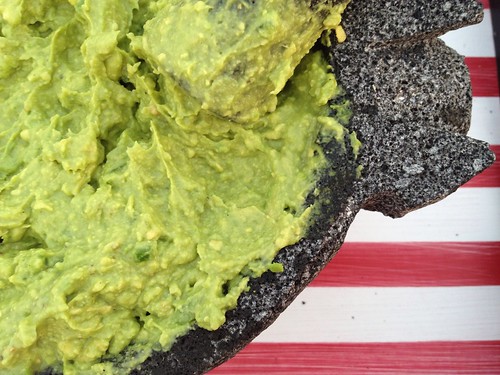
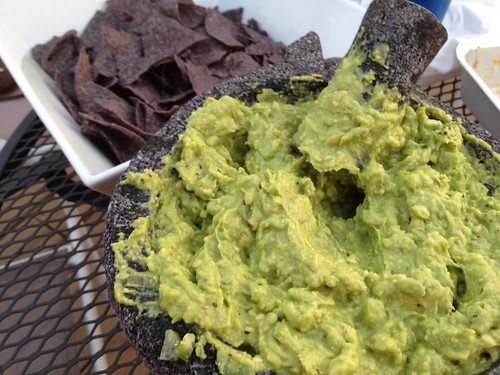
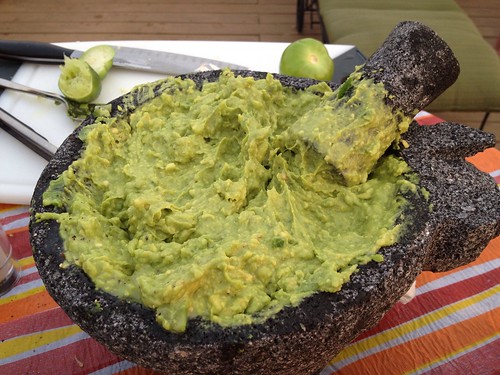
Much overdue to all of you, here is my go-to guacamole recipe.  I guess over the years I've adapted it from a plethora of recipes out on the web and made it my own.  We make it all the time - especially for big parties or family dinners.  It goes great on burgers, tacos, or just with chips.  It's the perfect treat for the summertime!  If you're not familiar with tomatillos, they're often sold with the tomatoes and avocados.  They look like miniature green tomatoes but they naturally have a paper-like outside that easily peels off.  They can be a bit sticky but that comes off with a good rinse under cold water.  They're the secret to my famous guacamole!

Guacamole

Guacamole

Ingredients
3 ripe avocados, removed from skins, pitted, and cut into chunks
1 medium to large tomatillo, diced
2-3 cloves garlic, diced
1 jalapeño, diced
juice of 1 lime
1 tsp salt
1 tsp freshly ground black pepper
1/2 tsp cayenne pepper (or more if you like spicy)

Instructions
1. Add the avocado, tomatillo, garlic, and jalapeño to a large bowl or mortar.  Smash with the back of a spoon, a potato masher, or a pestle until only small chunks remain.
2. Add the lime juice, salt, pepper, and cayenne pepper and stir to incorporate.

Monday, May 13, 2013

Bacon Chicken Caesar Salad

Bacon Chicken Caesar Salad

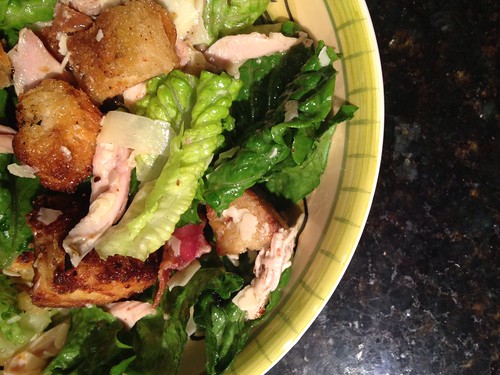
Before my parents moved up to the lake, I used to spend my vacation time in New England on Cape Cod with my aunt, uncle and little cousins.  It's a shame that it's becoming harder and harder to squeeze in any time on the Cape now that I've moved further away and my job doesn't have the flexibility of my college internships.  I miss lobster rolls, my daily serving of incredible ice cream, and especially my Aunt's Chicken Caesar Salad (which she got from Jamie Oliver).  So with the first bit of what felt like summer last week, I was craving this salad for dinner.
Bacon Chicken Caesar Salad

Obviously I didn't quite think through the fact that having our oven on 400 for 2 hours on the first day when Chicago had temperatures over 80 was probably not the best idea I'd ever had.  But when I got home from yoga and this salad was done, I didn't even care that I was sweating bullets.  I was transplanted to a summer day on the Cape when I could still carry my littlest cousin to the beach and when she saw me her face lit up like I was Santa Claus.  Nowadays I just get pictures of her wearing high heels and makeup.  Sigh.
Bacon Chicken Caesar Salad

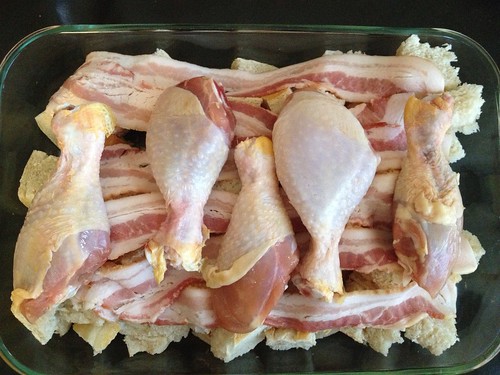
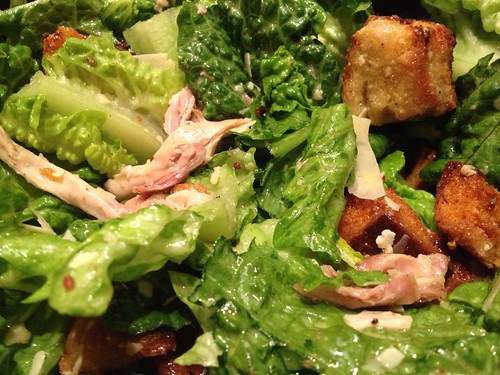
There are a couple of things to note about this salad.  The first is that this is not a "look I'm on a diet so I'm eating salad for dinner" salad.  You just let a loaf of bread soak up chicken fat and bacon grease for 2 hours and then ate it.  Don't kid yourself.  On a side note, these are literally the best croutons in the entire world.

If you do burn them a little bit because you turn the broiler on and then get distracted doing something important like studying for med school finals (I'm not saying that the Monkey Scientist burned all of the croutons while I was at yoga or anything like that), try to salvage them and just cut off the charred bits.  They'll be just fine as long as you didn't burn the whole thing!
Bacon Chicken Caesar Salad

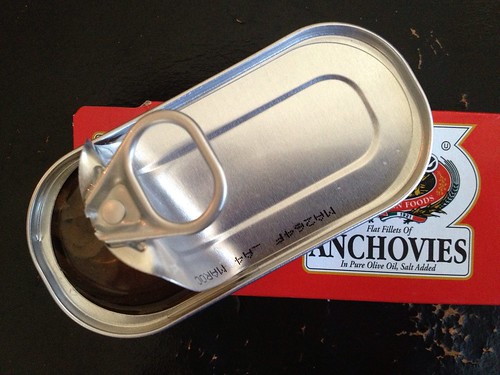
The second is anchovies.  Yes, I know you're scared.  Yes, they smell like cat food (and look like it once you mash them up).  No, they aren't something I want on my pizza.  But this is Caesar salad folks. And without anchovies, it just isn't Caesar dressing.  I promise they won't taste like cat food once you drown them in olive oil, creme fraiche, and lemon juice.  Just trust me on this one, OK?  On the bright side, who knew that a can of anchovies cost barely more than a dollar? I don't even feel that bad that I threw the rest of the can away (because what the heck was I going to do with leftover anchovies).
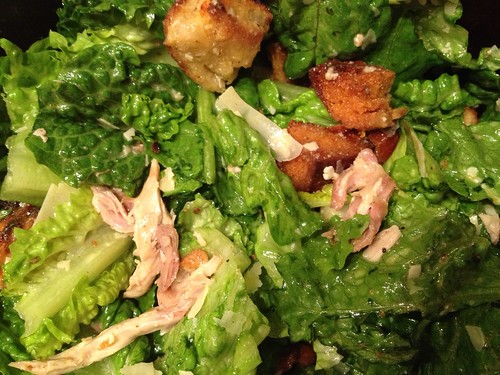
Bacon Chicken Caesar Salad

Now when I say this is my favorite Caesar salad ever, I'm not joking.  The dressing is creamy and delicious. The croutons soak up all that fat, get crispy in the oven, and then when you put the dressing on them they soak it up and become chewable without destroying your teeth.  Again, best croutons in the world.  I enjoy the baked, dark meat chicken on this about 1000 times more than the rubbery slices of grilled chicken breast you get anywhere else.  Although my aunt actually uses bone-in, skin on chicken breasts and it works great, too.  And despite the fact that the roommate made a side of pasta, I stand by the fact that this salad is a solid meal.  Even the Monkey Scientist had it for his whole dinner.  It's worth every minute of sweltering over the oven.
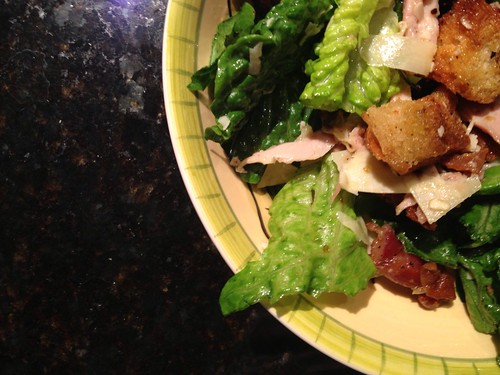
Bacon Chicken Caesar Salad

Bacon Chicken Caesar Salad
slightly adapted from Jamie Oliver

Ingredients
4-6 chicken legs, skin on
1 round loaf sourdough bread (about 9 ounces), chopped into 1.5" cubes
6 slices bacon
3 tbsp olive oil
Sea salt and freshly ground black pepper
3 sprigs fresh rosemary, leaves picked and roughly chopped
1 large head romaine lettuce, chopped
dressing
1 clove peeled and smashed garlic
4 anchovy fillets in olive oil, drained
3 oz freshly grated Parmesan, plus a few shavings to serve
1 heaped tbsp creme fraiche
1 lemon, juiced (about 2 oz)
Extra-virgin olive oil (about 6 oz)

Instructions
1. Preheat the oven to 400 degrees F.
2. In a large glass baking dish, lay out the cubed bread, then bacon, then chicken legs.  Drizzle with about 3 tbsp (or more) olive oil and sprinkle with freshly ground sea salt, black pepper, and chopped rosemary.  Toss to coat evenly.
3. Bake at 400 degrees F for 25-35 minutes, or until the chicken can easily be peeled off the bone.  Remove the chicken, and toss the bacon and croutons.  Make sure to leave all the fat drippings from the chicken and bacon in there.  The croutons will soak that up and that's what makes them delicious!  Return to the oven and allow to bake until the croutons and bacon are crispy but not burnt, tossing every 5-10 minutes or as necessary.  If this isn't happening at 400 degrees F, turn the broiler on low, but watch carefully as the croutons could start to burn quickly!
4.  When the chicken has cooled slightly, use your hands or two forks to peel off the skin and discard, then peel the meat off the bones and shred.  Chop the crispy bacon into bite size pieces.
5.  Add the lettuce, chicken, croutons, and bacon to a large salad bowl.
6.  Assemble the dressing: Using a mortar and pestle (or in my case, a small bowl and the handle of a lemon reamer), smash the anchovies and garlic into a thick paste.  Whisk in the grated Parmesan, creme fraiche, juice of 1 lemon, and 3 times as much extra-virgin olive oil as lemon juice.
7.  Pour the dressing over the salad and toss to coat evenly.  Serve with a few Parmesan shavings on top.

Tuesday, May 7, 2013

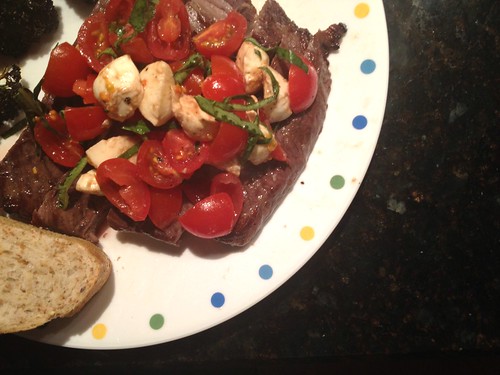
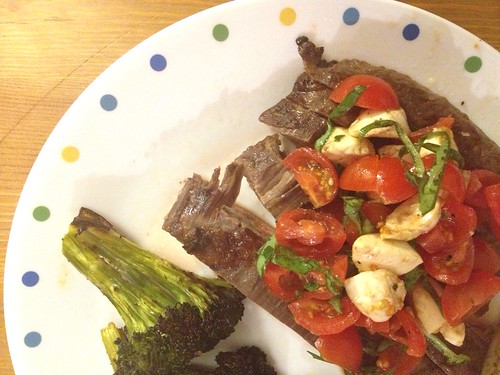
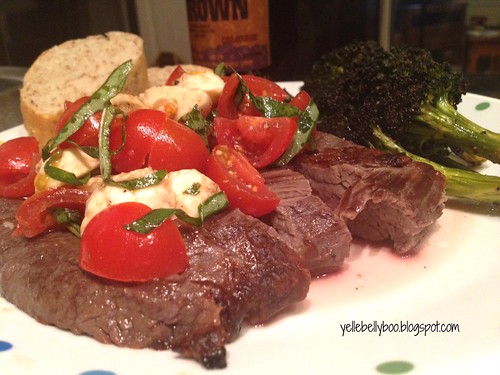
Caprese-Topped Steak

Caprese-topped steak

I have been learning to love craft beers over the last few years.  Since college, I'm not a huge drinker, but I am getting quite skilled at drinking a half to a whole bottle of a really good beer lately.  It's been a long journey from ordering light beers to understanding what types of beers I actually like.  I know I'm not the only one who would choose a nice craft beer over a Bud Light.  The growing number of bars with loads of beers on tap are a statement that wine-lovers aren't the only ones who get to be picky anymore!

Caprese-topped steak

In DC, we used to love going to Comet Ping Pong, where not only is the beer list long, but the pizza is pretty stellar as well.  The fact that you can play ping pong while you wait for a table on their patio doesn't hurt either.  And it was at Comet Ping Pong that I learned to love a brown ale, but more specifically learned that my very favorite beer just might be Tommyknocker's Maple Nut Brown Ale.  If you're surprised that this beer infused with maple syrup is my favorite... Hi, I'm Dani and welcome to my blog that might as well be named yellebelly-full-of-maple.  And lucky for me, I found a single bottle of this gem in the Make Your Own 6-Pack section of my local Jewel last week.  Unlucky for me, I only found a single bottle.  Can we find me some more please?

Caprese-topped steak

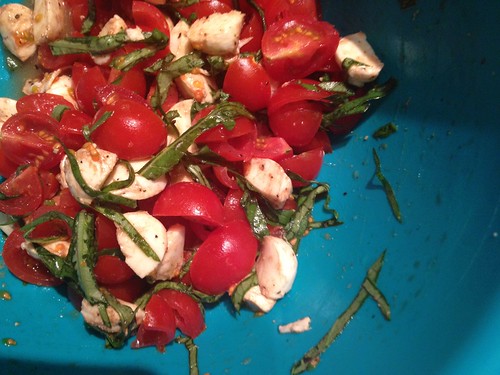
My favorite beer, well most beers really, went great with this flank steak, broiled and topped with a caprese salad.  I know what you're thinking, "wait a minute, Dani, you ate tomatoes?"  Yes folks, I have been learning to tolerate, maybe even like, cherry tomatoes.  As long as they've never seen a refrigerator.  Maybe you can teach an old dog new tricks after all!  Because man, I loved every bite of this dish!

Caprese-topped steak

Caprese-Topped Steak
from How Sweet It Is

Ingredients
1 (2 lb) flank steak, about 1 inch thick
1 1/2 c dry red wine
1/2 c olive oil
4 garlic cloves, minced
1 tsp salt
1 tsp pepper
caprese topping
1 pint cherry tomatoes, quartered
1 small shallot, diced (I left this out)
1/2 c mini mozzerella balls, quartered
10 basil leaves, freshly chopped or chiffonaded
1 tsp balsamic vinegar
1/2 tsp olive oil
1/8 tsp garlic salt
pinch of pepper


Instructions
1.  In a large ziploc bag, combine the steak, red wine, olive oil, garlic, salt and pepper.  Shake it up, then let it marinate for 2-24 hours in the refrigerator.
2. Place the marinated steak on a foil-lined cookie sheet and broil on high for 6 minutes on each side, or until it's starting to char.  You're welcome to grill it too, if you're into that.
3. Pour the extra marinade into a small saucepan and bring to a boil. Turn down the heat and allow to simmer for 10-15 minutes until it is reduced and you've killed all the evil steak bacteria.
4.  In a bowl, combine the tomatoes, shallot (if using), mozzarella balls, basil, balsamic vinegar, olive oil, garlic salt, and pepper.  Toss to coat.
5.  Allow the steak to rest for 10 minutes before slicing (unless you're impatient like me and hungry enough to eat dried out steak).  Serve slices topped with caprese salad.  Serve the reduced marinade on the side as a sauce for those who'd like it (or would like to dip freshly baked french bread in it).

Wednesday, April 24, 2013

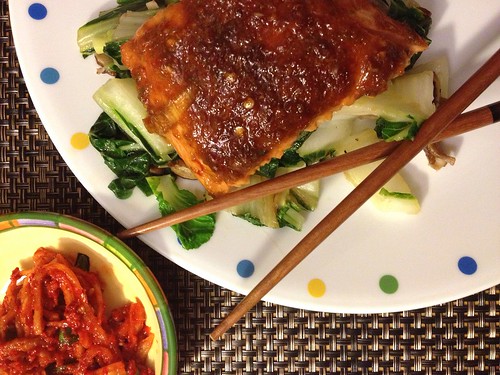
Bulgogi Style Salmon with Bok Choy and Shitake Mushrooms

bulgogi-style salmon

This weekend we finally made a trip up to my favorite type of grocery store - the Asian market.  We hadn't been in so many months, I was running low on lots of my staple ingredients!  Although there are a few Asian markets on the north side of Chicago, I haven't found any Korean markets, and I hadn't found any markets that were very big.  So this weekend was the grand adventure - we went up to the HMart in Niles.

Untitled

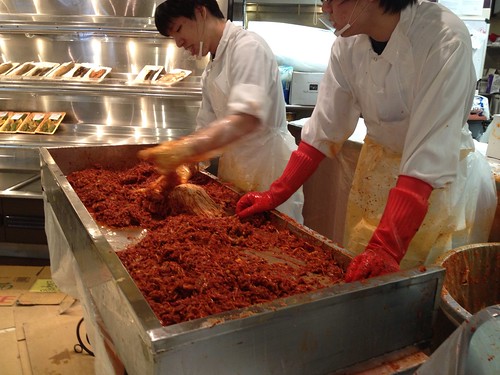
I've been to HMart's in Maryland and Massachusetts, so I knew generally what I could expect.  But the one in Niles is a Super HMart which means it's the size of the Home Depot next door.  We were literally lost in there for hours.  We watched folks making kimchi, tried lots of samples (except the blood sausage... the woman handing out samples didn't think it was a good idea to offer me any), and loaded up on some of our favorite ingredients.

Making kimchi

One fun part of the trip was watching the men at HMart making fresh kimchi.  For those of you who aren't familiar with kimchi, it's a spicy fermented cabbage dish.  It's almost similar to a good half sour pickle.  In Korean restaurants, they often start the meal with a variety of very small side dishes that can include tofu, a type of Korean potato salad, broccoli, and always kimchi.  I'd never seen anyone make it before so this was a special treat for me.  They pull the cabbage to shreds while they're mixing it with the spices and vinegar.  Pretty cool!

Untitled

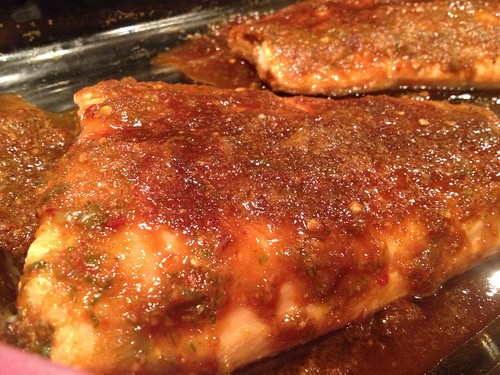
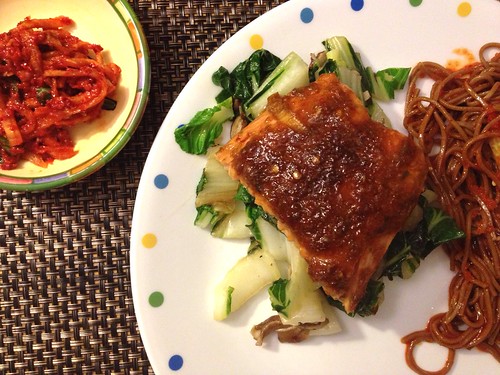
This salmon dish was really delicious. It was a nice change of pace from our usual lemon juice and garlic salt preparation.  It was just a little bit spicy from the sambal oelek and was sweetened by the sherry and sugar.  The ginger, garlic, and soy sauce rounded out the traditional Asian flavors.  In Korean tradition, I served a side of the freshly made kimchi along with our meal, which was spicy and pungent.  My favorite!  I especially liked the bed of bok choy and mushrooms under the salmon.  Stay tuned for the final component of the meal!

bulgogi-style salmon

Bulgogi-Style Salmon with Bok Choy and Shitake Mushrooms
slightly adapted from WeHeartFood

Ingredients
3 large garlic cloves, peeled, divided
1/3 cup chopped green onions
1/4 cup low-sodium soy sauce
1 tbsp cooking sherry (Chinese rice wine would work, too)
2 tsp minced fresh ginger, divided
2 tsp sugar
1 tsp sesame oil
2 tsp chili-garlic sauce (sambal oelek)
2 salmon fillets, 0.5-1 lb each
1 tbsp olive oil (or chili-infused olive oil)
1 bunch bok choy, bottoms removed and cut crosswise into 1/2-inch-wide strips
8 oz fresh shiitake mushrooms, sliced

Instructions
1. Preheat the oven to 500 degrees F.
2. Combine 2 of the garlic cloves (I broke them up slightly but didn't bother mincing), green onions, soy sauce, sherry, 1 tsp of ginger, sugar, sesame oil, and chili-garlic sauce.  Blend using either your immersion blender or food processor until smooth to create your marinade.
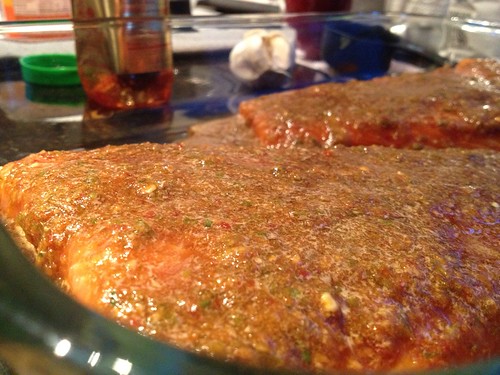
3. Place the salmon in a glass baking dish.  Pour the marinade evenly over the salmon fillets and allow to marinate for at least 5 minutes.  Bake for 8 to 12 minutes, or until the salmon is just opaque at the center.
4. Meanwhile, place the olive in a wok and heat over medium high heat.  Add the remaining clove of garlic, minced, and 1 tsp of ginger to the oil and heat until fragrant.
5. Add the bok choy and mushrooms and saute until the mushrooms are soft and the bok choy is wilted.
6. Serve the salmon over a bed of bok choy and mushrooms.

Tuesday, March 19, 2013

Smokey Roasted Chicken Tacos with Spicy Goat Cheese Crema

Chicken and goat cheese creama tacos

As you probably guessed, I've been having a lot of internal debate lately.  There are a lot of days where I just say, that's it. I want to quit the blog.  But then, like the hot girl at the gym, a recipe comes along that I have to share with you that changes my mind.  So I'm back here again.  So don't despair.

Chicken and goat cheese creama tacos

So what have you missed?  We had a delicious Valentine's Day dinner at what just might be our favorite restaurant in Chicago.  I am so excited for my a la Chicago cards to come in the mail so we can go back again ASAP.  The Monkey Scientist had a milestone birthday, which called for two cakes - a graham cracker torte from me and a carrot cake (his favorite) from his mom.  We had a romantic French dinner for our anniversary at a Chicago institution.  And now, of course, Cadbury Mini Eggs have returned to my daily food pyramid.  They almost make up for the fact that Spring has definitely not sprung yet in Chicago.

Chicken and goat cheese creama tacos

For my loyal DC following, I did make a quick trip back to my former home last month.  It was great to be back, even just for a couple of days.  I got in an amazing workout with my old trainer who I miss every time I work out in Chicago.  No one can kick my butt into shape quite like he can.  I also had a really great dinner at Maple with some friends I love and miss every day.  That little corner of Columbia Heights has really transformed since I moved with new restaurants and bars! I'm loving what's going on there food-wise.

Chicken and goat cheese creama tacos

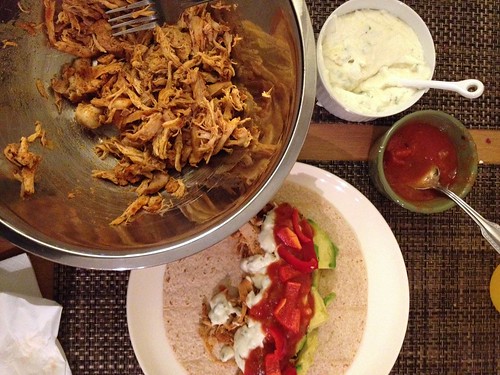
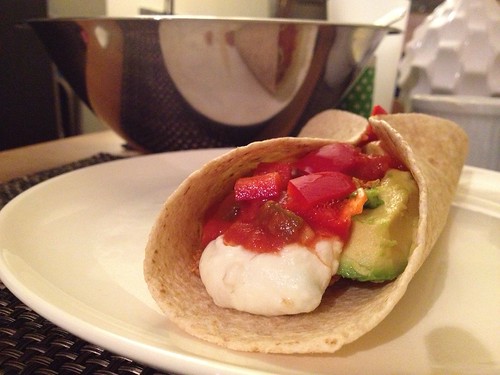
Oh, you just wanted to hear about the tacos?  The tacos are incredible.  This is not your every-Tuesday taco.  It's definitely up a level.  The goat cheese crema has a kick from the jalapenos that I really enjoyed.  And the chicken is smokey, spicy and exactly what I needed.  Way better than my standard ground chicken/turkey (even though I do love my homemade taco seasoning blend).  It takes a little more work, but it's still a pretty easy weeknight dinner if you give yourself the time to roast the chicken.  We will definitely be having this one again soon.  Or at least making some more crema, because I could eat that stuff with a spoon. (OK, I did eat some of it with a spoon.)

Chicken and goat cheese creama tacos

Smokey Roasted Chicken Tacos with Spicy Goat Cheese Crema
slightly adapted from How Sweet Eats

Ingredients
1.5-2 pounds boneless, skinless chicken thighs
1 sweet onion, sliced
1 tsp smoked paprika
1/2 tsp Kosher salt
1/2 tsp pepper
1/2 tsp cumin
1/2 tsp chili powder
1/4 tsp garlic powder
1/4 tsp cayenne pepper
2 tablespoons olive oil
2 limes, sliced into wedges
spicy goat cheese crema
1 tablespoon coconut oil (or unsalted butter)
1/2 jalapeño pepper, diced
1 garlic clove, minced
1 tablespoon flour
1/2 cup milk
6 ounces goat cheese, crumbled
salt and pepper
for serving
whole wheat tortillas, warmed
chopped tomatoes
sliced avocado
diced red onion
tequila lime salsa
lime wedges

Instructions
1. Preheat oven to 425 degrees F. Spray a glass baking dish with nonstick cooking spray.
2. In a small bowl, combine the salt, pepper, paprika, chili powder, cumin, garlic powder, and cayenne, mixing to combine.
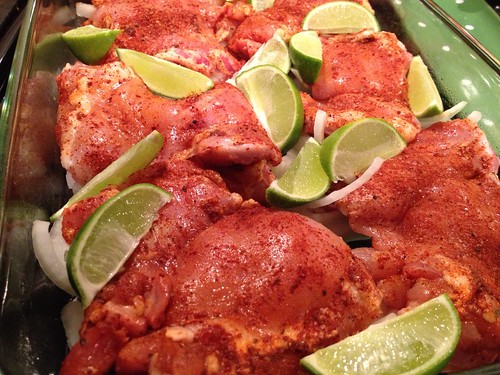
3. Pat the chicken thighs dry with a paper towel, then rub to coat with the spice mixture/
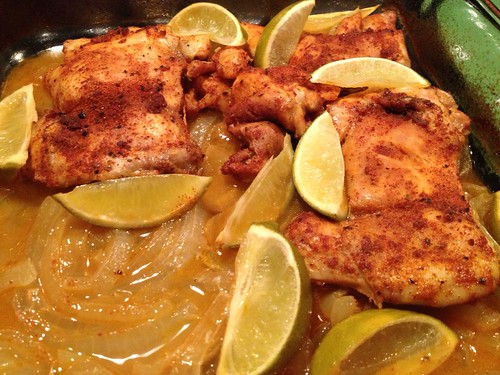
4. Spread the sliced onions evenly across the bottom of the baking dish, then set the chicken on top. Place lime wedges in between the chicken pieces. Cover tightly with foil and bake for 45-60 minutes.
5. Remove chicken and let cool slightly, then shred with two forks.
6. While the chicken is cooling, make the goat cheese crema:  In a medium saucepan, melt the coconut oil over medium heat.  When completely melted, add the garlic and jalapeno, cooking while stirring for 1-2 min.  Add the flour and whisk to form a roux.  Allow to cook for 1-2 minutes to brown very slightly.  Then, whisk in the milk.  Reduce the heat to low and allow to cook for another 1-2 minutes until thick.  Stir in the goat cheese until entirely melted, then season with salt and pepper.
7. Assemble the tacos on warm tortilla shells, with the shredded chicken, goat cheese crema, tomatoes, onions, avocados, and salsa.  If desired, top with fresh squeezed lime juice.


This recipe was featured on Full Plate Thursday!
Miz Helen’s Country Cottage

Sunday, October 14, 2012

The BEST Brisket

Brisket

I have owed you this blog post for a long time now.  I actually made this brisket for Rosh Hashana... which somehow became nearly a month ago.  Time has been slipping away from me so quickly - I can't believe it's mid-October.  Anyways, even though it took me a long time, I had to share this recipe with you.  It's probably the best piece of meat I've ever cooked.

BrisketBrisket

Although I've hosted a few Passover dinners, this was my first time hosting Rosh Hashana.  Now that we're living in Chicago, we are lucky enough to be able to share the holidays with the Monkey Scientist's family.  We had his parents, brother, and brother's girlfriend over for Rosh and it was the best time.  They're all so nice and wonderful to be around.  And the food was beyond plentiful.  We had enough to feed at least 10 more people!  I guess that's what happens when you literally cook from Friday night until Sunday night for just about every waking hour....

BrisketBrisket

The star of the meal was definitely this brisket.  I hid it behind some tzimmes (which wasn't so popular at Rosh night 1, but was a hit when I brought the leftovers to a friend's house for night two!), but it still managed to shine.  Although this recipe takes a long time, Nach Waxman is the man to trust when it comes to brisket.  After all, he owns the largest food-related book store in the country!

Brisket 

I should warn you, however,  that you have to slice 8 onions for this recipe. EIGHT.  For anyone who knows me, you know I have the wateriest eyes in the world when I chuckled.  When I chop one onion I'm sobbing.  When I chop 8? I actually couldn't close my eyes for a good 12 hours.  I might recommend buying onion goggles.  They have to work better than the torture I put myself through!!

 Brisket

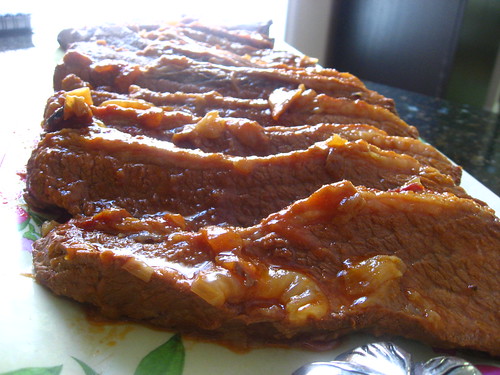
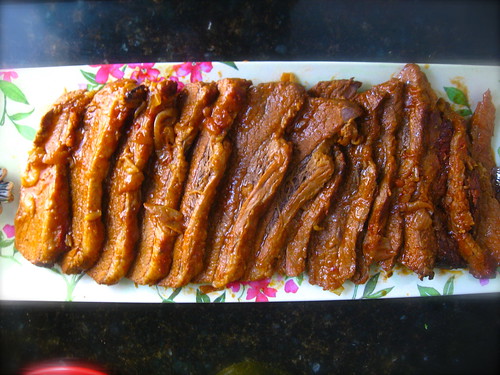
I haven't eaten a lot of brisket in my life, but this is far and away the BEST brisket I have ever tried.  (Yes, better than my old favorite, the Southwestern Pulled Brisket, but that's wonderful in it's own way). It is tender, juicy, and just takes like beef should.  There's nothing frilly or sweet, it's just perfect.  And the best part? It gets better in the fridge for the next day or two.  That is, if there are any leftovers.  It's a lot of work, but your family will love you if you make this.  I promise.

Brisket

Nach Waxman’s Best Brisket Recipe
from Leite's Culinaria

Ingredients
One 5- to 6-pound first-cut beef brisket, trimmed so that a thin layer of fat remains
All-purpose flour, for dusting
Freshly ground black pepper
3 tablespoons corn or other mild vegetable oil
8 medium onions, peeled and thickly sliced
3 tablespoons tomato paste
Kosher salt
2 to 4 garlic cloves, peeled and quartered
1 carrot, peeled and trimmed

Instructions
1. Preheat the oven to 375°F. Have ready a large ovenproof enameled cast-iron pot or other heavy pot that has a lid and is large enough to just barely contain the brisket snugly.
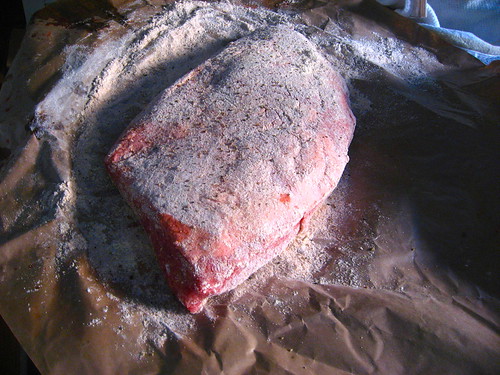
2. Lightly dust the brisket with flour, then sprinkle it with pepper. Heat the oil in the pot over medium-high heat. Add the brisket to the pot and cook on both sides until crusty and browned areas appear on the surface here and there, 5 to 7 minutes per side.
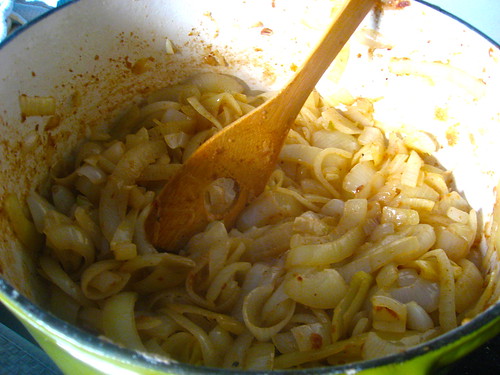
3. Transfer the brisket to a platter. Turn up the heat under the pot a bit, then add the onions and cook, stirring constantly with a wooden spoon and scraping up any browned bits stuck to the bottom of the pot. Cook until the onions have softened and developed a rich brown color but aren’t yet caramelized, 10 to 15 minutes.
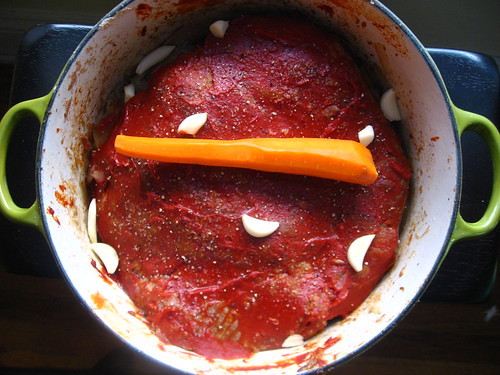
4. Turn off the heat and place the brisket on top of the onions. Pour any juices that accumulated on the platter over the brisket. Spread the tomato paste over the brisket as if you were icing a cake. Sprinkle the brisket with salt and pepper, then add the garlic and carrot to the pot. Cover the pot, transfer it to the oven, and let it cook, untouched, for 1 1/2 hours.
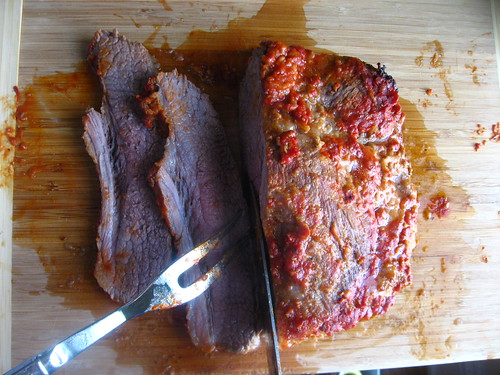
5. Transfer the brisket to a cutting board. Using a very sharp knife, thinly slice the meat across the grain into approximately 1/8-inch-thick slices. Return the slices to the pot, overlapping them at an angle so that you can see a bit of the top edge of each slice. The end result should resemble the original unsliced brisket leaning slightly backward. If absolutely necessary, add 2 to 3 teaspoons of water to the pot.
6. Cover the pot and return it to the oven. Lower the heat to 325°F and cook until the brisket is fork-tender, about 2 hours more. Check once or twice during cooking to make sure that the liquid hasn’t bubbled away. (Mine had more than enough liquid, maybe from not trimming enough fat.) If it has, add a few more teaspoons of water—but no more. Also, each time you check, spoon some of the liquid on top of the roast so that it drips down between the slices.
7. It’s ready to serve right away with its juices, but it’s even better the second day. Let the brisket cool, cover it loosely with foil, and refrigerate it overnight to serve the day after. Skim any fat from the surface of the liquid and reheat the brisket, covered, in an oven turned to 325°F for about an hour.

Thursday, October 4, 2012

Italian Wedding Soup

Italian Wedding Soup

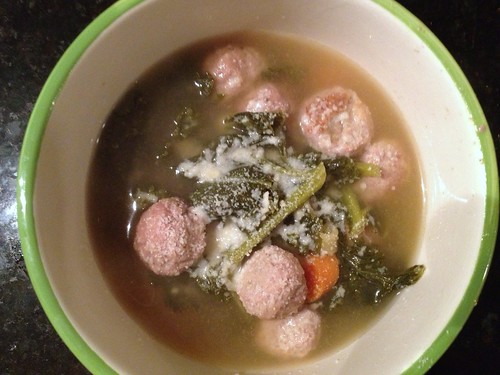
The cold has really started to set in here in Chicago!  I grew up in Boston and went to school in Michigan, so I'm no stranger to the cold, but somehow 3 winters in DC has made me a little unprepared for the cold.  I've been wearing what was my DC-winter coat for two weeks already! And it's only getting colder from here...  I can't complain too much though, it is October.  But seriously, when did that happen? Wasn't it August like, yesterday?

A quick note: I wrote this post about a week ago, when it was still 40 or 50 degrees outside.  Since then, we've had a couple of really gorgeous days (today it might even hit 80!) and I have been so appreciative.  But there is no denying that the cold weather is coming back and there will be much more soup to come!!

Untitled

Anyways, there is one great thing about the colder weather.  It's soup season!!!  I have been on a bit of a mini meatball kick for a few weeks now.  It started when I had a sudden urge to make rigatoni with mini meatballs a few weeks ago (and yeah, that was amazing) and is continuing with this soup.  The only thing I don't like about mini meatballs is rolling all of them.  It takes forever and my hands get so dried out with meat.  If you have kids, this is where I recommend bringing them into the kitchen and putting them to work!! (Or sending them over to me, I'll put them to work! Just be sure to take them home with you after, please.)

Italian Wedding Soup

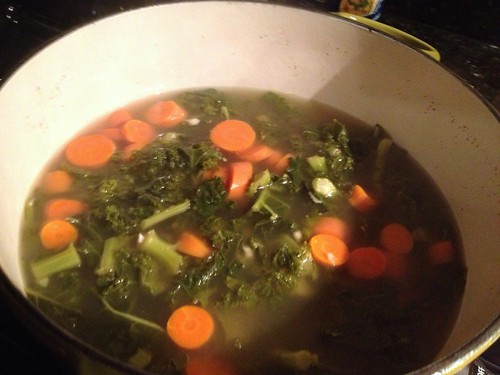
I never used to be a huge kale fan, but I like it a lot in this soup!  If you buy it at Trader Joe's, it's already washed and perfectly cut for this soup. However, they give you more than you need in a bag, so use only like half a bag.  It wilts down, but not so much.  Just use your best judgement.

Italian Wedding Soup

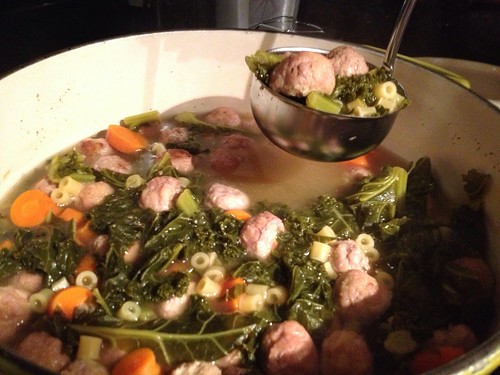
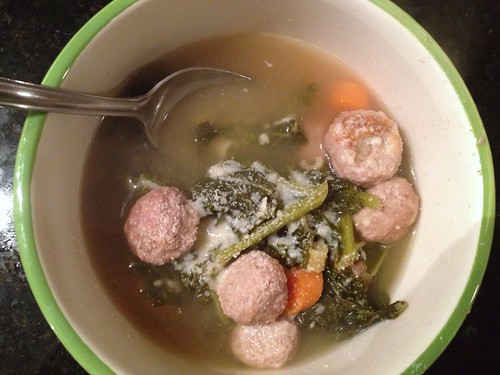
The first soup of the season was a tasty one!  The Monkey Scientist said, "That's a good soup!"  I liked that it had so many components - vegetables, pasta, and savory meatballs.  It is leaps and bounds above the canned Italian wedding soup, which in my opinion isn't even worth eating.  If you like this soup, be sure to check out my Mini Chicken Meatball soup.  It's similar and delicious in it's own way!

Italian Wedding Soup

Italian Wedding Soup
adapted from Tracey's Culinary Adventures

Ingredients
12 c low-sodium chicken broth (I made my own!)
4 carrots, cut into 1/2-inch dice
1 tbsp (about 3 cloves) minced garlic, divided
1 bunch (half TJ's bag) kale, stems removed, leaves cut into thin strips
1/2 c grated Parmigiano-Reggiano cheese, plus more for serving
2 eggs, lightly beaten
1/2 c Panko bread crumbs
1/2 tsp salt
1/2 tsp pepper
1/4 tsp crushed red pepper flakes
5-6 dashes worcestershire sauce
1 lb ground turkey
2 tbsp olive oil
1 1/2 c ditalini pasta (or other small shape)

Instructions
1. Preheat the oven to 350F and line 2 large baking sheets with foil. Brush with olive oil.
2. In a large Dutch oven, combine chicken broth, carrots, garlic, and kale. Cover and bring to a boil over medium-high heat, then lower and simmer 30-40 minutes until the carrots are tender.
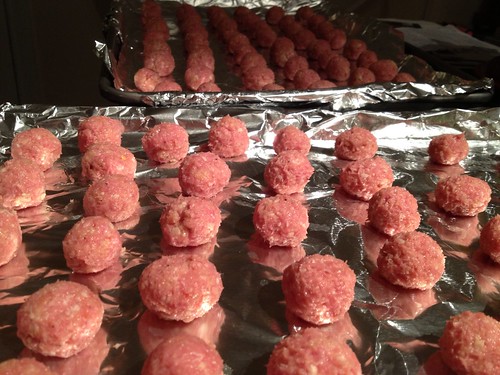
3. Combine the cheese, eggs, bread crumbs, salt, pepper, red pepper flakes, and worcestershire in a medium bowl.  Add meat and combine with your hands but don't overmix.  Roll into 1" balls and line along the cooking sheet.  Drizzle over the top of the meatballs with olive oil.  Bake 15-20 minutes, or until cooked through.
4. When the carrots are tender and the meatballs are still cooking, add the pasta to the Dutch oven and cook 10 minutes (or according to package instructions).  Turn off the heat and, once cooked, add the meatballs to the soup.
5.  Serve immediately, topped with extra Parmigiano-Reggiano.

Monday, June 11, 2012

Chicken with Pepperoni Sauce

Chicken w pepperoni sauce

One of my favorite parts of DC is the number of former Top Chef contestants who are always buzzing around.  The really famous chefs, like Jose Andres, might leave their signatures on the menus, but these chef-lebrities are around town - at Nat's Games, walking down the street, and often at their restaurants.  It's a lot of fun!

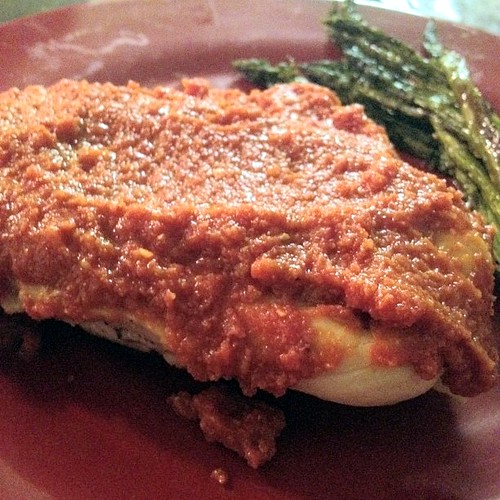
Mike Isabella was not one of my favorites on his first season of Top Chef, but by the time he was on All Stars, I was a fan.  Since then we've seen him a number of times around town.  He just opened a new Mexican tapas restaurant, Bandolero, so we're going to visit for my birthday dinner tonight!  However, last night, we made our own Mike Isabella dinner - we whipped up his famous pepperoni sauce.  This could be spread on almost anything and it would be absolutely delicious.  We put it on some pan seared chicken and it was a delight!  Hopefully tonight's dinner will be just as good - maybe I'll even get Mike Isabella to sing Happy Birthday to me!

Chicken w pepperoni sauce

Chicken with Pepperoni Sauce
from Mike Isabella at Graffiato

Ingredients
6-oz. pepperoni, cut into thin slices
4-oz. yellow onion, sliced thin
2 cloves garlic, sliced thin
1 teaspoon chili flake
1 teaspoon fennel seed, toasted
4-oz. crushed San Marzano tomatoes, chopped
4-oz. chicken stock
2 tablespoons extra-virgin olive oil
1 teaspoon salt
1 tablespoon apple cider vinegar
1 lb chicken breasts, hammered until thin
1 tbsp olive oil

Instructions
1. In a pot, sweat onions in olive oil for five to seven minutes. Add garlic and continue to sweat for two minutes.
2. Add the pepperoni and cook for about three more minutes. Add spices and cook for an additional minute.
3. Add the crushed tomatoes with the juice and cook for five more minutes. Lastly, add chicken stock and simmer for 40 minutes.
4. Remove the mixture from heat and puree in a blender. Season with salt and pass it through a fine china cap. Finally, add the splash of vinegar.
5. Season chicken with salt and pepper. Heat oil over medium heat in a large skillet. Pan sear on each side until just cooked through. Top with pepperoni sauce and serve immediately.

Friday, June 8, 2012

Grilled Stuffed Jalapeños

Jalapeño poppers!

I realized that somehow, even though I have been posting my weekly recipes from Thursday Night Grilling, I haven't actually posted any recipes that you make on the grill. So this week we're mixing it up!

I whipped up these stuffed jalapeños on Wednesday night, so on Thursday I just thew them in the grilling basket and cooked them up.  They were super easy to make and had great flavor!  They honestly are not that spicy if you're at all accustomed to spice, so don't be afraid!  The hottest part of a jalapeño is the seeds, and since they're all scraped out these are actually pretty mild and perfectly smoky.

I was so surprised to see this recipe originally derived from a Cooking Light recipe.  Don't be fooled my friends - you're eating cheese and bacon.  Don't get me wrong - two of my favorite ingredients - but don't go eating all 28 pepper halves on your own!  They're definitely worth saving some weekly calories for, though.  They're absolutely scrumptious!

Jalapeño poppers for TNG

Grilled Stuffed Jalapeños
slightly adapted from Tracey's Culinary Adventures

Ingredients
4-6 slices bacon
14 jalapeño peppers, halved lengthwise
1 (8-oz) package reduced fat cream cheese, at room temperature
1/4 cup shredded cheddar cheese (I used sharp)
1/4 cup minced scallions
1 teaspoon freshly squeezed lime juice
1/4 teaspoon kosher salt
1 garlic clove, minced

Instructions
1. Preheat grill to medium heat.
2. In a medium skillet set over medium-low heat, cook the bacon until browned and crisp. Transfer to a paper towel-lined plate. Allow to cool slightly, then crumble.
3. While the bacon cooks, scoop the seeds and ribs from the insides of the halved peppers using a small spoon. In a medium bowl, combine the crumbled bacon, cream cheese, cheddar cheese, scallions, lime juice, salt and garlic. Stir to combine.
4. Stuff each of the pepper halves with some of the cheese mixture. (At this point, you can cover and refrigerate the stuffed peppers, then cook them later.)
4. Spray a grill basket or pan with nonstick cooking spray then transfer the peppers to the prepared pan. Place the pan in the preheated grill and cook (with the grill cover closed) for about 8-15 minutes, or until the cheese mixture browns slightly, and the bottom of the peppers is charred. Transfer the peppers to a serving platter and serve immediately.

Thursday, May 24, 2012

Carnitas Pizza with Guacamole

Untitled

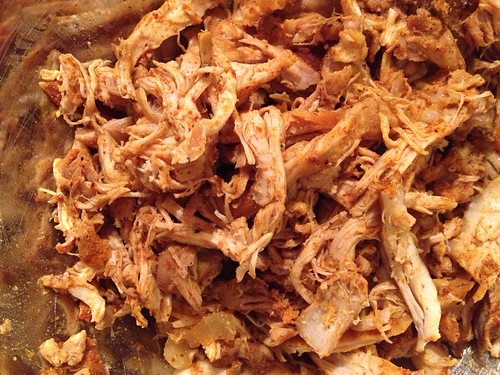
The Monkey Scientist and I have been experimenting with carnitas lately. There is nothing like delicious shredded pork. We've tried making it in both the Dutch oven and the CrockPot but I haven't decided which tasted better. Since we had so many leftovers, we decided to make a carnitas pizza!

Pizza with salsa sauce

I have to admit (and maybe you've noticed) that I'm not a huge fan of Mexican food. It's surprising since I love spicy food, but between the cilantro and corn tortillas there are so many things I don't like at all. I was excited that this recipe let me bring in all of the Mexican flavors I like in a familiar favorite - pizza.

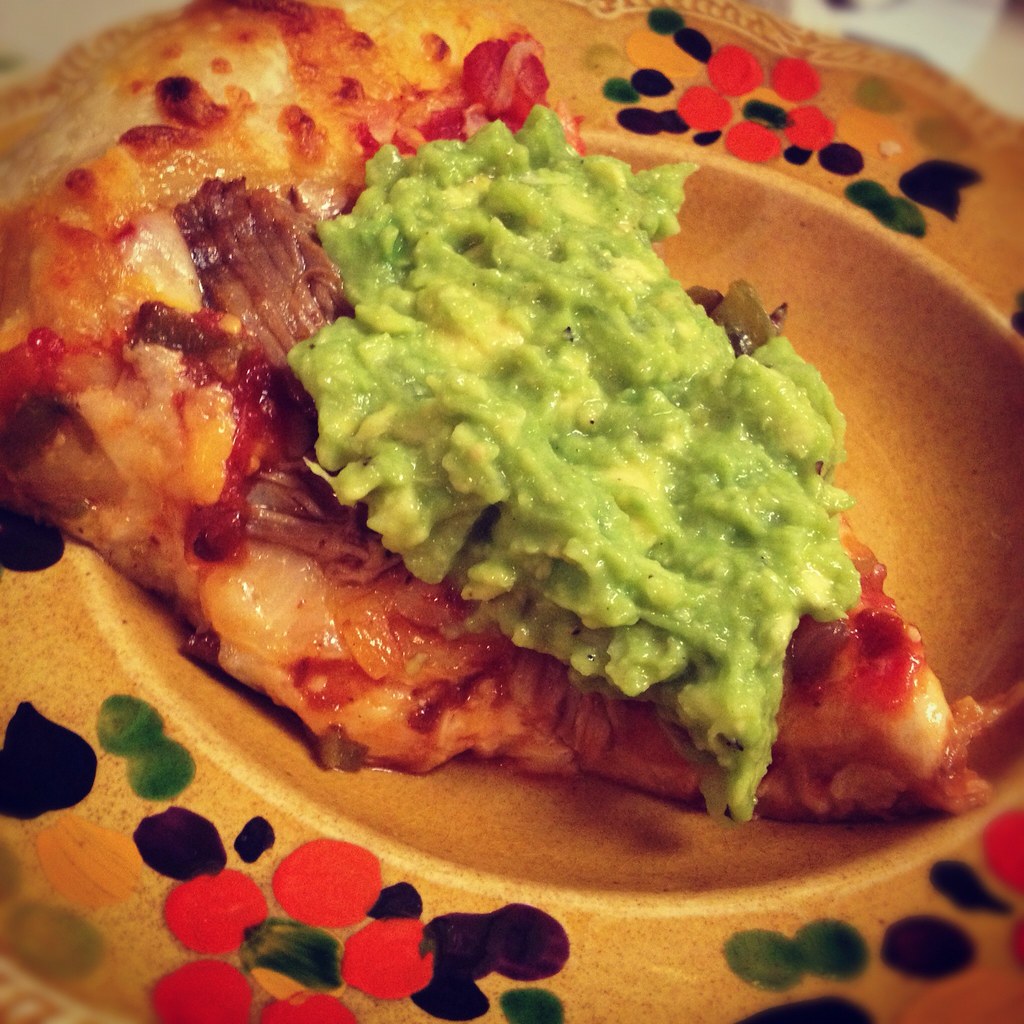
I loved how this came together. The Monkey Scientist picked up the dough at the Italian market in Cleveland Park. It has wonderful flavor and came out nice and crispy on the edges. The pizza was the perfect combination of spicy, cheesy and tangy. I liked the hot pizza topped by the cool guacamole as well, it was a nice contrast. This is the guacamole recipe I always use (usually with chips of course) and I adore it! Next time we may try to make this pizza on the grill like Mom does - I bet it would be fantastic!

Untitled

Carnitas Pizza with Guacamole
carnitas adapted from My Baking Addiction
pizza adapted from What's Gabby Cooking?
guacamole is a yelleBELLYboo original

Ingredients
Carnitas
1 large Vidalia onion, thinly sliced
2 tbsp brown sugar
1 tbsp paprika
2 tbsp kosher salt
1/4 tsp freshly ground pepper
1 pork butt (ours was 2 1/2 lb)
3/4 c cider vinegar
4 tsp Worcestershire sauce
1/2 can chipotles in adobo, roughly chopped
2 oranges, juiced
1 1/2 tsp crushed red pepper
1 1/2 tsp sugar
1/2 tsp dry mustard
1/2 tsp garlic salt
1/4 tsp cayenne
1 bottle beer
Pizza
1 batch pizza dough
1/2 jar salsa
1 bag shredded Mexican cheese
1/2 can fire-roasted chiles
2 tbsp adobo sauce from chipotles in adobo
Guacamole
2 ripe avocados, diced
2 tomatillos, diced
2 cloves garlic, minced
1 lime, juiced
Salt and pepper
Dash cayenne
Dash cumin

Instructions
Carnitas
1. Rinse pork under cold water and pat dry with paper towels.
2. Place onions in Crock pot. In a small bowl, combine brown sugar, paprika, salt and pepper. Rub to cover the roast. Place roast on top of onions.
3. Mix remaining ingredients and add to Crock pot. Add water to just cover pork.
4. Cook on low 10-12 hours.
5. Remove meat and onions from Crock pot. Chop or shred meat and onions. Add a bit of the cooking liquid for flavor.
Pizza
1. Preheat the oven to 500.
2. Carefully stretch dough to the size of your pizza pan or cookie sheet.
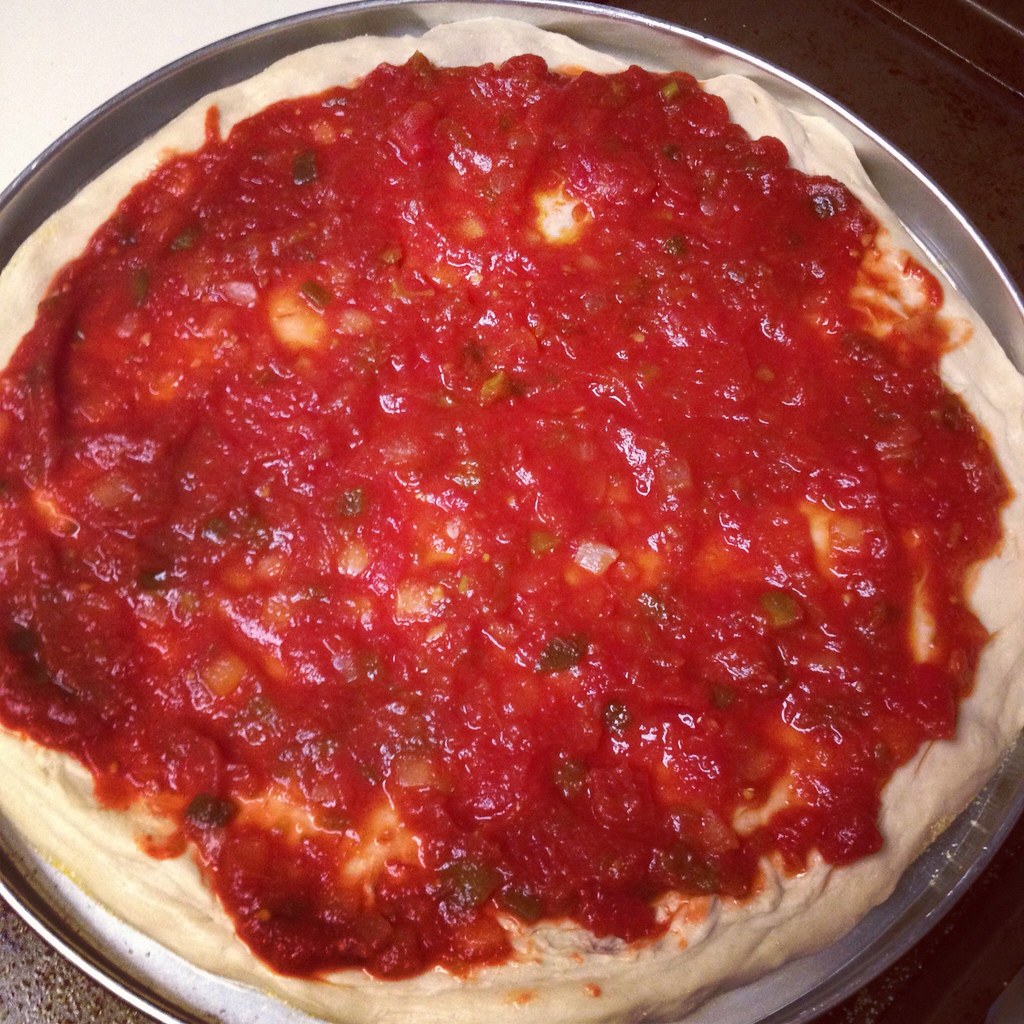
3. Top with salsa, then cheese, chiles, and adobo.
4. Bake 8 minutes, remove from onion. Top with shredded carnitas (maybe 2/3 c worth).
5. Return to oven and bake an additional 4 minutes.  Let rest for at least 5 minutes before slicing.
Guacamole
1. Add all ingredients to a medium bowl.
2. Mash with a potato masher or the back of a fork until well combined.
3. Smear on top of each slice of pizza.

Tuesday, March 13, 2012

Dak Bokkeum with Spinach (Korean Stewed Chicken with Spinach)

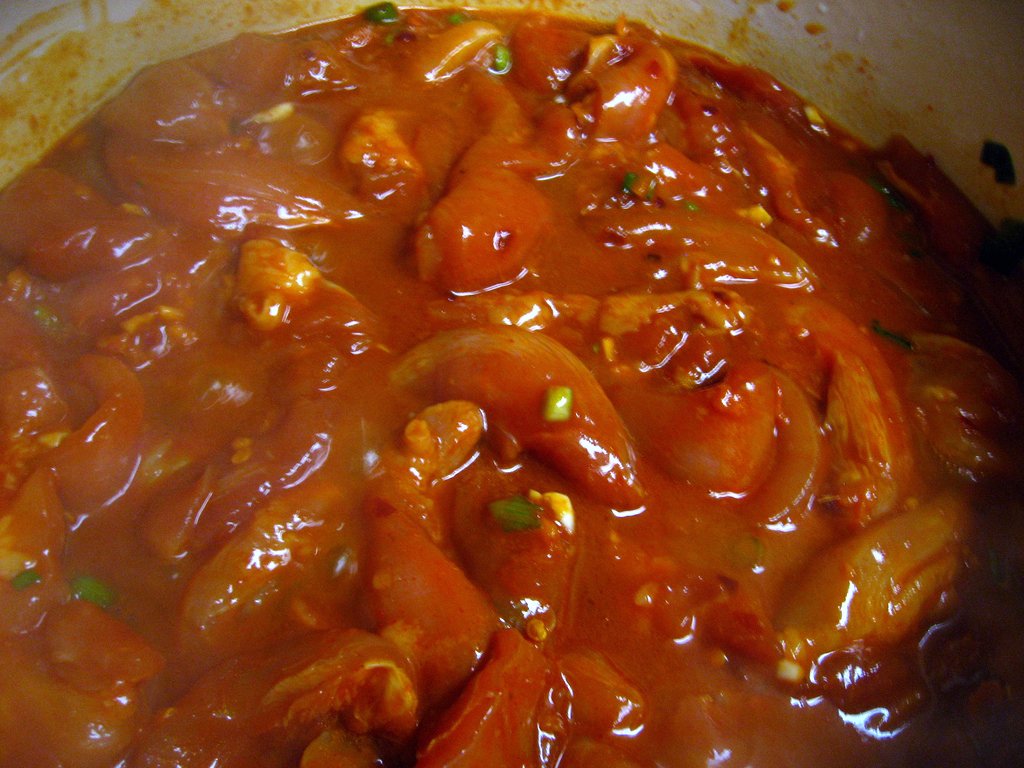
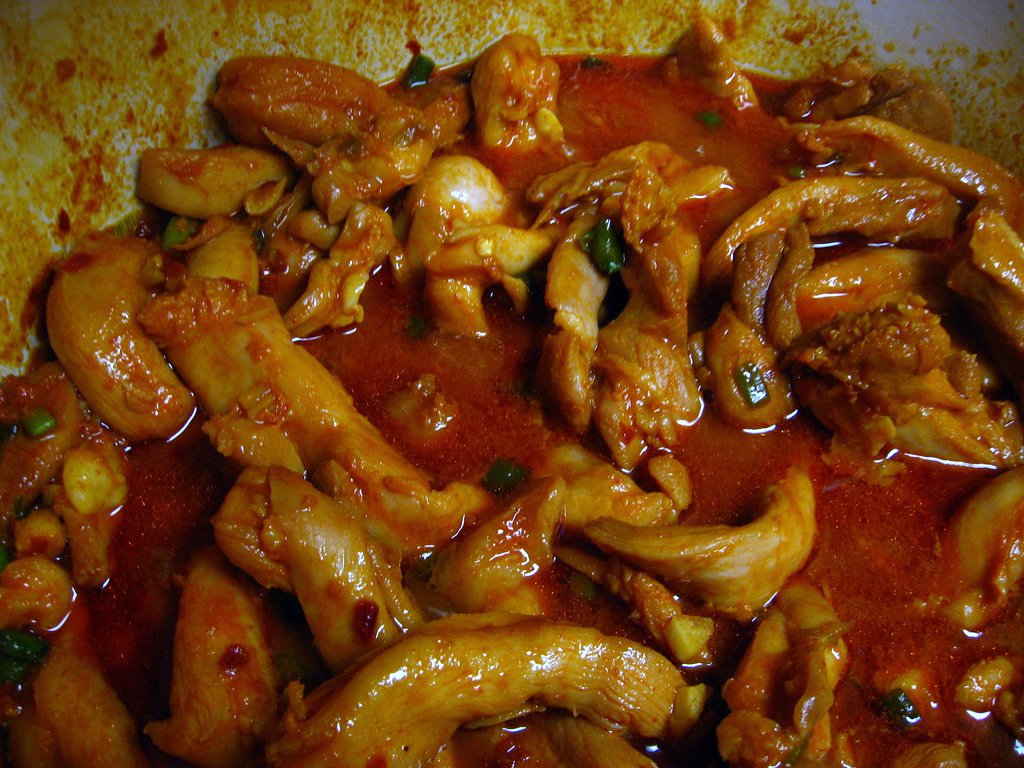
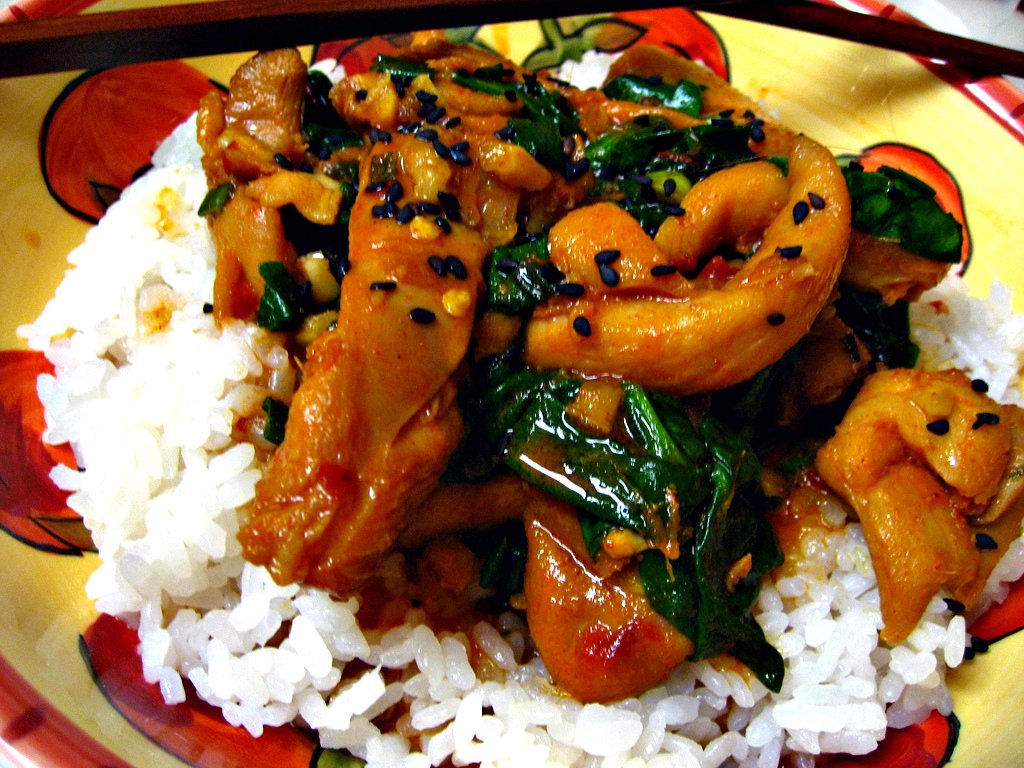
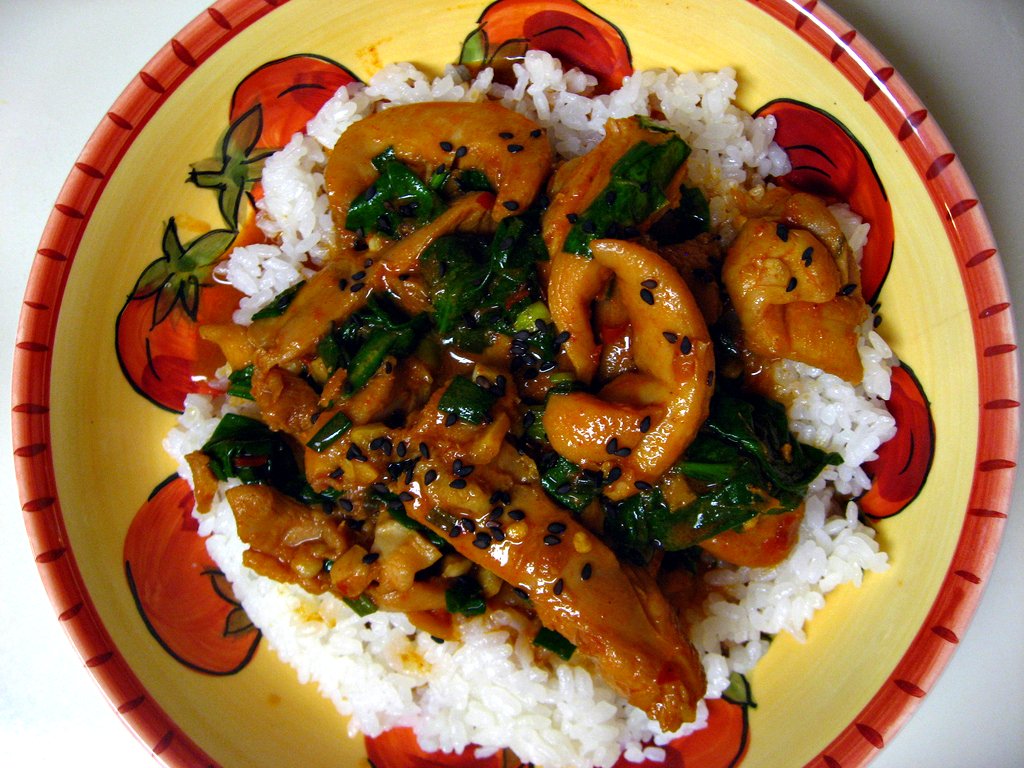
Dak Bokkeum with Spinach

About a year ago, my coworker took me on a trip up to Maryland for what we called "Coworker's Without Cars Day".  It was my first trip ever to H-Mart and I was so excited to find all of the Asian ingredients I couldn't get at my local grocery store.  One of those ingredients was gochujang, a fermented Korean chile sauce.  Of course, being the klutz that I am, I dumped an entire container of gochujang on my foot while we were in the store and made quite the scene.  I was cleaning it out of my flip flop for months.

Dak Bokkeum with Spinach

Despite the scene, I never got around using the gochujang until now! I know - a total shame and I had promised a recipe last April that I never got around to making.  My gochujang actually technically expired since then, but I looked online and there seems to be some consensus that this stuff never really expires and the date on the back is more a "best by" date (had to look online, all of the description around the date was in Korean).  The top layer did turn a little bit brown rather than bright red, but it tasted fine and we didn't get sick so it seemed good to me.

Dak Bokkeum with Spinach

When you go to buy this, there is a huge aisle of H-Mart with different heat intensities of gochujang. It comes in a rectangular red tupperware and on the back right upper corner it will say gochujang in English in itsy bitsy font and it should say in English just how spicy it is. I think mine is the regular spice level and it was very spicy!  For those of you without an H-Mart or other Asian market, I hear a rumor that Annie Chung has a version of gochujang that's sold in regular grocery stores, though I've yet to see it.  Or, if you live in DC, they actually sell it at Tenley Mini Market, oddly enough.  Not exactly what you expect to see in a liquor store but they have it!

Dak Bokkeum with Spinach

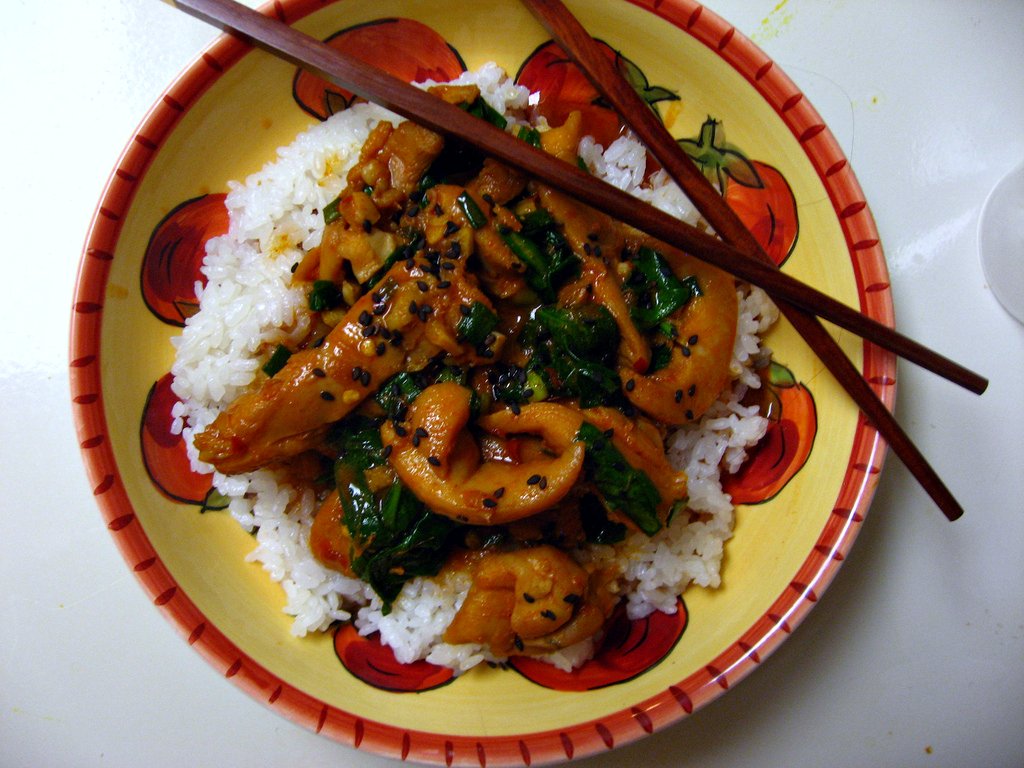
With all of this talk about gochujang, you probably want to know if it's worth it, right?  Man, oh man is it worth it.  This is one of my favorite recipes I've made in a long time and the whole time I was eating it I kept remarking to the Monkey Scientist how much I enjoyed it.  If you cook Asian food frequently, you might even have everything you need at home already so you can make this tonight.  You make the whole dish in basically one pot (and your rice cooker) which makes for fairly easy clean up.  The dish doesn't even need to be babysat while it cooks - you just throw it in and walk away.  That's my favorite kind of meal to make!  And the taste is out of this world! It's got a hefty spice level (the Monkey Scientist barely added any sriracha on top) and is packed with flavor.  It's super filling and healthy (just make sure you trim the fat off of the chicken thighs) as well!  It's a total win-win-win dinner - the two of us couldn't praise it enough.

Dak Bokkeum with Spinach

Dak Bokkeum with Spinach
Korean Stewed Chicken with Spinach
from Cooking Light

Ingredients
1/3 cup gochujang (Korean chile sauce)
1/4 cup (1/2-inch) slices green onion bottoms
2 1/2 tablespoons lower-sodium soy sauce
2 tablespoons minced fresh garlic
2 tablespoons minced peeled ginger
2 tablespoons dark sesame oil
1 tablespoon brown sugar
3/4 teaspoon crushed red pepper
2 pounds skinless, boneless chicken thighs, cut into 1/2-inch strips
1 1/2 cups uncooked short-grain white rice (sushi rice)
1 1/2 cups water
1/3 cup water
3/4 cup (1 1/2-inch) slices green onion tops
1 (5-ounce) bag fresh baby spinach
1 tablespoon toasted sesame seeds

Instructions
1. In a large bowl, combine gochujang, green onion bottoms, soy sauce, garlic, ginger, sesame oil, brown sugar, and crushed red pepper. Add in strips of chicken thighs, cover, and put in the refrigerator to marinate for at least 30 minutes.
2. Place the rice in a mesh strainer. Fill a large bowl with cold water and place the mesh strainer in the water so that the water covers the rice. Stir the rice gently and then remove from water. The water will be milky. Drain water and then repeat 2-3 times until the water comes out nearly clear.
3. Cook the rice with 1 1/2 cups water in a rice cooker. If you don't have a rice cooker, place water and rice in a pot, and bring to a boil. Reduce to a simmer and cover and allow to cook for 20 minutes. Remove from heat and let stand 20 minutes. (I actually added a pinch of sea salt to my rice cooker as well.)
4. While the rice is cooking, add 1/3 cup water to a dutch oven and bring to a boil. Add the chicken mixture and bring to a simmer. Reduce heat, cover, and allow to simmer for 20 minutes.
5. Uncover and allow to simmer for an additional 10 minutes or until the mixture reduces, stirring occasionally.
6. Remove from heat. Stir in green onion tops and spinach and allow the spinach to wilt. Sprinkle with sesame seeds and serve over the rice.