Sunday, October 14, 2012

The BEST Brisket

Brisket

I have owed you this blog post for a long time now.  I actually made this brisket for Rosh Hashana... which somehow became nearly a month ago.  Time has been slipping away from me so quickly - I can't believe it's mid-October.  Anyways, even though it took me a long time, I had to share this recipe with you.  It's probably the best piece of meat I've ever cooked.
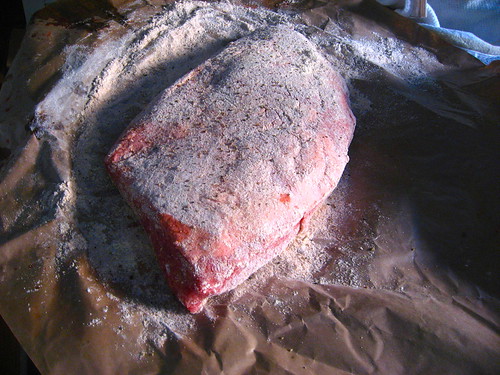
BrisketBrisket

Although I've hosted a few Passover dinners, this was my first time hosting Rosh Hashana.  Now that we're living in Chicago, we are lucky enough to be able to share the holidays with the Monkey Scientist's family.  We had his parents, brother, and brother's girlfriend over for Rosh and it was the best time.  They're all so nice and wonderful to be around.  And the food was beyond plentiful.  We had enough to feed at least 10 more people!  I guess that's what happens when you literally cook from Friday night until Sunday night for just about every waking hour....

BrisketBrisket

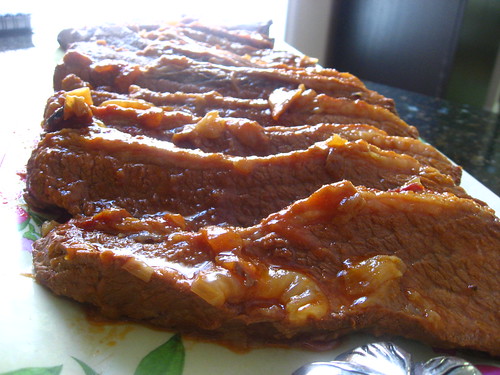
The star of the meal was definitely this brisket.  I hid it behind some tzimmes (which wasn't so popular at Rosh night 1, but was a hit when I brought the leftovers to a friend's house for night two!), but it still managed to shine.  Although this recipe takes a long time, Nach Waxman is the man to trust when it comes to brisket.  After all, he owns the largest food-related book store in the country!
Brisket 

I should warn you, however,  that you have to slice 8 onions for this recipe. EIGHT.  For anyone who knows me, you know I have the wateriest eyes in the world when I chuckled.  When I chop one onion I'm sobbing.  When I chop 8? I actually couldn't close my eyes for a good 12 hours.  I might recommend buying onion goggles.  They have to work better than the torture I put myself through!!

 Brisket

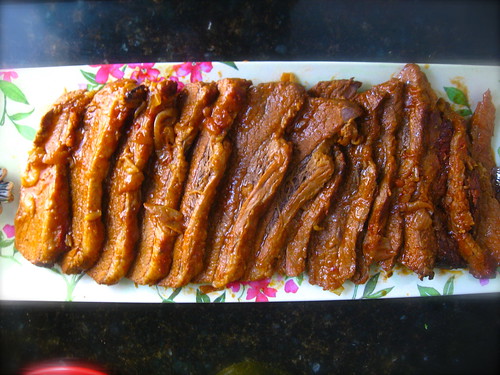
I haven't eaten a lot of brisket in my life, but this is far and away the BEST brisket I have ever tried.  (Yes, better than my old favorite, the Southwestern Pulled Brisket, but that's wonderful in it's own way). It is tender, juicy, and just takes like beef should.  There's nothing frilly or sweet, it's just perfect.  And the best part? It gets better in the fridge for the next day or two.  That is, if there are any leftovers.  It's a lot of work, but your family will love you if you make this.  I promise.
Brisket

Nach Waxman’s Best Brisket Recipe
from Leite's Culinaria

Ingredients
One 5- to 6-pound first-cut beef brisket, trimmed so that a thin layer of fat remains
All-purpose flour, for dusting
Freshly ground black pepper
3 tablespoons corn or other mild vegetable oil
8 medium onions, peeled and thickly sliced
3 tablespoons tomato paste
Kosher salt
2 to 4 garlic cloves, peeled and quartered
1 carrot, peeled and trimmed

Instructions
1. Preheat the oven to 375°F. Have ready a large ovenproof enameled cast-iron pot or other heavy pot that has a lid and is large enough to just barely contain the brisket snugly.
2. Lightly dust the brisket with flour, then sprinkle it with pepper. Heat the oil in the pot over medium-high heat. Add the brisket to the pot and cook on both sides until crusty and browned areas appear on the surface here and there, 5 to 7 minutes per side.
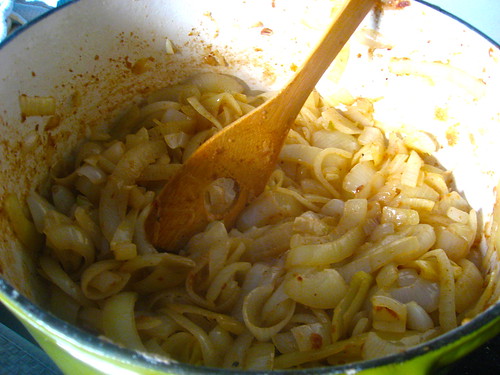
3. Transfer the brisket to a platter. Turn up the heat under the pot a bit, then add the onions and cook, stirring constantly with a wooden spoon and scraping up any browned bits stuck to the bottom of the pot. Cook until the onions have softened and developed a rich brown color but aren’t yet caramelized, 10 to 15 minutes.
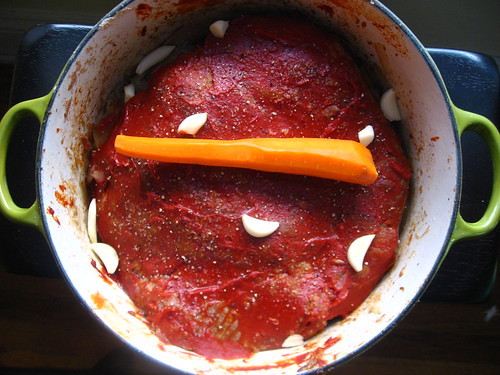
4. Turn off the heat and place the brisket on top of the onions. Pour any juices that accumulated on the platter over the brisket. Spread the tomato paste over the brisket as if you were icing a cake. Sprinkle the brisket with salt and pepper, then add the garlic and carrot to the pot. Cover the pot, transfer it to the oven, and let it cook, untouched, for 1 1/2 hours.
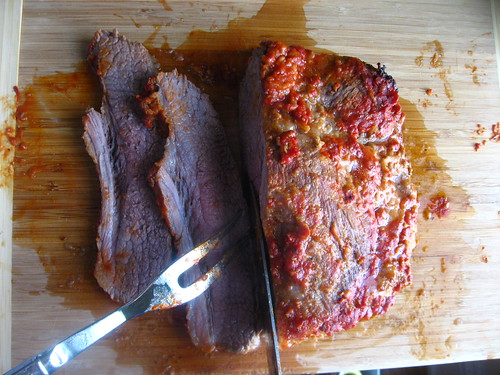
5. Transfer the brisket to a cutting board. Using a very sharp knife, thinly slice the meat across the grain into approximately 1/8-inch-thick slices. Return the slices to the pot, overlapping them at an angle so that you can see a bit of the top edge of each slice. The end result should resemble the original unsliced brisket leaning slightly backward. If absolutely necessary, add 2 to 3 teaspoons of water to the pot.
6. Cover the pot and return it to the oven. Lower the heat to 325°F and cook until the brisket is fork-tender, about 2 hours more. Check once or twice during cooking to make sure that the liquid hasn’t bubbled away. (Mine had more than enough liquid, maybe from not trimming enough fat.) If it has, add a few more teaspoons of water—but no more. Also, each time you check, spoon some of the liquid on top of the roast so that it drips down between the slices.
7. It’s ready to serve right away with its juices, but it’s even better the second day. Let the brisket cool, cover it loosely with foil, and refrigerate it overnight to serve the day after. Skim any fat from the surface of the liquid and reheat the brisket, covered, in an oven turned to 325°F for about an hour.

Thursday, October 11, 2012

Twice-Baked Potatoes with Feta and Rosemary

Twice Baked Potatoes with Feta and Rosemary

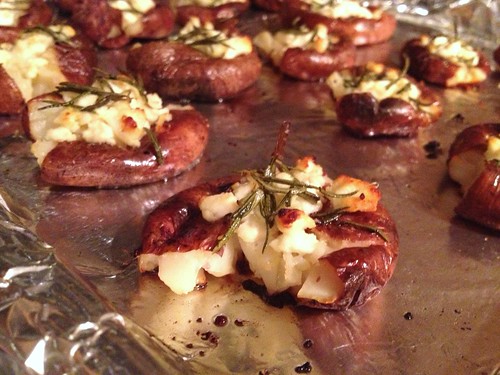
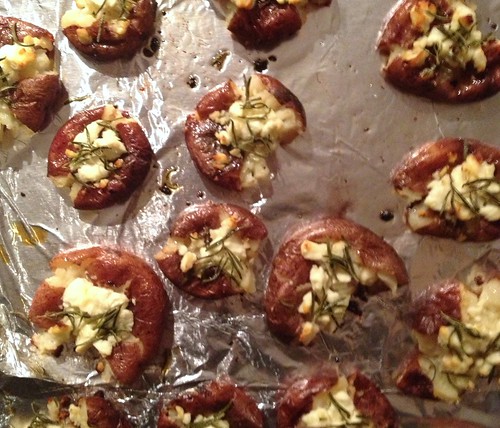
I had these last week and I have been waiting very impatiently to share them with you.  Omigoodness.  Now, I could bake little red potatoes covered in olive oil every day and probably be quiet happy.  They're definitely a favorite comfort food.  But add rosemary and feta cheese? Deliciousness.

twice baked potatoes with rosemary and feta

We served these with some simply seared and baked bone-in, skin-on chicken thighs and they were perfection. They're perfectly salty and fill my ever-existent carb need. They actually crisp up so nicely that you can pick them up with your hands, which means I think they can pass for appetizers (as long as you use little enough potatoes). This recipe is so super simple, I promise anyone can pull it off and impress their guests!

twice baked potatoes with rosemary and feta

Twice-Baked Potatoes with Rosemary and Feta
from fresh365

Ingredients
10-15 tiny or 6-8 medium red potatoes
olive oil
1/2 c crumbled feta cheese (crumbled goat cheese would work too)
3 tbsp fresh rosemary leaves
salt and pepper, to taste

Instructions
1. Preheat the oven to 450F. Scrub potatoes and poke each one with a fork. Line a baking sheet with foil.
2. Place stabbed side up, in a single layer, on the baking sheet. Drizzle with a good amount of olive oil.
3. Bake 35-50 minutes, until fork can be inserted easily. Remove the baking sheet from the oven, and cut a deep X into each potato. With a fork or a paper towel, push the top of each potato until it opens (it will look messy).
4. Drizzle each potato with a bunch more olive oil. Sprinkle with feta cheese, rosemary leaves, salt and pepper (they won't need much salt - I think I forgot the salt and pepper and they only were lacking the pepper). Return to the oven and bake for an additional 15-20 minutes until the edges and cheese are golden-brown and crunchy.


This recipe was featured on Full Plate Thursday on 10/18/12!

Miz Helen’s Country Cottage

Sunday, October 7, 2012

Tourtière (French Canadian Meat Pie)

Untitled

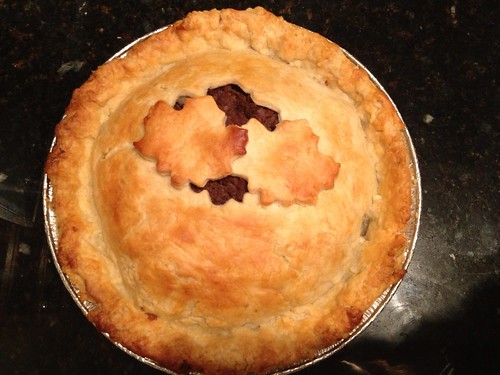
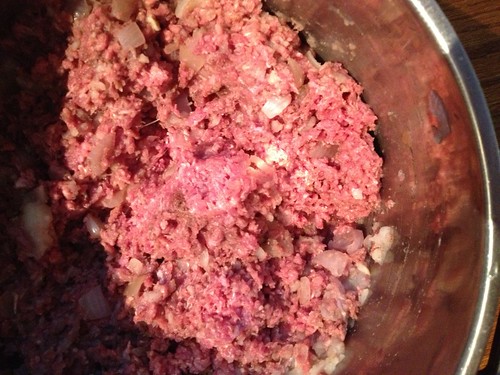
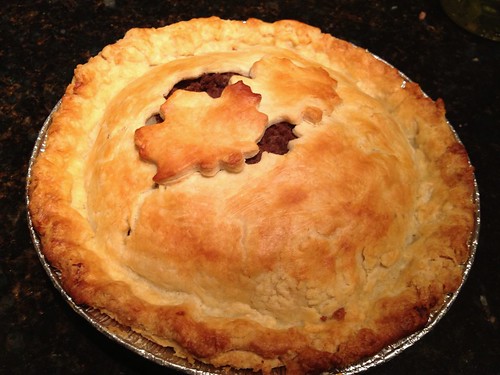
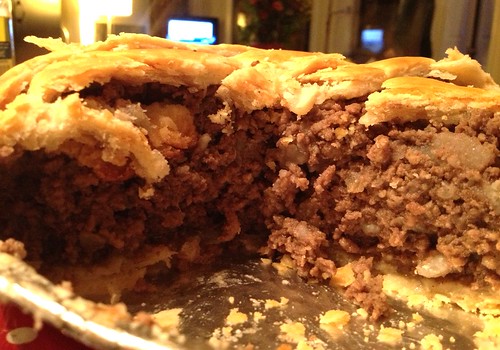
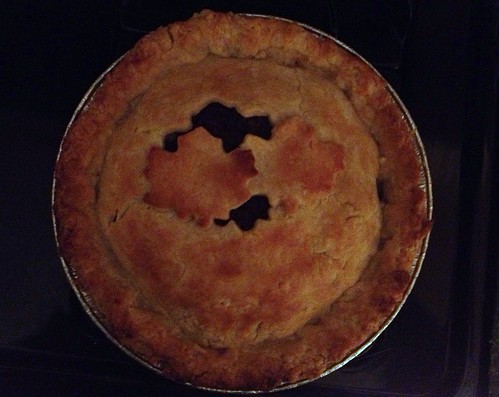
The strangest thing happened today.  I woke up and was dead set on making tourtière, for no apparent reason.  One of my mom's best friends is French Canadian (although she has always lived in the States) and every year for Christmas she makes the most delicious meat pie, called tourtière, that her family made growing up.  She knows I love it, so she always makes an extra and has us for dinner sometime the following week so that I can enjoy it.  It's become something I look forward to each winter.

Untitled

A couple years ago, I decided I wanted to make it myself.  I dug around looking at recipes online and emailed my mom's friend for the recipe.  I had it sitting in my inbox for almost 2 years, but I never got around to making it!  So this morning, I dug it up and decided I just had to make it.  The Monkey Scientist thought I was crazy (Canadian food?) but he couldn't say no to meat and pie.

tourtiere

So I went to the store, and got everything I needed, and made two pies (one to eat, one to freeze for another night this winter).  We ate and enjoyed them and the Monkey Scientist went back to studying.  Then I was online and realized that - by total coincidence - it is Canadian Thanksgiving tomorrow.  Although I've always known this to be a Christmas dish, it appears that it is also eaten on Thanksgiving in Canada.  The Monkey Scientist told me he thinks I have a 6th sense for Canadian holidays - what do you think?

tourtiere

As far as the recipe goes, this one is something I will keep around.  It is the perfect meal for a cold day because it's so warm - both in temperature and from the cinnamon, all spice, nutmeg and cloves.  It just tastes like a Christmas night by the fire in New Hampshire to me.  The Monkey Scientist and I liked it with a little Chulula on top, but it is just great on it's own as part of a holiday meal - whether it's Canadian Thanksgiving, US Thanksgiving, Christmas, New Years, or just a winter's night with the family.

Happy Canadian Thanksgiving to everyone celebrating!

tourtiere

Tourtière (French Canadian Meat Pie)
adapted from Yankee Magazine, All Recipes, and LB
makes 2 pies

Ingredients
filling
2 small potatoes, chopped
2 finely chopped onions
2 lbs ground pork
2 lbs ground beef
1 1/2 c water
1 tbsp salt
1/2 tsp pepper
2 tsp allspice
1 tsp cinnamon
1/2 tsp nutmeg
1/2 tsp ground cloves
crust
4 c unbleached AP flour (plus more for the rolling surface)
1 tsp salt
1 3/4 c shortening
1 large egg, lightly beaten
1 tbsp vinegar
1/2 c ice water
to assemble
1/4 c milk

Instructions
1. Preheat the oven to 400F (you can wait to do this until you begin assembling the pies).
2. In a very large pot, bring several cups of water to a boil, then add the potatoes and onions.  Cook about 20 minutes, or until potatoes can be easily pierced with a knife.
3. Drain the water, and return the potatoes and onions to the pot.  Add the pork, beef, 1 1/2 c water, salt, pepper, allspice, cinnamon, nutmeg, and ground cloves to the pot.  Bring to a boil, then reduce heat and simmer, covered, for 1 hour.
4. When the meat is done cooking, drain the liquid into a bowl and place the meat into a separate bowl. Put both bowls in the refrigerator and chill for at least an hour.
5.   In a large bowl, combine the flour and salt.  Add in the shortening and cut with a pastry cutter until you have pea-sized clumps.
6.  Add the egg, vinegar, and ice water to the flour and shortening mixture.  Work into a soft, cohesive dough ball. Cut the dough into quarters.  On a well-floured surface, roll out each quarter of the dough ball into rounds for the bottoms and tops of each pie.  Transfer one pie crust into each of your your two pie dishes.
7.  Remove the liquid and meat from the fridge.  Scrape the solidified fat off the top of the liquid and discard.  Fill each of your pie dishes with half of the meat mixture.  Top with one tablespoon of the liquid in each pie.  Top your pies off with your last two pie crusts and pinch edges to seal.  Cut slits in the top of each crust so that steam can escape.
8. Brush the tops of the pies with milk.  Bake in the preheated oven for 50 minutes or until golden brown.  Serve immediately or freeze until you're ready to serve.

Thursday, October 4, 2012

Italian Wedding Soup

Italian Wedding Soup

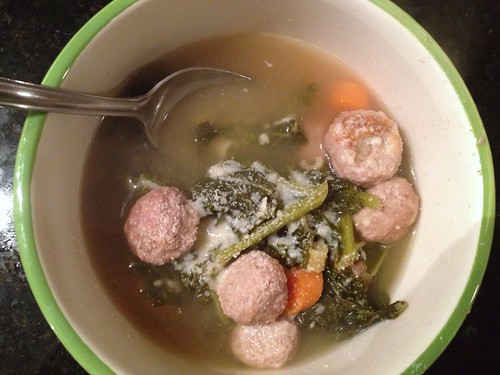
The cold has really started to set in here in Chicago!  I grew up in Boston and went to school in Michigan, so I'm no stranger to the cold, but somehow 3 winters in DC has made me a little unprepared for the cold.  I've been wearing what was my DC-winter coat for two weeks already! And it's only getting colder from here...  I can't complain too much though, it is October.  But seriously, when did that happen? Wasn't it August like, yesterday?

A quick note: I wrote this post about a week ago, when it was still 40 or 50 degrees outside.  Since then, we've had a couple of really gorgeous days (today it might even hit 80!) and I have been so appreciative.  But there is no denying that the cold weather is coming back and there will be much more soup to come!!

Untitled

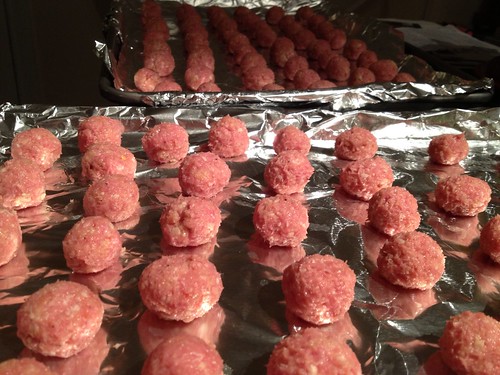
Anyways, there is one great thing about the colder weather.  It's soup season!!!  I have been on a bit of a mini meatball kick for a few weeks now.  It started when I had a sudden urge to make rigatoni with mini meatballs a few weeks ago (and yeah, that was amazing) and is continuing with this soup.  The only thing I don't like about mini meatballs is rolling all of them.  It takes forever and my hands get so dried out with meat.  If you have kids, this is where I recommend bringing them into the kitchen and putting them to work!! (Or sending them over to me, I'll put them to work! Just be sure to take them home with you after, please.)

Italian Wedding Soup

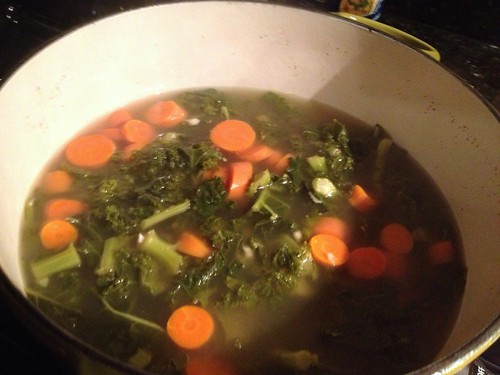
I never used to be a huge kale fan, but I like it a lot in this soup!  If you buy it at Trader Joe's, it's already washed and perfectly cut for this soup. However, they give you more than you need in a bag, so use only like half a bag.  It wilts down, but not so much.  Just use your best judgement.

Italian Wedding Soup

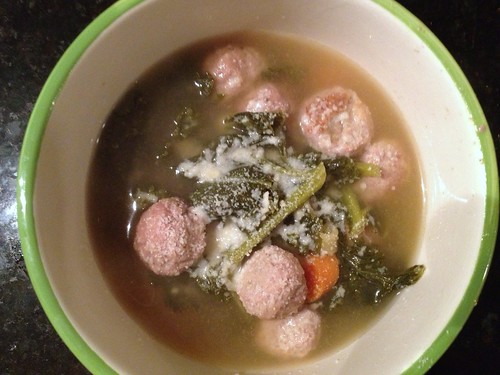
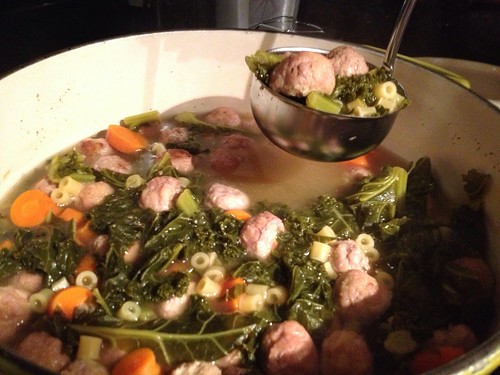
The first soup of the season was a tasty one!  The Monkey Scientist said, "That's a good soup!"  I liked that it had so many components - vegetables, pasta, and savory meatballs.  It is leaps and bounds above the canned Italian wedding soup, which in my opinion isn't even worth eating.  If you like this soup, be sure to check out my Mini Chicken Meatball soup.  It's similar and delicious in it's own way!

Italian Wedding Soup

Italian Wedding Soup
adapted from Tracey's Culinary Adventures

Ingredients
12 c low-sodium chicken broth (I made my own!)
4 carrots, cut into 1/2-inch dice
1 tbsp (about 3 cloves) minced garlic, divided
1 bunch (half TJ's bag) kale, stems removed, leaves cut into thin strips
1/2 c grated Parmigiano-Reggiano cheese, plus more for serving
2 eggs, lightly beaten
1/2 c Panko bread crumbs
1/2 tsp salt
1/2 tsp pepper
1/4 tsp crushed red pepper flakes
5-6 dashes worcestershire sauce
1 lb ground turkey
2 tbsp olive oil
1 1/2 c ditalini pasta (or other small shape)

Instructions
1. Preheat the oven to 350F and line 2 large baking sheets with foil. Brush with olive oil.
2. In a large Dutch oven, combine chicken broth, carrots, garlic, and kale. Cover and bring to a boil over medium-high heat, then lower and simmer 30-40 minutes until the carrots are tender.
3. Combine the cheese, eggs, bread crumbs, salt, pepper, red pepper flakes, and worcestershire in a medium bowl.  Add meat and combine with your hands but don't overmix.  Roll into 1" balls and line along the cooking sheet.  Drizzle over the top of the meatballs with olive oil.  Bake 15-20 minutes, or until cooked through.
4. When the carrots are tender and the meatballs are still cooking, add the pasta to the Dutch oven and cook 10 minutes (or according to package instructions).  Turn off the heat and, once cooked, add the meatballs to the soup.
5.  Serve immediately, topped with extra Parmigiano-Reggiano.

Tuesday, October 2, 2012

Owl Clock

Owl Clock

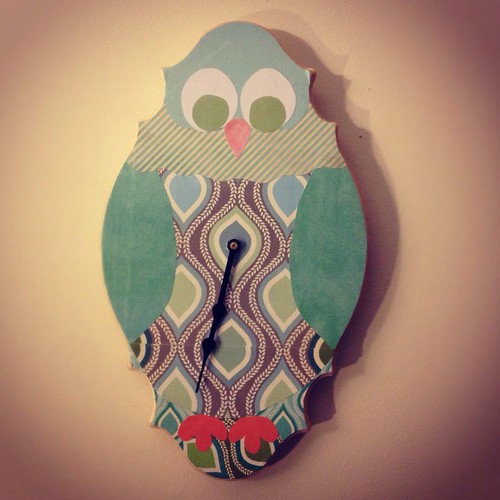
I realize I've been sharing a lot more crafts than food with you lately, but I just had to show you my latest creation.  I got the idea from Artzy Creations, but I had to adapt a little because I couldn't find a wood cutout in the shape of an owl (or anything big enough for a clock, really).  So I bought another shape I liked, thinking I'd just do something abstract, and halfway through I realized it was still looking like an owl, so I just went for it.  I am really happy with how it came out!

Untitled

You can find all of the instructions over on Artzy Creations.  I got all of my pieces at Michael's.  The paper I used was for sale on the 25 cent rack!  I got a few packs with all different patterns - I think I'll be able to use them for lots of crafts.

Untitled

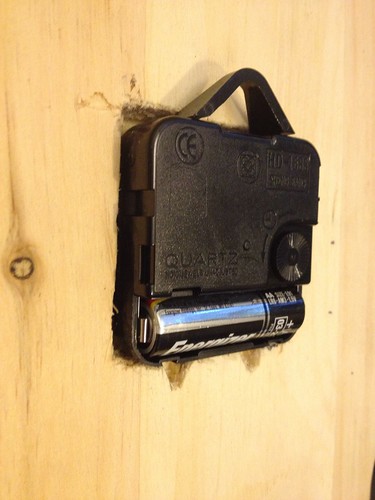
The only major problem I encountered was that, because I used a big piece of wood and not a wood cut out, the clock wasn't long enough to go all the way through the wood.  I needed to take a big hunk of wood out of the back for the clock to fit in.  Of course, I don't have any very fancy tools, so I went to the hardware store and for $5 they did it for me!  It was a great deal if you ask me.

Untitled


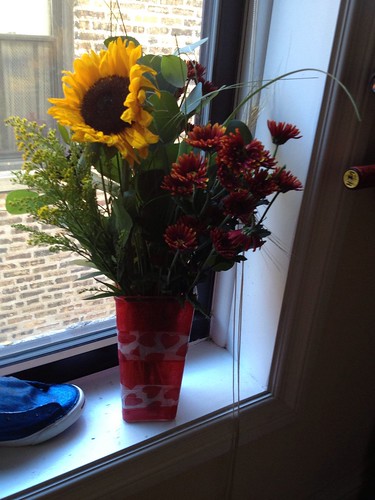
And while we're talking crafts, I also decoupaged this vase with some tissue paper I had around the house.   Then I picked up these flowers for only $3.99 at Trader Joe's on Sunday - my place feels so fun and autumnal!  It was a very crafty week!  What do you think of my mod podge creations?  I am pretty excited about them!  Don't worry though, there is a food recipe coming soon!

Saturday, September 29, 2012

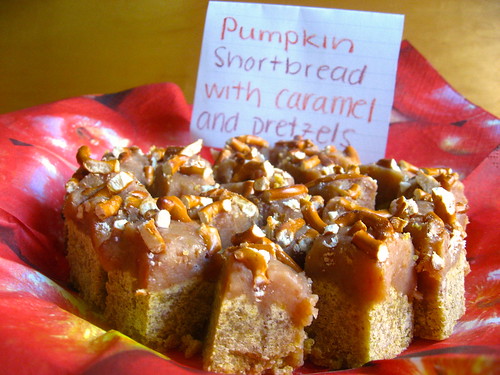
Pumpkin Shortbread with Caramel and Pretzels

IMG_8053

This weekend there are lots of events going on in our neighborhood!  I woke up to lots of barking from the 9th Annual Mutt Strut.  It took a LOT of restraint to not adopt the adorable 3 year old black pug the Chicago Canine Rescue group brought.  He was so cute and sweet.  Luckily I have my dad to call and bring me back down to reality instead of adopting puppies on a whim!

Then, the Lakeview Chamber of Commerce hosted a dessert potluck just around the corner.  I wanted to bring a fun fall dessert and I'd been eyeing this recipe all week.  It was the perfect excuse!

IMG_8046

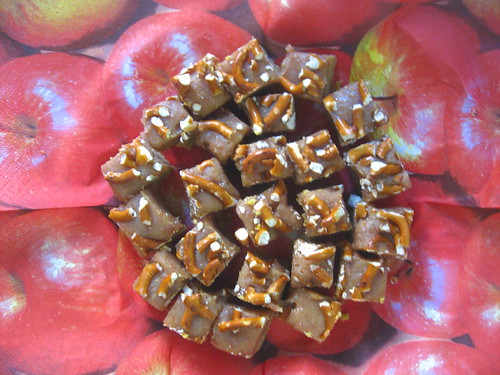
We all thought these were a delicious treat, and based on their tweet, I think the Chamber of Commerce and my neighbors enjoyed them as well.  They were sweet and a little bit salty, and plenty buttery.  I had these adorable apple napkins left from Rosh Hashana, which made them perfect for serving on.  Speaking of Rosh Hashana, I've been holding out on you with some really great recipes.  I promise, I will be posting my new favorite brisket recipe soon. It's amazing!!

IMG_8050

Pumpkin Shortbread with Caramel and Pretzels
slightly adapted from Sugarcrafter

Ingredients
pumpkin shortbread
cooking spray
1 3/4 c AP flour
1/4 c sugar
1/2 tsp cinnamon
5 tbsp pumpkin puree
10 tbsp unsalted butter, cut into 1″ pieces
caramel
12 tbsp butter
1 (14-ounce) can sweetened condensed milk
4 tbsp honey
topping
1 c crushed pretzels

Instructions
1. Preheat the oven to 325F. Line an 8" square baking dish with foil and spray with cooking spray.
2. In a food processor, combine the flour, sugar, cinnamon, pumpkin, and butter. Pulse until combined and when you press the mixture together with your fingers it sticks together like dough.
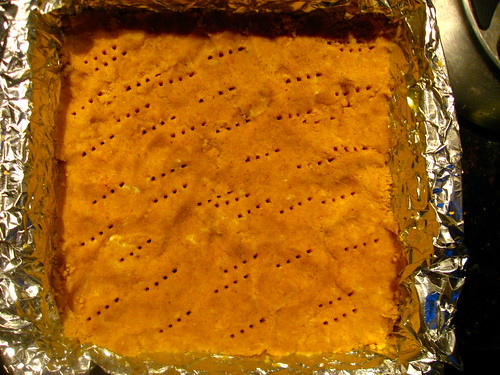
3. Press into the prepared dish and pierce all over with a fork. Bake 5 minutes, then lower the oven to 300F and bake and additional 30-40 minutes or until light golden brown. Remove from oven and allow to cool.
4. In a deep glass bowl, melt the butter. Stir in the condensed milk and honey. Whisk until well combined. Heat in the microwave 7 minutes until boiling, stirring every 30 seconds. Don't walk away, because it can boil over! The caramel is ready when thickened and light golden brown.
NOTE: If you are multitasking and put the microwave on for 7 minutes and totally forget about it and don't stir it every 30 seconds, and when you remove it from the microwave it looks like butter with brown clumps at the bottom - don't think you TOTALLY ruined it. Sure it isn't perfect, but if you stir constantly with a spatula for long enough, it will still turn back into caramel. Not that I would know from experience or anything... oops.
5. Pour the hot caramel over the cooled cookie layer. Sprinkle the crushed pretzels over the caramel layer.
6. Cool to room temperature, then place in the fridge and allow to cool completely. Cut into small square and serve.

Tuesday, September 25, 2012

I've been cooking, crafting... just not blogging

Hiya! So, I made a huge dinner for Rosh Hashana, and even took photos of some of the recipes to share with you. Like, good photos. On my camera.  Which also means that in order to write a blog post, I need to actually boot up my computer. Obviously, hasn't happened yet.

My new art project

In the meantime, check out my recent crafting adventure over at Carly on Queue!  I have all sorts of fun talents, didn't you know?